
It's been too long! I miss you guys… sniff sniff. Life has been busy, lets just say that. However, I DID finally get some major progress done on the car in Jan/Feb. Back in January after I finished most of the prep on the body shell, my buddy Colin Jensan came by my shop and schooled me on the ways of MIG welding. I haven't done any welding since high school, and even then, my experience is very limited.
Armed with a small Lincoln Weldpak MIG machine I went to town on the chassis stitch welding it everywhere possible. This is an important step on a car this old to help stiffen up the unibody. I was amazed at how thin some of the sheet metal used on these 2nd gen RX-7's is! Very easy to burn holes through it… trust me, I know. I did however become proficient filling holes with a MIG and a flapper disk! The whole stitch welding process took me about a week worth of evenings, this could be done in a few hours if it wasn't for all the surface rust, seam filler, and crap filling all the seams I was welding. It's important its as clean as possible to get the cleanest welds, a clean weld = a stronger weld.
As some of you might know, the Olympics were here for 2 weeks in February, I took that opportunity to take 2 weeks off work and create my own Olympic event, cage building!
The first Saturday of my time off I loaded the bare shell onto a U-Haul trailer and hauled it out to Abbotsford to my friend Colin's shop. Colin is the master of Porsche 928's and is a general all-around smart guy when it comes to metal fabrication, and all sorts of other crazy things. Once we got the car into to the shop, we spent the first day fabricating a hydraulic tubing bender from a die, some 2"x1/4" steel, some 1" bolts, a hydraulic ram, and a forklift, the forklift is essential in any tubing bending application. Check out the video of the first bend: Video
We used the forklift as its hydraulic system would be more than up to the task of actuating the hydraulic ram and bending some 1.75" x 0.095 DOM tubing. Colin added a couple quick connect couplings on the hydraulic system and within minutes we were up and running. I have to give all the credit to Colin on the idea for all of this too, saved us a lot of money vs buying an off the shelf system and it took less than a day to get it running.
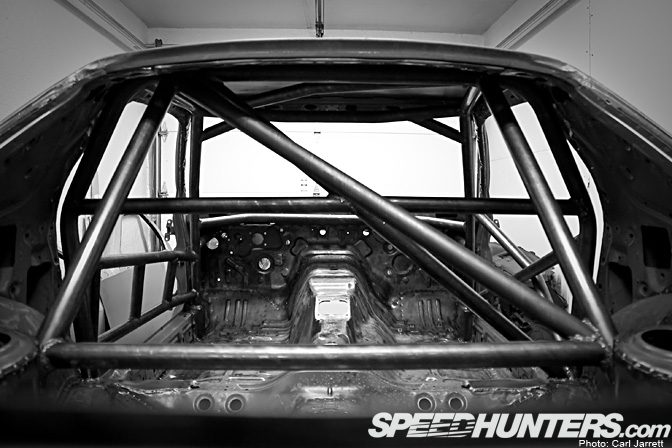
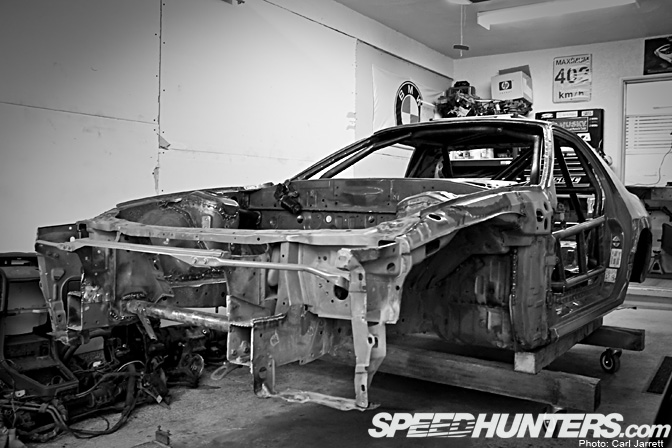
The cage I built was using the SCCA rules for production class cars, as the FC RX-7 is still used widely in the E-Production class across the US. The differences between the Production rules and Improved Touring is primarily how many places you can attach the cage to the chassis, and penetration of the firewall, the latter Touring does not allow but makes a big difference being able to tie the front suspension to the roll cage and the rest of the chassis.
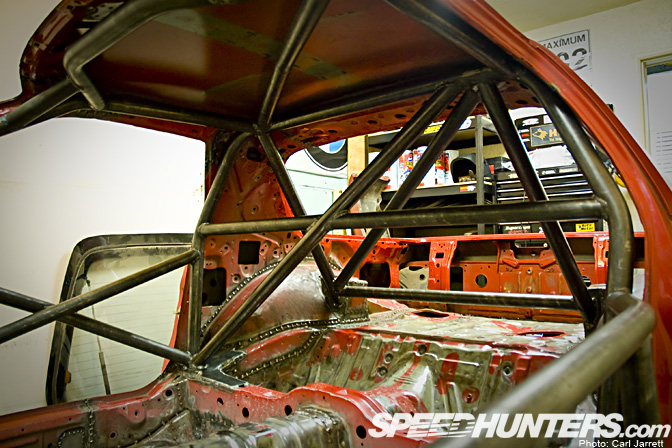
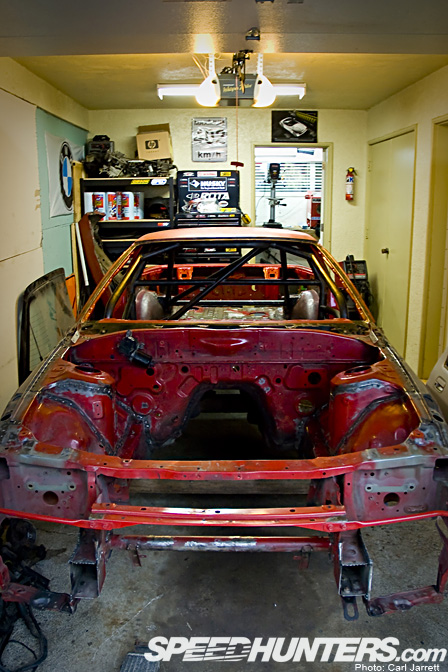
The cage itself is pretty much done, but there is a lot of work remaining to gusset everything. I will be taking as much advantage of the Production rules as I can, tying the cage to the chassis at the A-pillar, B-Pillar, the trunk floor to the cross member, the roof halo bar to the roof itself and more. I am waiting for a couple tools to come in so I can finish that part of it.
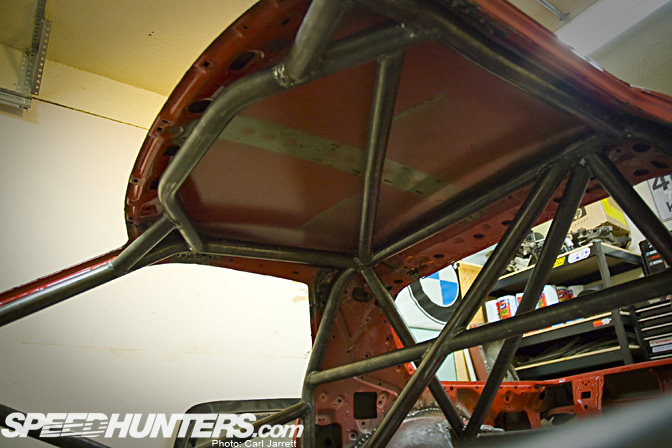
One thing I had to consider when building the cage was my height, as SCCA rules state, the top of the main hoop needs to be 2" higher than the driver's helmet. Being 6'4", this isn't straightforward in a car like this. We actually clearanced the roof quite a lot (with a ball peen hammer no less) to fit the main hoop as high up as possible. I think we did a pretty awesome job, considering the lack of clearance between the top of the cage, and the roof of the car, there isn't much more to be had, unless I cut out the floor panel and drop my seat lower!
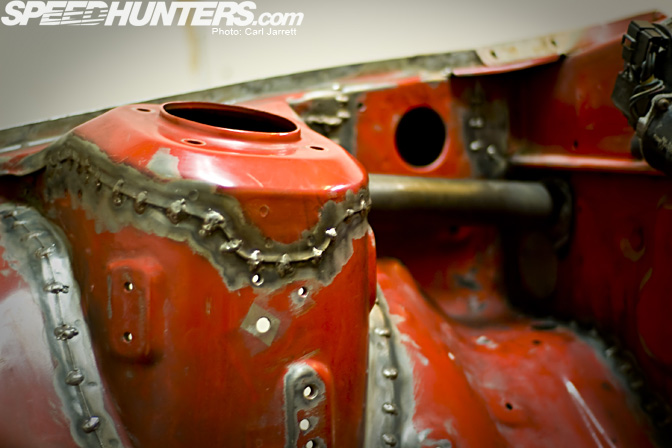
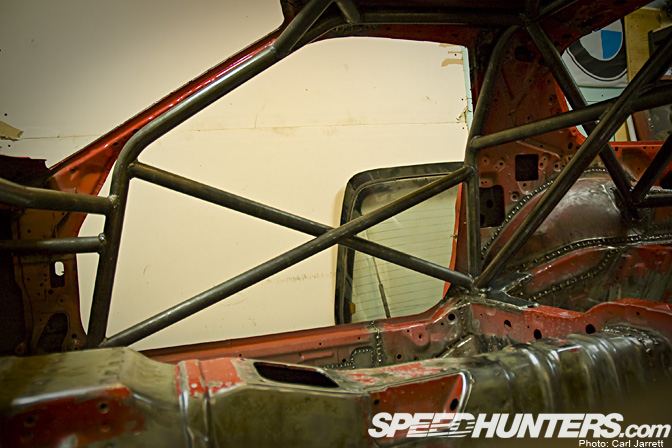
I'm also going to attempt to fabricate a removable front suspension cross brace that ties into the main cage through the firewall with plates on each side once I figure out how much clearance I need for the engine. Here you can see some of the stitch welding and the tube that ties the cage to the front suspension. Colin welded this at the firewall as well which helps seal it up as well as adding a small amount more rigidity at the firewall.

On the driver's side, we used NASCAR bars to protect the driver, and on the passenger side, did an X with continuous tubing. The X uses less tubing so is lighter weight. I did build the cage with weight in mind, but safety is number one. For my weight class in Production, they require tubing that is one size smaller than what I used which was the 1 3/4" 95 wall DOM tubing. I calculated the weight of the entire cage using this tubing versus the 1 1/2" 120 wall DOM and I would only have saved around 9-10lbs total.
While I was at Colin's 928 shop I took full advantage of some of the tools he had including his plasma cutter. I used the plasma a lot to cut out the plates for the cage mounting points, but also to remove a bunch of useless weight in the front of the car. I've gone through the whole chassis fairly extensively and removed anything unnecessary, which equates to over 50lbs or more of metal removed. Removing weight from the outer most parts of the car, especially the front, will help with weight balance, but also allowing me to keep more of the weight near the center of the car, in turn, helping the quickness and ability of the car to turn.
I'll be really busy in the next couple weeks doing all of the gussets on the car as well as getting it ready to prime and paint, however, I do have a few asks of you guys, of who have a lot of experience collectively, and individually I'm sure.
Do any of you have any hard data of how much difference the color of paint makes in terms of engine bay temperature, and interior temperature? Will it make a significant difference to warrant painting the entire car white? I'm still torn between painting the whole car white, or black..
What is the best paint and primer to use on the interior of the car and underside? I want something durable, that will stick to the small amounts of rust there is and neutralize it. Any tips on how to prep the car for primer and paint would be very helpful.
I've also been working on the concept of the car a bit, and working on the aero as well and will post some more about that soon I hope.
I also need to thank a few people. First of all, Colin Jensan for use of his shop, all that he taught me during the welding and cage building process, as well as lending his awesome welding skills for that 2 weeks. Thanks to Erven and Scott, who gave me some good tips that helped during the cage building process. Josh at RE-Tuning in Texas who has given me a wealth of knowledge from the few times I've pestered him with questions! My buddy who's been helping me with the aero, and my cousin Mark, a Civil/Structural Engineer who lent me his brain and helping plan the cage and gusseting. And my fiance for putting up with me not being at home for 2 weeks while I built the cage!
As always, love to hear the comments, especially the constructive ones, we all learn somehow, and somewhere, I use the people around me such as you guys to learn from, some keep it coming!
- Carl Jarrett