
Here we are again with the third instalment of Nigel Petrie's Drift Hilux build. It's a story of innovation, dedication, improvisation and self reliance. One man's quest to build a world class race car on a budget as big as his shed.
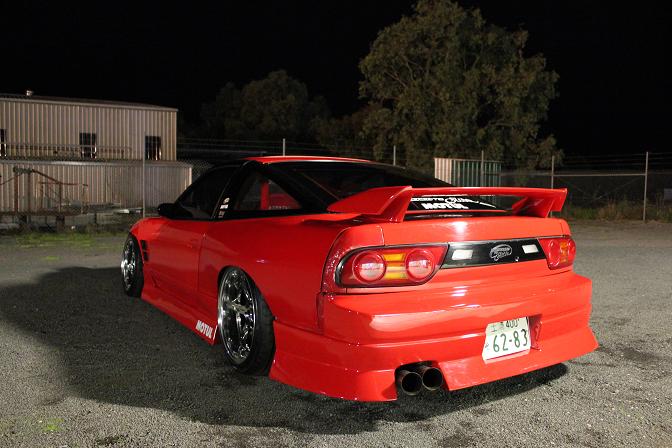
Since Part Two of my guest blog back in April a lot has happened. I had the VicDrift Drift Attack Competition in May and as a result of this, work was put on hold for a week while my focus on pre event preparation for my RPS13 took over.
It was all worthwhile with a podium finish and no mechanical dramas to hinder the progress of the Hilux.
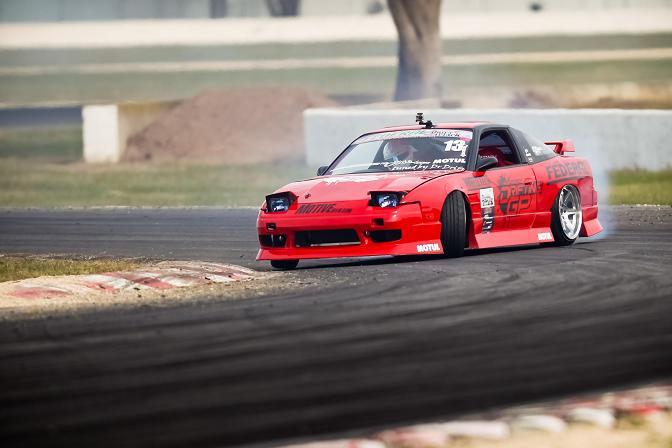
The idea behind the Hilux has nothing at all to do with competitiveness, in fact it's quite the opposite. The RPS13 is my competition car and always will be. Tube frame cars are outlawed in nearly every national series around the world and Australia is no different. Our upcoming series, Australian Drifting Grand Prix has rules in place so that cars like my Hilux cannot compete because of the advantage they posses over their manufactured competitors.
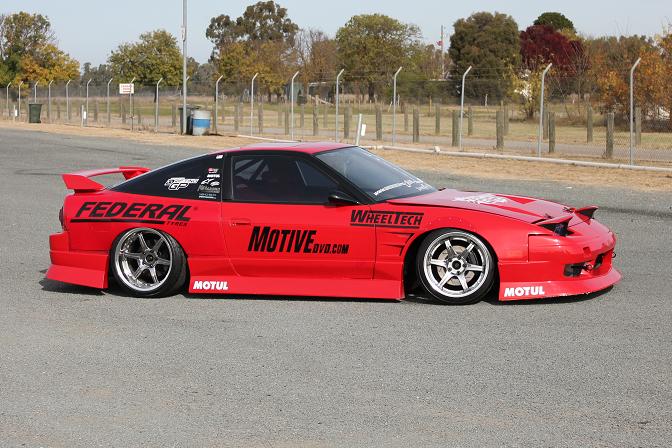
I believe tube frame drift cars have a place in the drifting community but far too often they are built by big budget teams sacrificing style for outright performance and gaining an edge over their competition. The reason I am building my Hilux is for style reasons. Please don't get me wrong, I want it to work well on the track just like my RPS13 does but seeing a long and low Hilux entering a corner backwards at speed is the reason I am doing this.
I've had to learn to switch my motivation between the two cars all year, my RPS13 must always be ready for a battle before I start work on the Hilux. Driving is just as important to me as building, and I want to be the best I can be at both aspects of drifting.
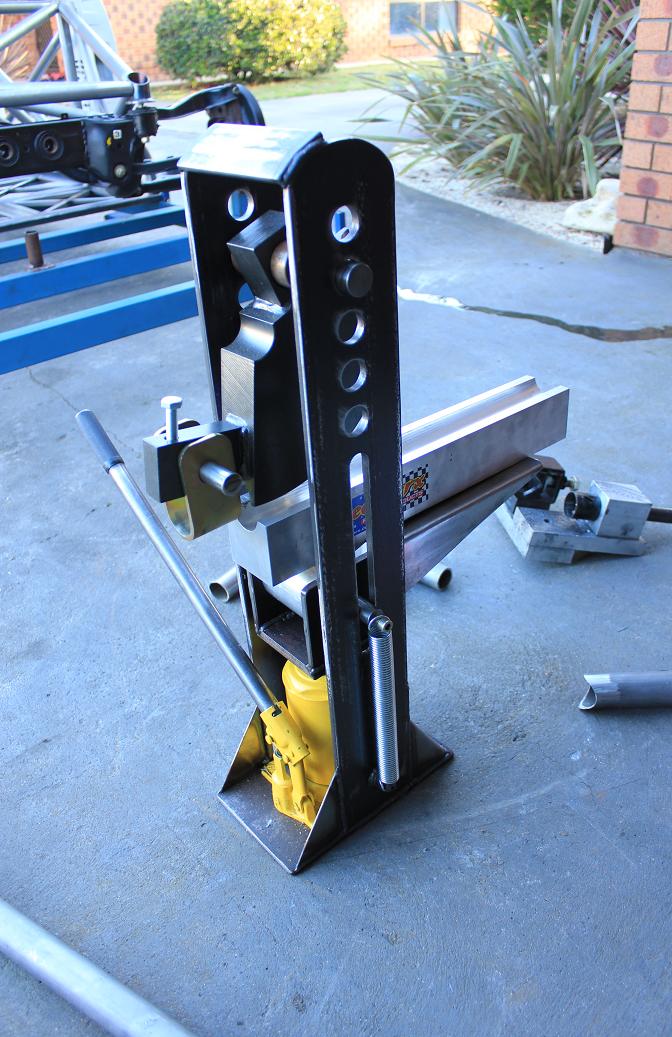
The tube bender I fabricated has been the heart of the operation, precise bends are only a few pumps away.
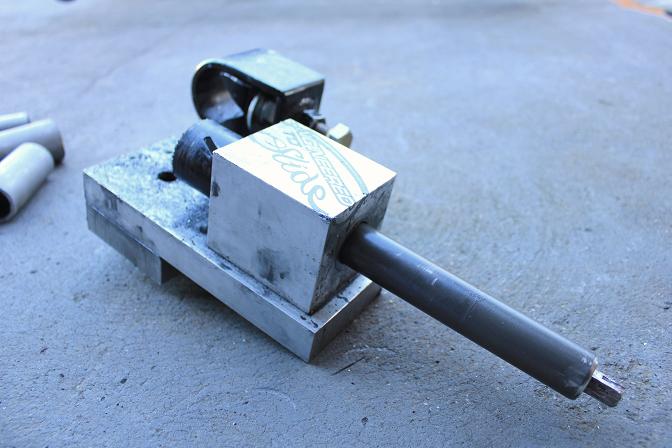
But the one tool I have used more than the bender is my self fabricated tube notcher. With the bender, tube notcher, TIG welder and simple tools like a drill, file, angle grinder and some CRC, this entire chassis can be made.
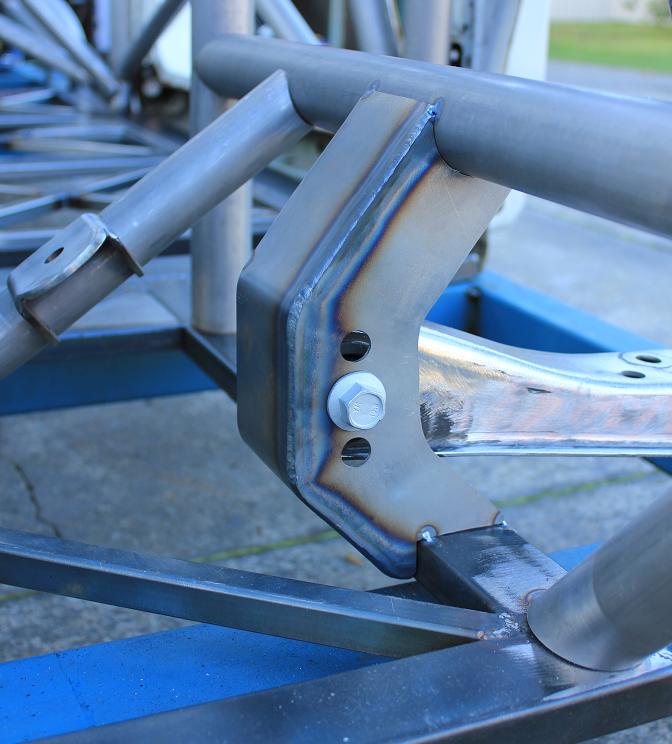
In Part Two I discussed the idea behind the entire floor being remade. That decision had really paid off. With a total flat floor and squeeze frame to work off, brackets like this lower control arm mount are a breeze to fabricate and attach to the floor.
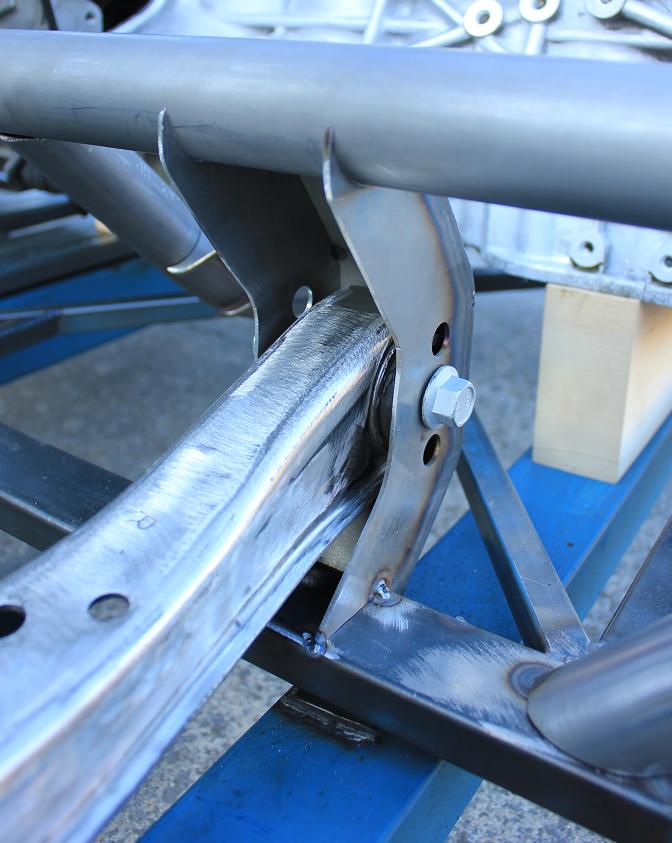
For now I am running S15 front lower control arms but will be fabricating my own rose jointed tubular control arms with an integrated caster arm mount.
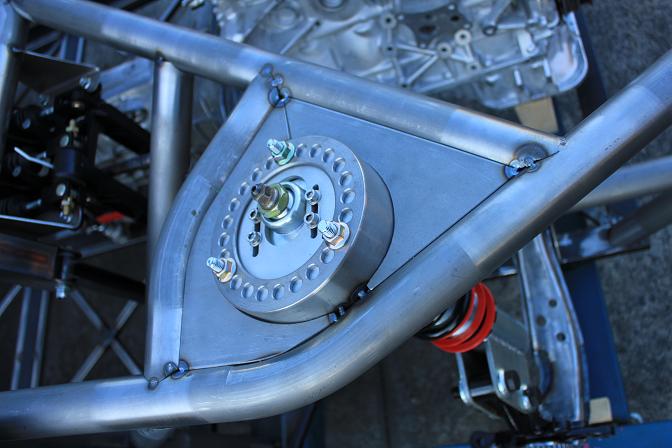
My strut tops house the MCA struts, using 2.8mm sheet metal to encase the billet steel machined top mounts.
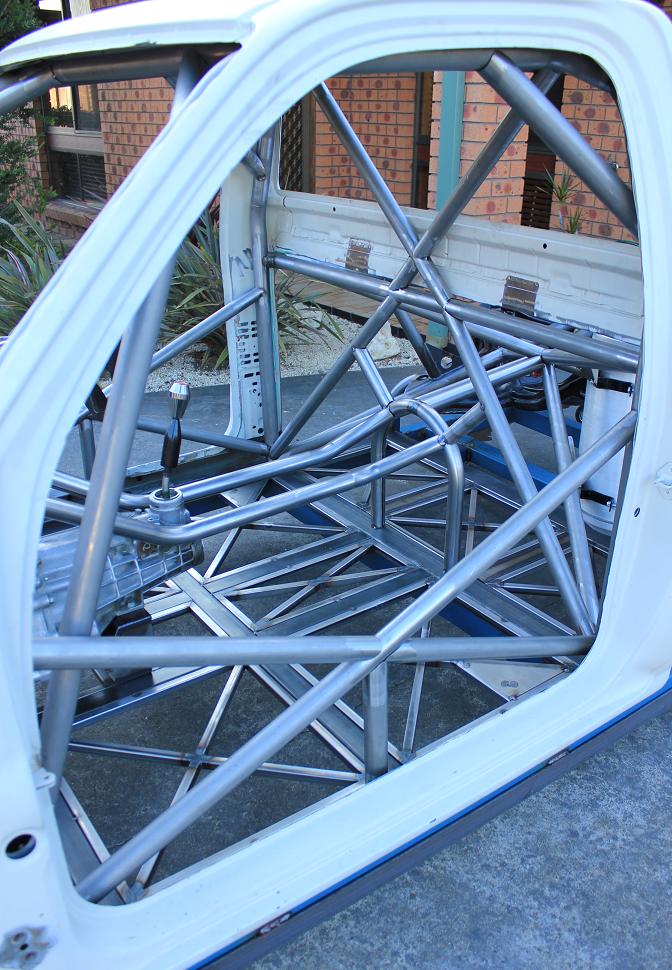
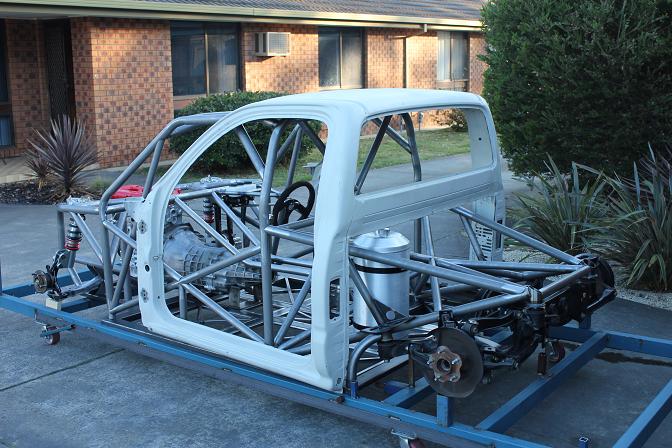
The biggest changes have been on the inside. In Part One we saw the complete S15 interior being fitted but now I have chosen not to do this, instead opting for more of a race car/industrial look showing off the time and effort put into perfect bar work. The original idea of utilising as much S15 Silvia stuff as I can has unfortunately gone. Instead I have opted for a more 'fabricate everything' approach.
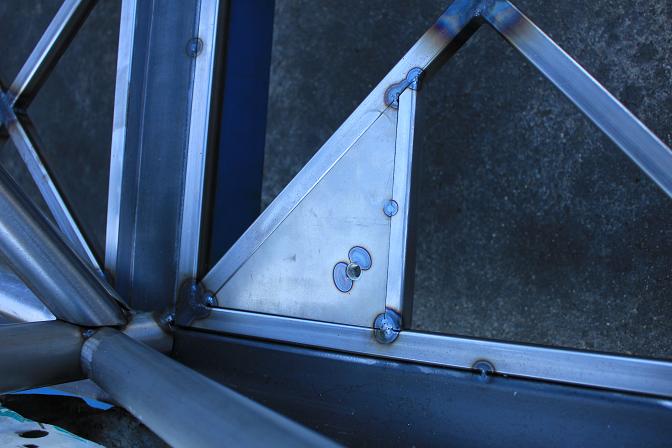
I wanted to focus on some smaller details in Part Three as this is the time consuming part. You can make or break a project when it comes down to the smaller aspects of a build. Here we have one of the seat mounts in the floor.
There is still around two meters of steel tube to be added to the console/backbone that encases the driveline, I wanted to make sure there was enough strength in the middle of the chassis.
I am a lover of all motorsports, both two wheel and four wheel. I attribute my design to the many disciplines I look up to, and there's a lot of drag racing chassis fabrication ideas within this drift ute build.
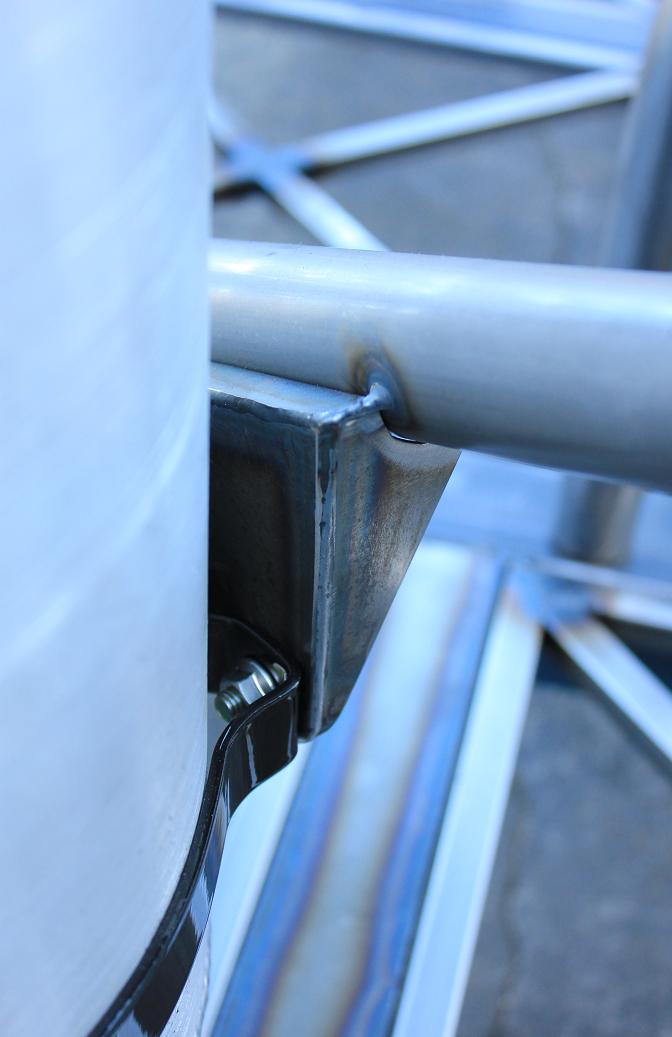
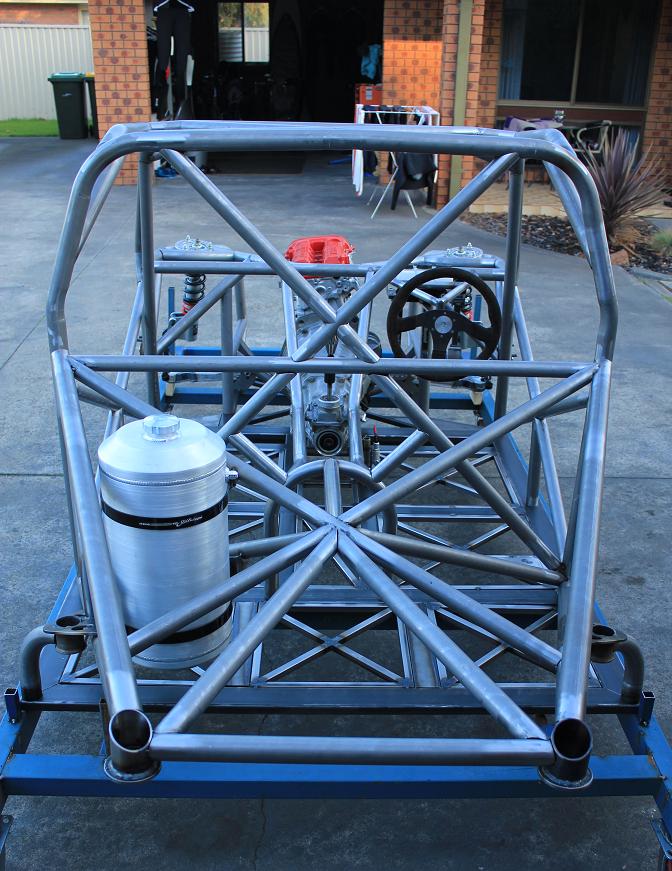
I have pre-welded a lot of the smaller brackets before tacking in position, I want to make sure everything is in its correct position before the final welding process. These are the fuel tank supports.
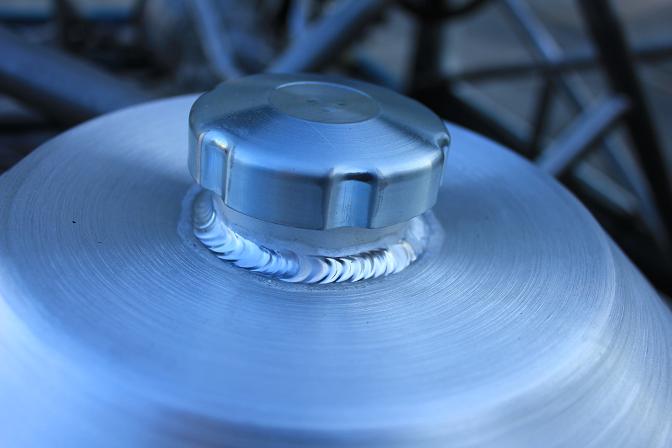
On the subject of the fuel tank I had a spun alloy unit made up in USA. I couldn't have made it near as neatly as they did, let alone even find the materials to make it.
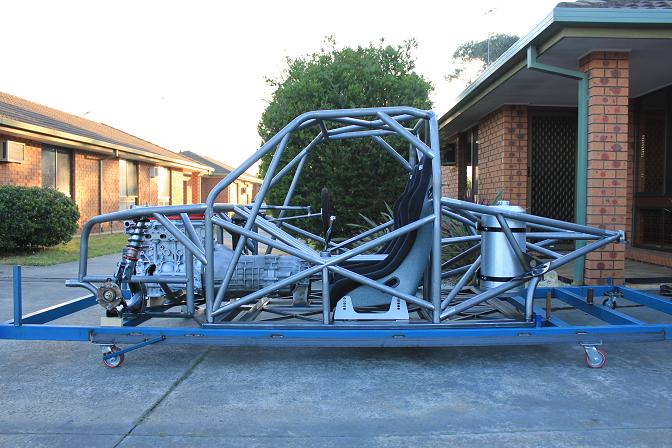
It's around a month before I lose the rolling frame it's mounted to. But a few more welds and the Hilux will be strong enough to stand its own for feet. I will surely sit back with a beer and cherish that moment!
It's a simple one man process to remove the body shell, simply slide it back over the frame and lift it off.
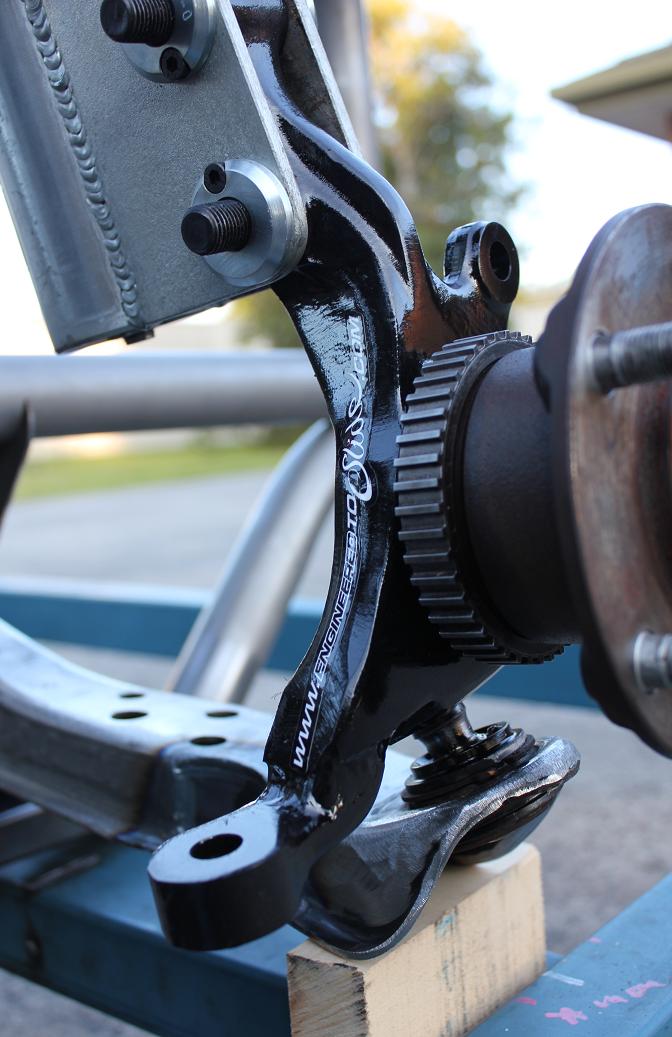
I have been making my own knuckles for several years now and have found it highly effective. I remade these S15 ones to be the same ones I run on my RPS13. It will give me a good base line to work from when improving the driftability of the Hilux.
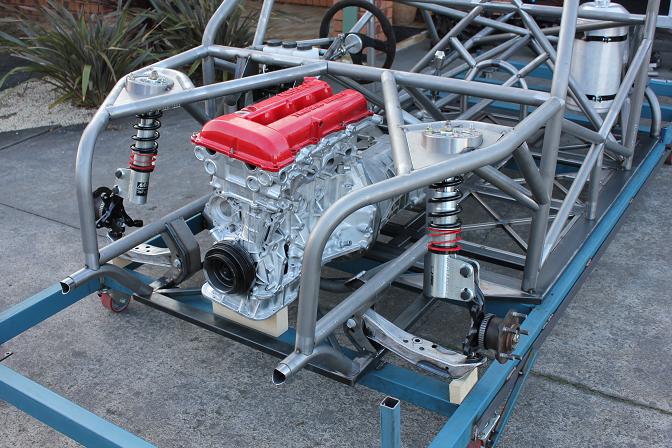
Every now and then I hear the comments from people saying what a cop out the SR install is. I've run these motors for 7 years – since I turned 21 – and I have never had an issue and just love their power productivity and simplicity. If I was to start again with another motor then I would be starting from scratch; I know the SR well and believe it suits the chassis and purpose this is built for.
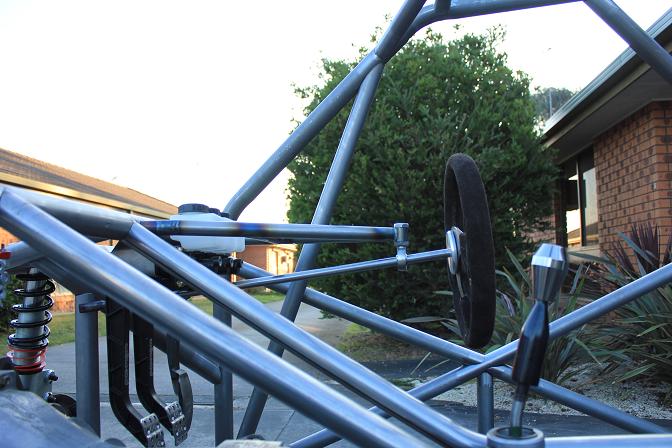
The steering column support was fabricated from 25.4mm tube. I will be working with this tube a lot from this point on with the build AS the entire rear end and front end will be made out of it to hang the panels and ancillaries off.
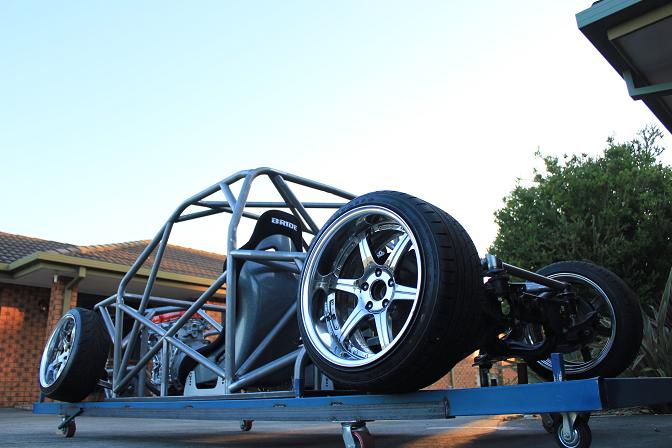
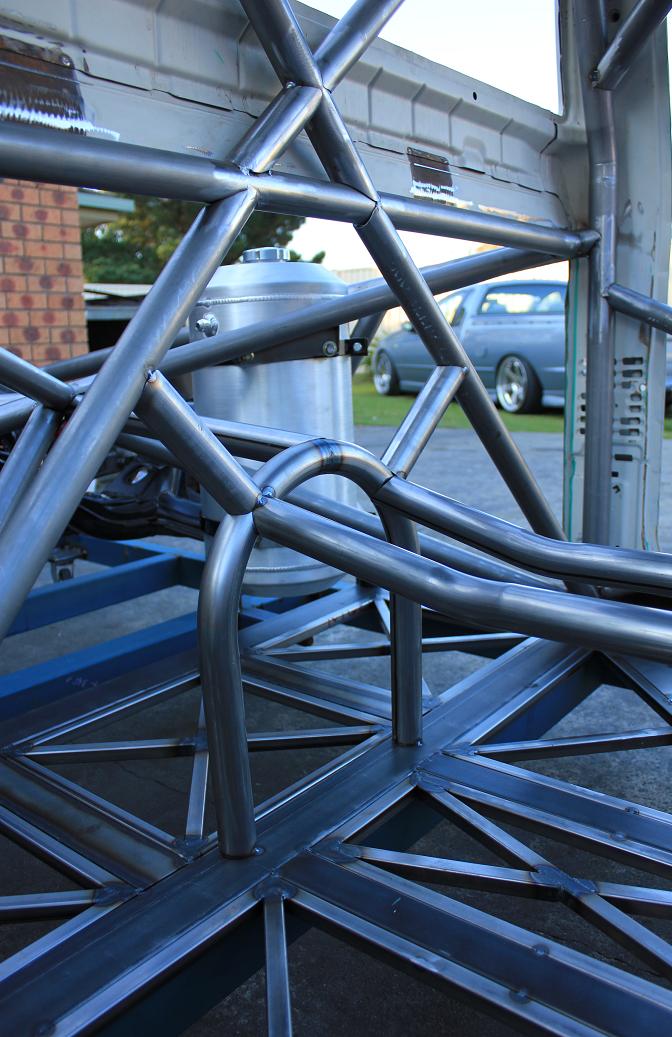
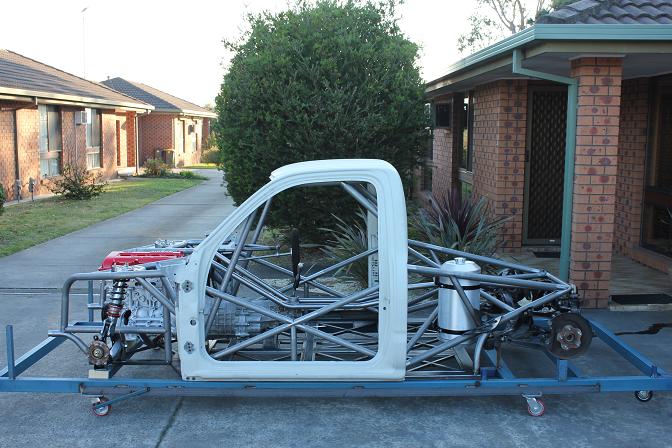
The chassis has been a mix of strengths and looks. I wanted angles and lots of them, i wanted this chassis to be a piece of handcrafted metal art, something that wouldn't look out of place in an industry art gallery.
If you had shown me this picture six months ago and said 'this is what your building' I would have laughed at the suggestion. Starting with a tape measure, no TIG welding skills, no tube bending skills, little to no room and nothing but a possible dream of a sideways Hilux, it's exceeding my expectations in every way possible.
It's been all about focusing on one step at a time and never losing sight of the bigger picture, and making sure that I never say 'that will do'. If I haven't been happy with something I haven't dwelled on the issue, I have just cut it off and learnt the lesson of that mistake making sure it doesn't happen again.
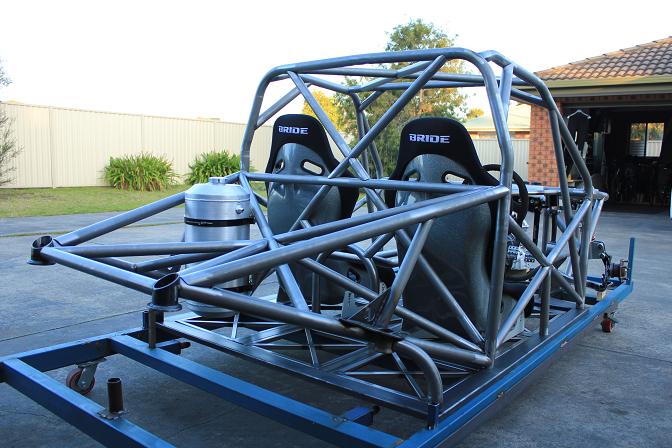
This build is a mix of many car cultures in this build. The items that I cannot build will be mostly Japanese like the iconic Bride seats.

The new console sections of tubing will eventually meet the floor in a section of angled tubes, I am waiting to incorporate the RB25 tail shaft mounts into this tubing.
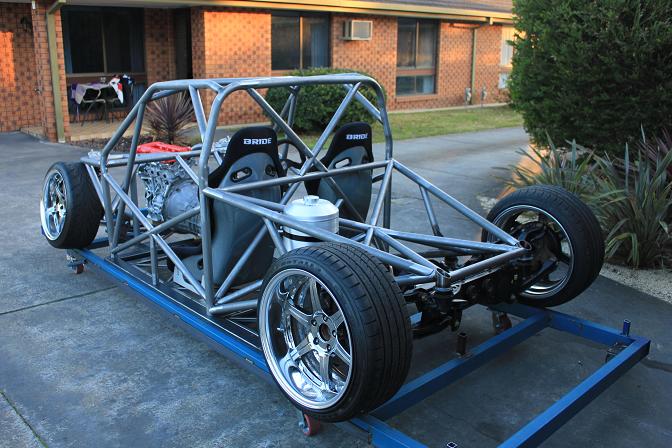
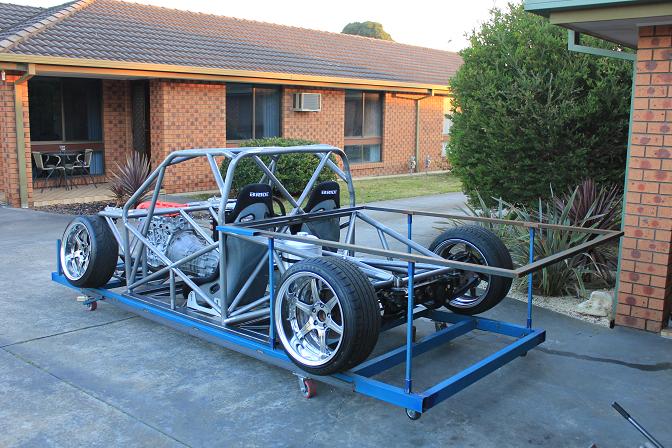
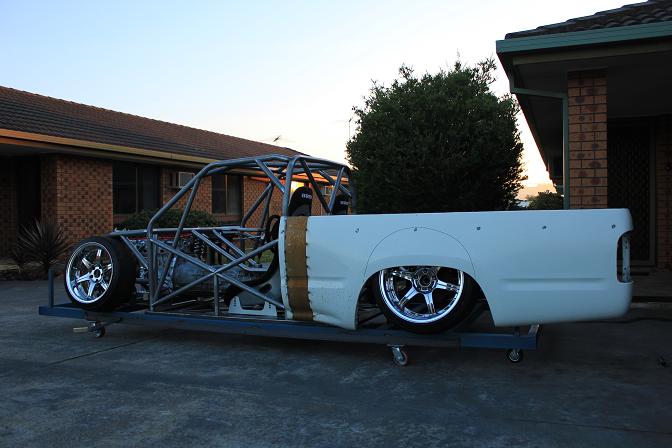
With the wheels on it gives the Hilux a distinct hit of personality. It's like an RC car waiting for its plastic body to be painted and clipped on.
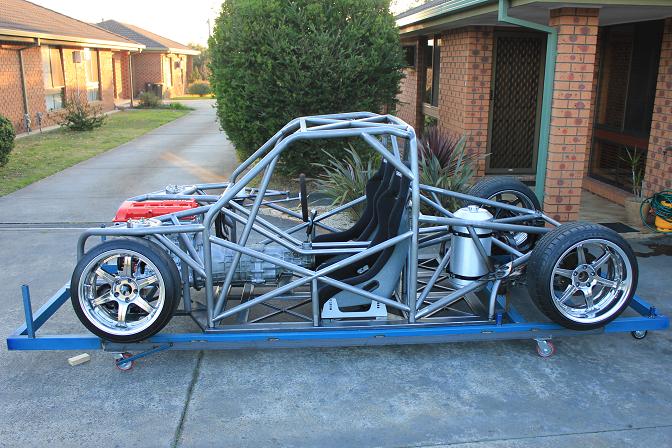
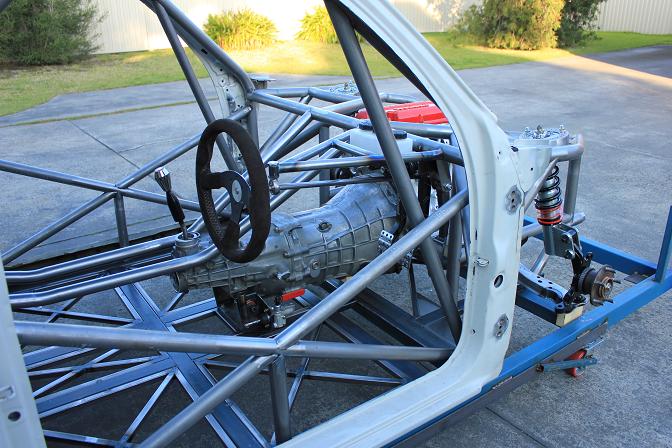
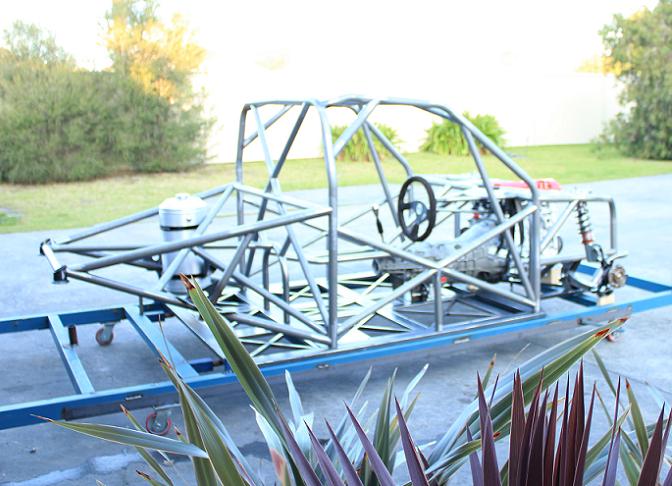
The one thing I have heard most from the feedback is how short it looks, no matter how many times I explain that the wheelbase is the same size as a JZX100 people still seem to think it's short. This view gives you an idea of the length, some 150mm longer than an S15 Silvia.

If you are thinking of building something on a jig like this please take a lesson I have learnt on board: make cut outs for the wheels so they can be sat at the correct ride height while the chassis is on the base of the jig. It's something I didn't do and now regret it as I can't measure angles until it's off the jig.

Everything is tacked with decent tracks. Once everything is in place I will weld the entire chassis over the duration of a week.
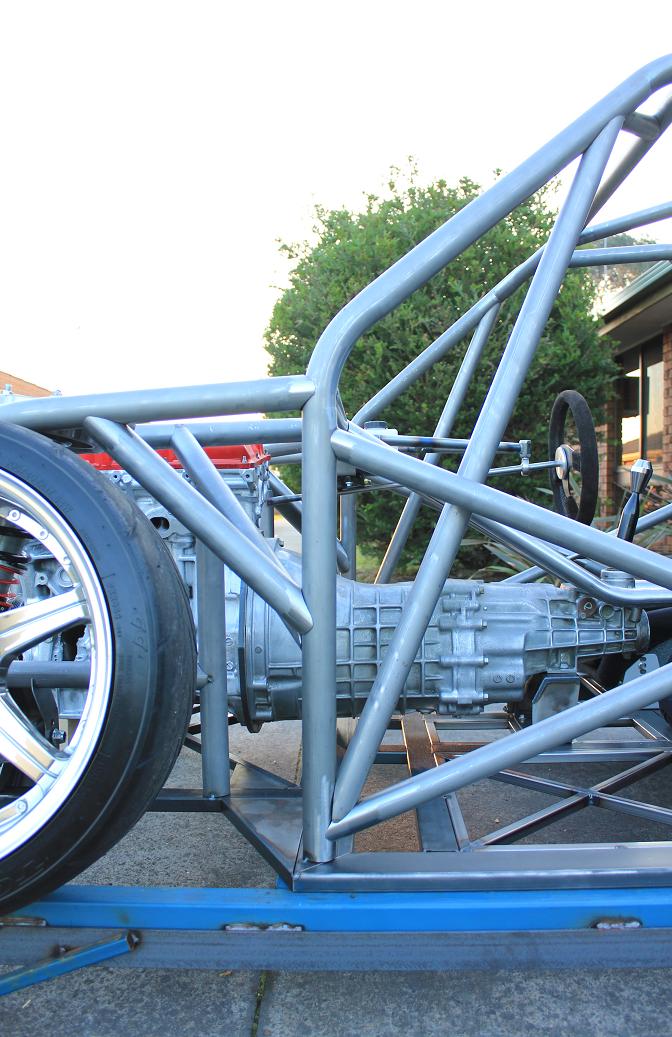
The gearbox is from an RB25 and increases strength in the driveline by large amounts. It will all be mounted to the chassis via solid mounts and sheet metal gussets will run throughout the chassis once the final welding has taken place.
I made up some slip-in supports for the tub to hang on to while I measure and shape the rear panels. At this stage you get a feel for the sheer length of the finished product.
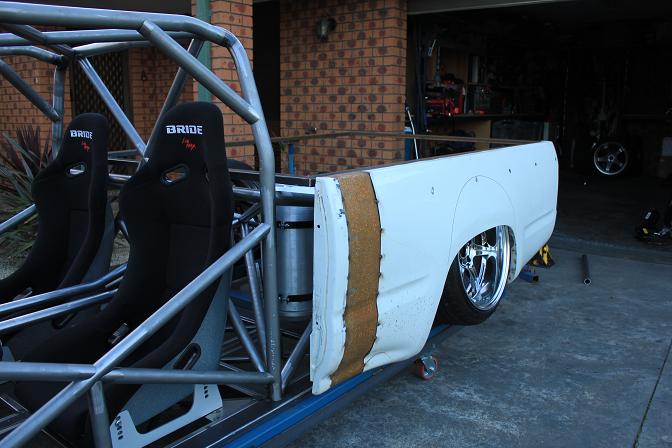
The tub sides are from the same model but the extra cab variant. This means I had to add 150mm of sheet metal to the sides to achieve the correct length. The width on the other hand isn't exactly where I need it. The wheel arch area needs another 70mm of pumping each side and I'm taking my time to think of the neatest way possible to do this. The tailgate will also be an FRP item.
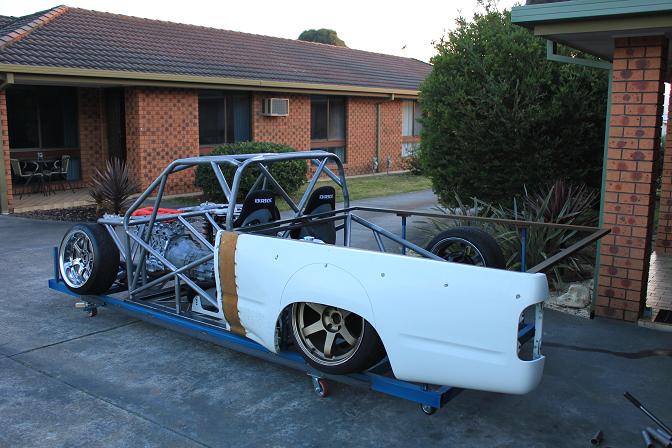
Once the guards are all shaped in metal they will be taken to an FRP shop to have a mold produced. That way I can have as many rear quarter panels as I need. The TE37 in bronze looks just right but I think the HIlux will need big polished rim lips.
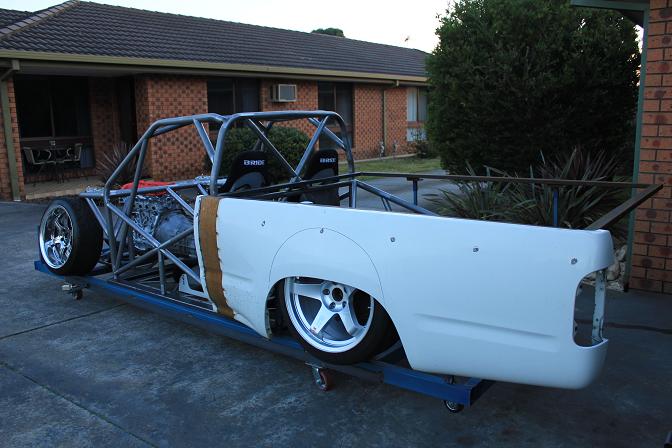
The Bee-R B5 rims I thought would be a good match but they just don't look right tucked up like that. I can now measure out where the entire under car diffuser will exit at the rear. I want to spend a lot of time doing it just right as a lack of downforce on the rear may become an issue.
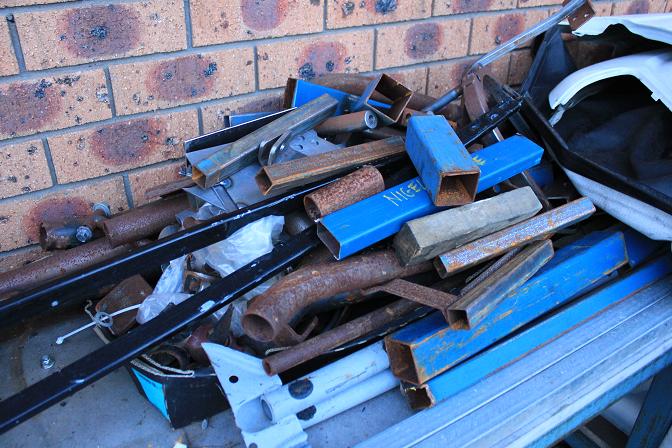
This is only 1/10th of my scrap metal pile. I do feel bad for some of these pieces of metal, AS they were once destined for a lifetime of love, a coat of paint and become part of my automotive history. Now they are banished to a lifetime of rust and loneliness.
This has been a story about self reliance; this creation has become a sold part of my life. It's about making sure everything fits within its criteria and budget. The build has enriched my life with confidence, skills, accomplishment and dreams. It's not just a build to me, it's an extension of myself. My hands have created what you see before you. The dream in my head gives way to hard work and after six month it's gone from an idea to something solid, something I can look at. And in another six months that something will be hurtling down a racetrack and backwards into the corner! Shut your eyes and you'll be hearing a screaming SR20; open them and you will see a Hilux, centimetres off the ground and plumes of smoke off the tyres.
I'd like to thank Casey and the Speedhunters team for posting this up for the world to see. Thanks for reading and remember to see constant updates at EngineeredToSlide.com
- Nigel Petrie