
After a hiatus of a more than a year I tracked down Nigel Petrie and asked him about the progress on his drift Hilux. I have been following his guest blogs on Speedhunters with great interest and was glad he wanted to collaborate again. So I’ll let him explain what he has been up to.

A lot has happened this past year: my girlfriend and I finally found a house that suited our needs, we moved in and I spent three months fitting out my new garage and getting everything ready to commence work on the Hilux. Coming from a one-car garage that required the chassis to be pushed outside every time I worked on it to a 12- by 7-metre shed, it was a dream come true.
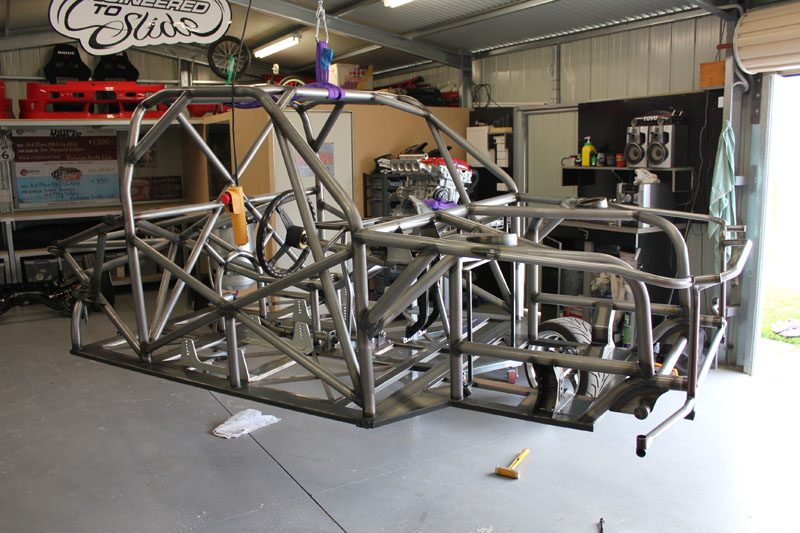
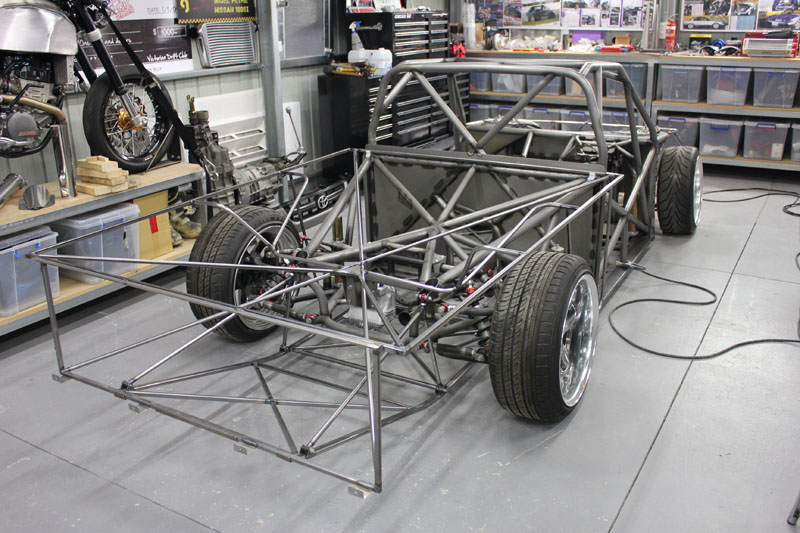
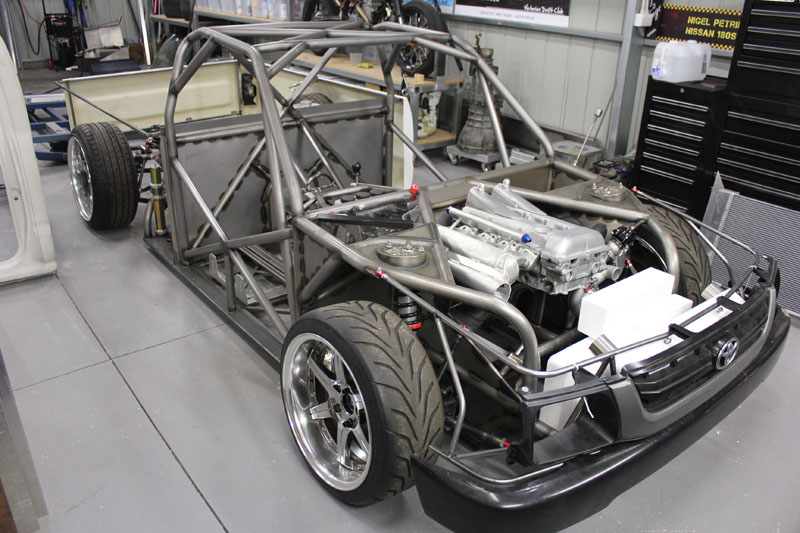
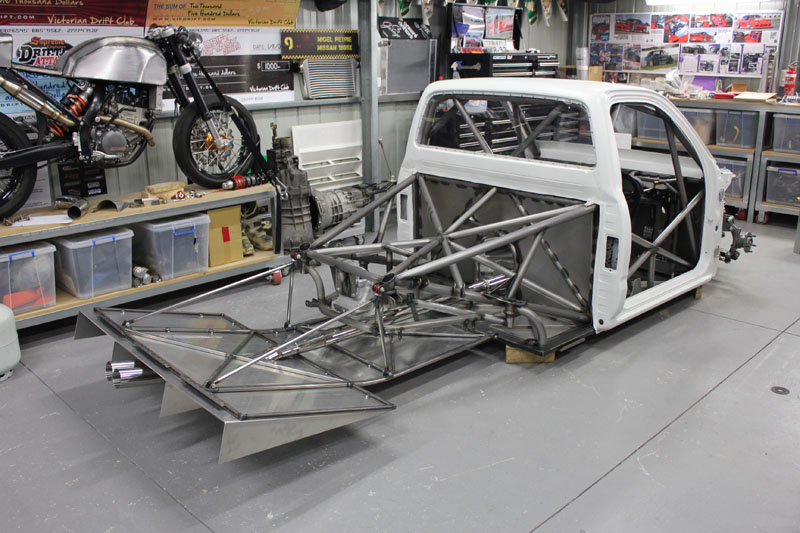
I wasted no time in getting back to the build: the rolling Hilux was stripped back to a bare chassis and lifted up onto my new jig.
It was then that the build took on a whole new chapter: I felt relaxed and able to concentrate on certain aspects of the build. Everything I do is after business hours as I work a normal job, so it was a huge relief to be able to work at night with proper lighting. I didn’t feel rushed any more and set myself new goals for the finished product. Nearly everything but the tube-work was redone to the best of my ability.
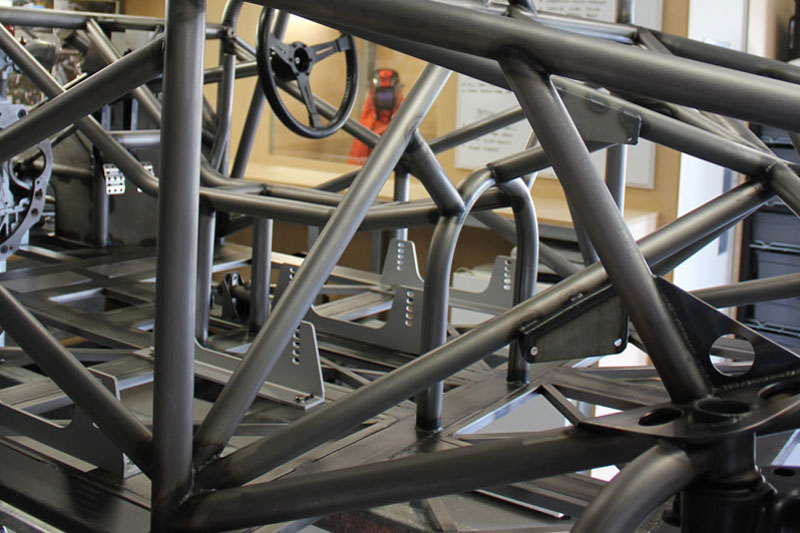
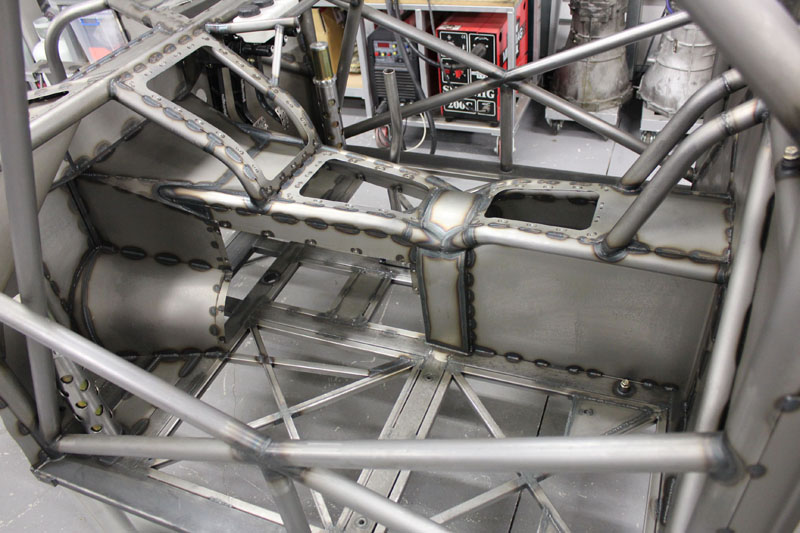
I spent a long time doing the sheet-metal work on the front and rear firewalls. Using 1mm polycarbonate sheet I produced templates for every single area that needed to be sheeted. From there I traced everything onto 0.9mm sheet-metal and used an angle-grinder to cut it all out. I quickly learnt that an extra five minutes perfecting the template saved a lot of pain when it came to welding on the sheet.

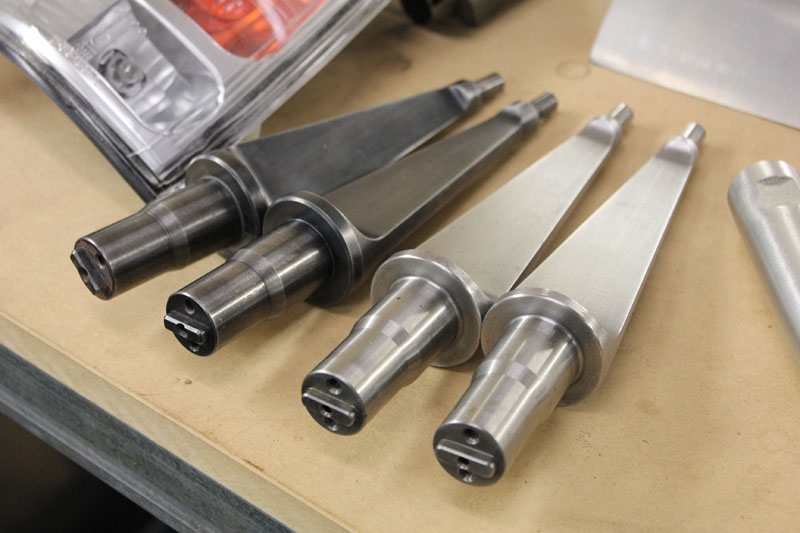
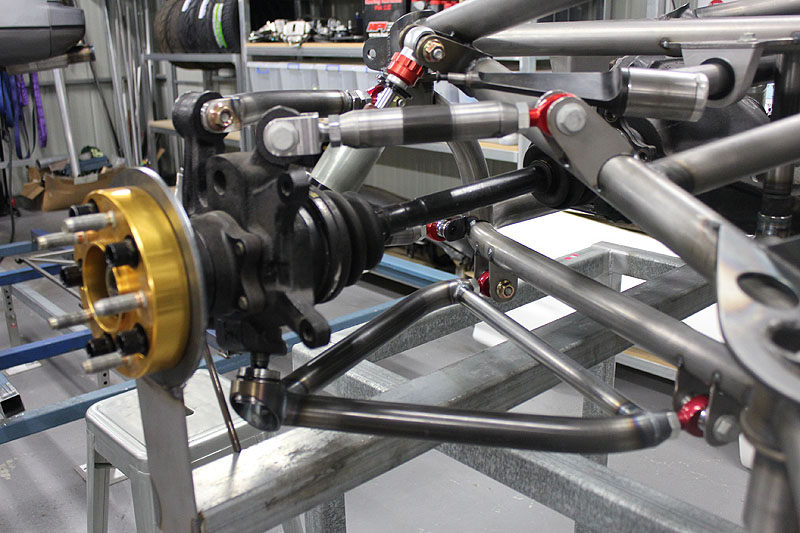
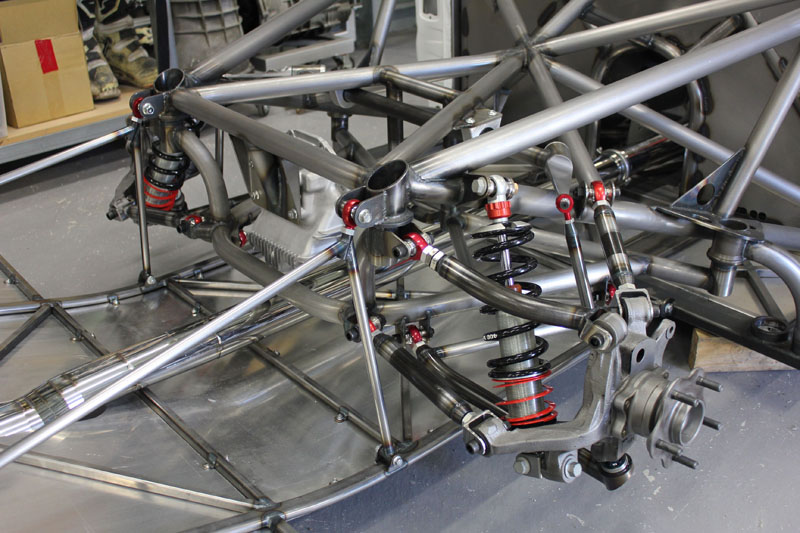
One thing led to another and I started gaining confidence to do all those things I never thought I could. All the suspension was redone: up front I made some chromoly front lower arms with integrated caster rods – these allow more lock and adjustability whilst being light and more than strong enough.
I started to think about swaybars and realised there was no way a regular swaybar was going to fit. So I started looking at my options and spent a week researching the adjustable blade-type bar. This is where my friend Liam from Riverside Racing came into play: I took a drive up the highway to have a look at the racecars in their workshop. They had some second-hand V8 Supercar swaybar ends that I was able to buy –the rest I had to build, but I am very excited to see how they perform.

I spent a lot of time on the rear end, firstly with making a frame for the radiator. After it was finalized and all the alloy ducting was done I stood back and questioned what I had done: I just didn’t like the issues that may have arisen from the rear-mounted radiator. A lot of the time less is more and I made the decision to go back to basics with all the cooling being handled up front.

To be honest I just hated the look of the factory subframe. Being a real feature in the rear of the chassis I wanted something a lot nicer to look at and work on. I made up a tube subframe and mounted the diff to the chassis.
With the tube cradle now built I could start on the arms. To make sure the uprights stayed in place I used some spacers and some rectangle tube to hold the wheels where they should be. It was difficult to work everything out, but at the end of the day if the wheels are where they should be, the arms are mounted where they should be and the ends are adjustable – you can’t go too far wrong.
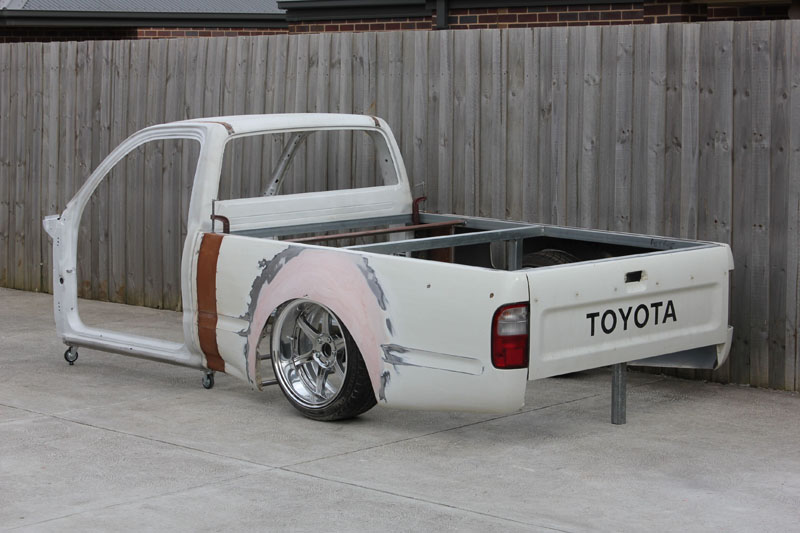
Once that was all finished I could make the new undertray, but not until the rear quarters were finished. It was a pain building the quarters: hours of sanding turned into weeks and those weeks seemed to turn into months. It was a long process to get the guard just right before taking a mould.
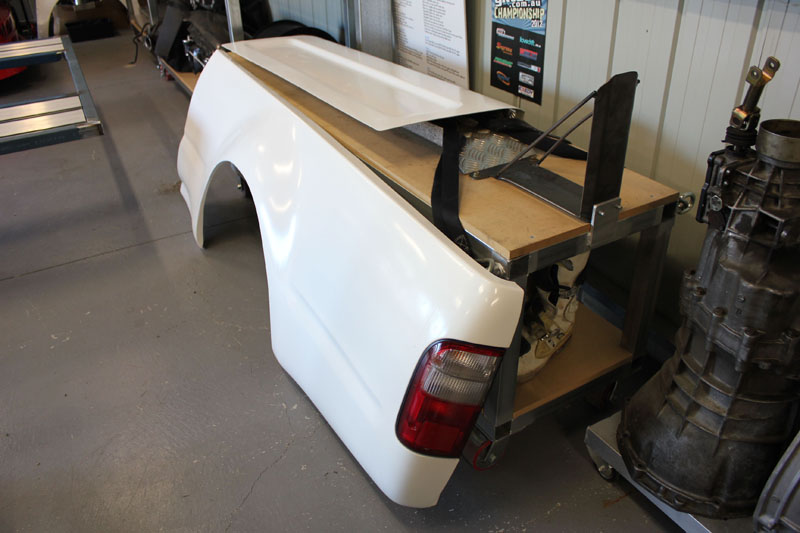
Once the panel popped out of the mould I was very happy that I had spent so long building these quarters: the fit was millimetre perfect and now I could continue building the rear-end to support the panel work.
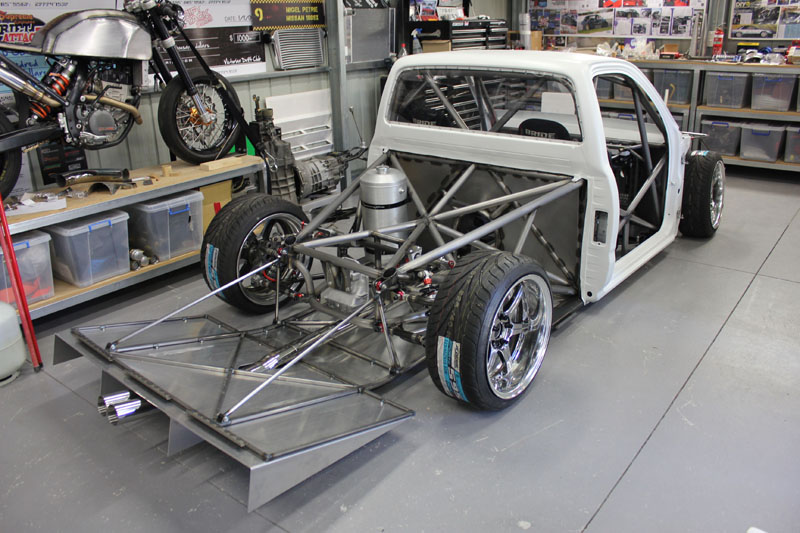
I built a frame from extremely light 16mm tube with a wall thickness of 1.2mm: it holds the FRP guards and FRP tailgate on and is easily removable. From there I was able to bend up my undertray rails and that created the base for the alloy rear floor section that extends out into a diffuser.
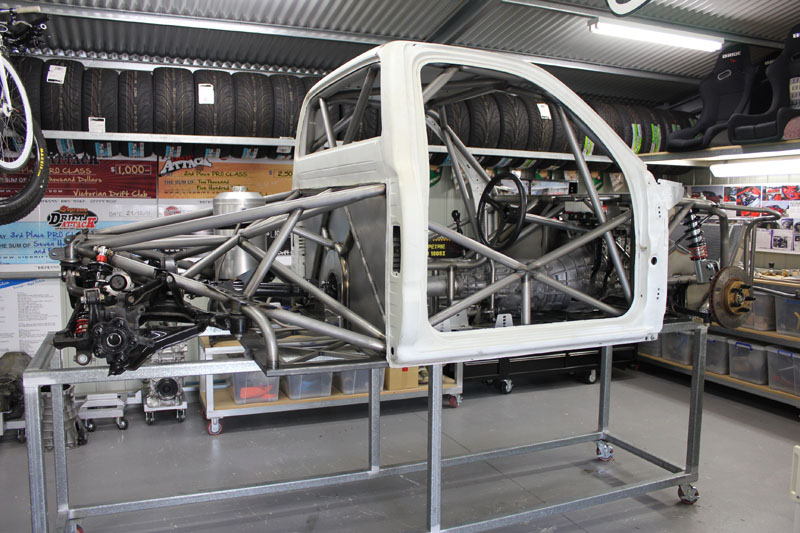
With the rear end all sorted it was time to rehang all the front end panels. I threw out everything I had already done and started from scratch. I made a neat 16mm tube front structure and painstakingly hand-made every single tab (like I have done throughout the entire build) to hold the panels.
The front bar just slips on and the entire front is easily removable and replaceable if need be. The headlights hang in position and look right at home in their new surroundings. Hilux share headlights with 180SX and RX7s so I had a fair few spares lying around.
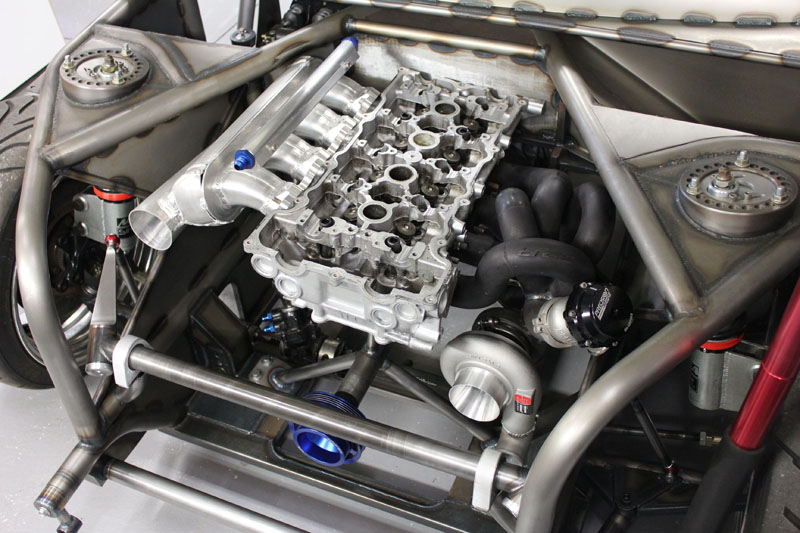
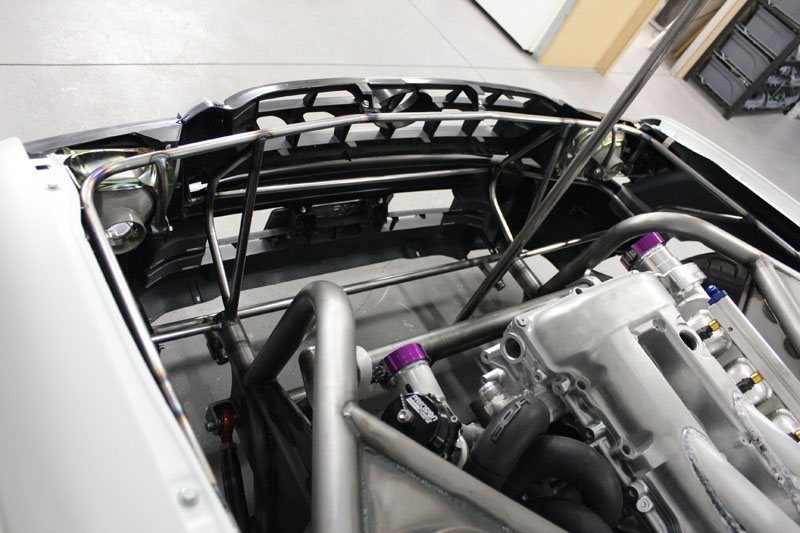
It’s here that I decided to build a quick frame from scraps to use a dummy engine block: a few hours work allowed me to get the head, gearbox and manifolds in position. With the dummy motor back in I could design my intake plenum. I designed and built a dual-plenum type intake with a 14mm air gap that should evenly distribute air into the cylinders and at the front I welded on a flange to suit the Plazmaman 75mm throttle.

I have thought a lot about intercooler size and placement. I have never been a fan of massive intercoolers used on cars with small turbochargers run well within their efficiency range (I call the TD06L2 8cm small) and prefer the radiator to get the majority of fresh air. I found some foam and went to work designing the intercooler and radiator position and was able to get a lot of airflow to both while keeping the engine bay relatively uncluttered.
The exhaust runs down beside the gearbox and through the trans tunnel with neat twin-80mm tips running through the centre of the diffuser. This is one part I am not 100% happy with as it’s a pain to fit – it’s something that will be redesigned when I get to that stage.
Nearly every component I had sandblasted and then clear coated: the factory Nissan uprights, steering rack and anything else that was dirty I blasted clean and then sealed with clear. In fact the entire chassis, suspension and pretty much everything will be clear-coated. I have paid great attention to rust prevention by constantly cleaning the entire chassis down with thinners and coating it in CRC Dry Film rust prevention spray that smells just like wet sheep.
The two Bride Vios seats mount to the floor and the new tunnel now has removable sections of 3mm alloy sheet to gain access to the Haltech ECU, gearbox and tail shaft.

My Bridgestone Driftmaster wheels in 18×9.5 +0 and 17×8.5 +3 were fitted up with fresh Federal 595 RS-R rubber and the pieces of the puzzle started to come together. These wheels were never going to be the final rims to be used, but everything else I mount on it just doesn’t look right. I may go down the track of designing my own three-piece wheels to get the look I’m after.
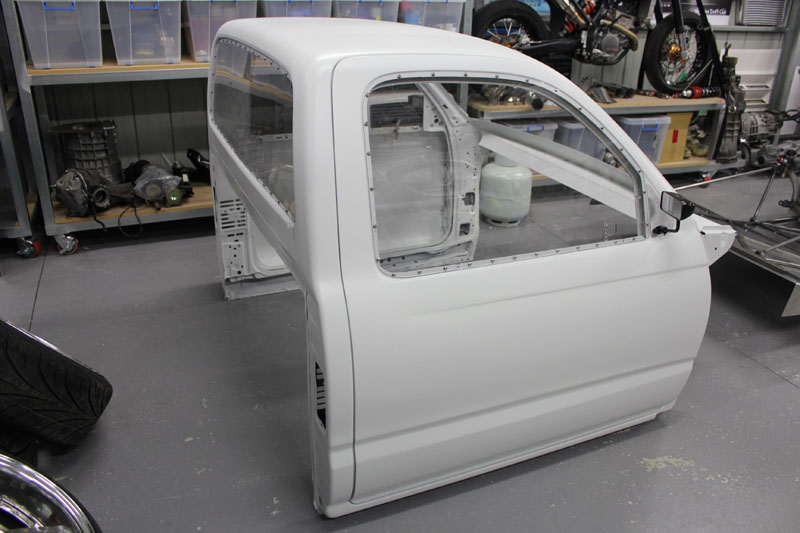
The panel work on the Hilux needed some attention. I had already cut all the inners out of the doors, but it needed some refinement. I filled in the door handles and mirror holes and sanded them straight. I made up some simple alloy handles that can be operated inside or out and the doors simply lift off with the factory hinges cut in half and the pins ground to a point to give the door an easy locater.
Once the cab was dry it was time to make the windows. My local plastic shop had a sheet of 3mm polycarbonate (sometimes called Lexan because of the brand-name) so I made a template, jigsawed out the shape and then marked the hole positions and drilled 5.5mm holes in the windows. Using Stainless M5 screws I mounted the corners in and then drilled and tapped each hole. It was a time-consuming task but well worth it in the end.
I’m still not sure about what mirrors to run, but in the meantime I fitted up some carbon mirrors to alloy plates that I made to bolt in the original position. In the future I will make some East Bear/Bomex-style Aero mirrors out of FRP to give it a smoother look.
The bonnet and front guards are still work in progress. The bonnet will need to be heavily vented to expel all the engine bay heat; the front guards I have started to widen and still need to radius to get the amount of steering lock I have engineered into the chassis. Once those two items are shaped to my satisfaction I will get a mould taken of them and then reproduced in FRP. By that stage I will have a very ‘replaceable’ body and all the moulds to reproduce everything that’s custom.
So that concludes part 5! With just over a year and a half in the build I’m really looking forward to the next six months: my attention now shifts to brakes, plumbing, driveline and finishing off all those items that will slowly turn this project into a finished product.
For all the latest head to www.engineeredtoslide.com and don’t forget to like my page on Facebook!
I wanted to thank Nigel for his time and photos and I’m already looking forward to part 6!
Jeroen Willemsen