
There’s no doubt that you remember the insane Supra-powered Lancia Delta that we featured this summer. The crazy machine generated quite the response, so we decided to get in touch with the man behind the car to get his story on how the build came together. Without further delay, here’s Peter Pentell to take us through the creation of this car.
-Mike
Hi everyone out there in the Speedhunters scene. Let me introduce myself. My name is Peter Pentell, the owner and builder of what some of you know as the Epic Lancia Delta, or as I’ve named it – the LaSupra. Now I will tell you the story of how and why this car was built.
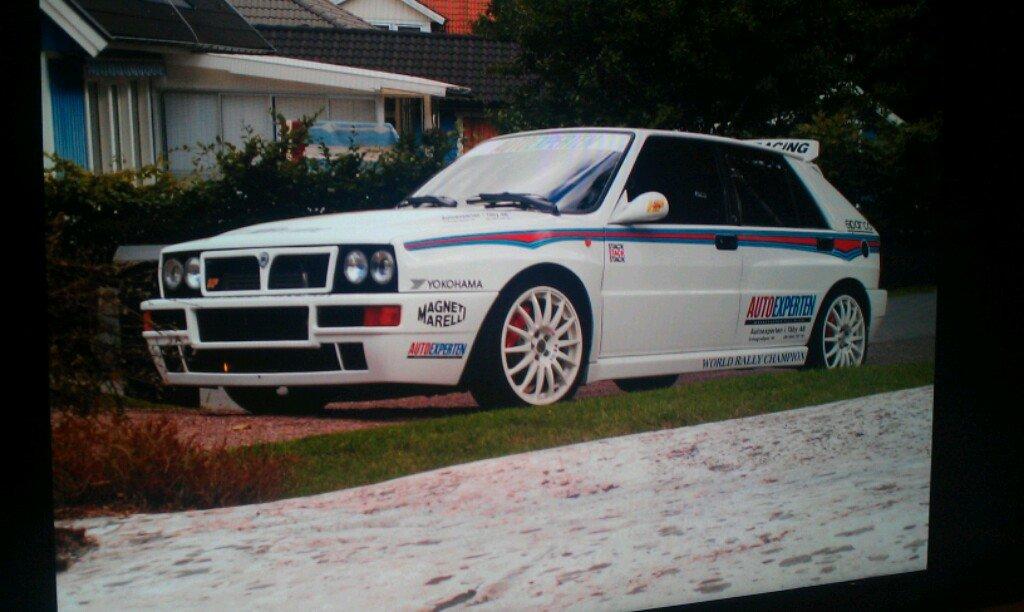
We will start from the beginning. I have owned this car now for more than ten years and in the beginning when it was an original Lancia Delta Evo 1, the plans were like many other street cars out there – to give it a small tune-up and some rims…
I made one version of the car where I still used the complete Lancia drivetrain and engine, but it never gave me the satisfaction that I needed.
Now 10 years later and after years of building and tuning for the track days, I gave up the idea of using the Lancia chassis and drivetrain as it just didn’t deliver what I was seeking – traction and durability. So the aim of building my own race car started to grow. Just why I was using the Delta body for this build is quite simple – I already had it and from what I know it had not been used before in the track racing scene like this.

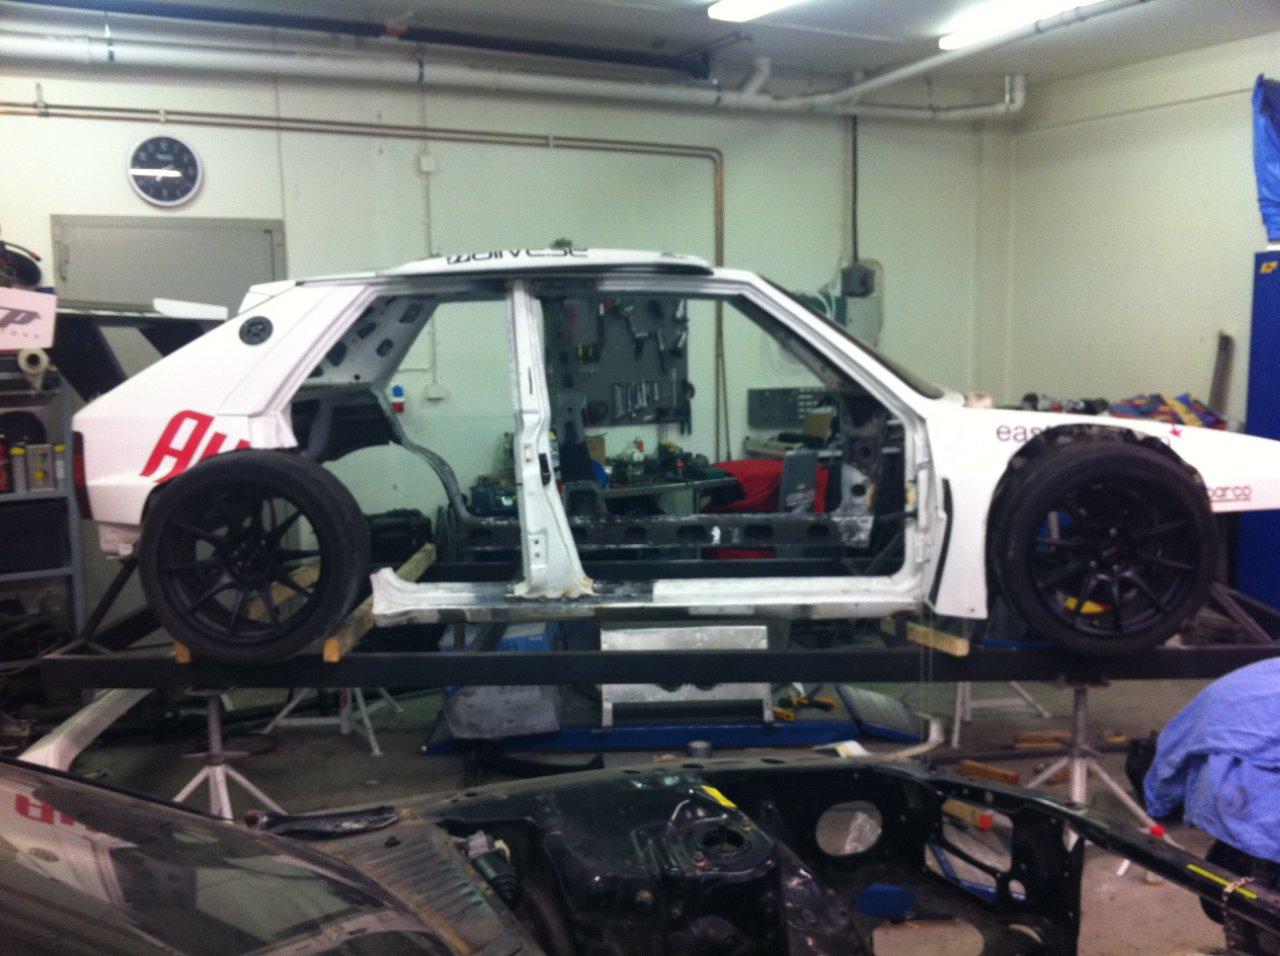
The car was stripped down to its shell and welded onto a metal frame so I could be sure that I always had a straight platform to measure from. Now the cutting could begin…
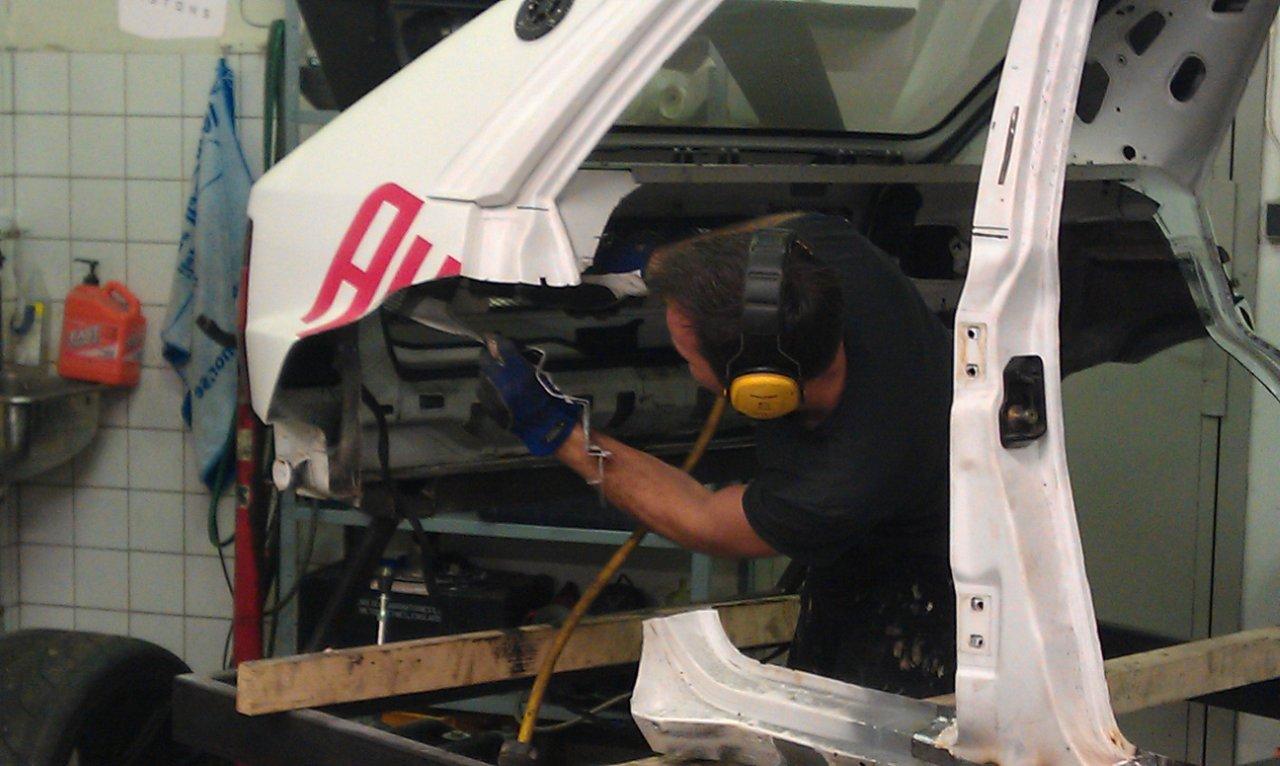
Quite soon I realized that the driver position had to be quite far back to meet my idea of a good weight distribution to get the engine as far back as regulations allow. I ended up cutting the B-pillar out and move it back 150mm so I would have enough space to get in and out of the car.
My idea was to use something that I know works when it comes to suspension and control arm geometry. It’s been proven for many years now that you can make a Supra go fast on the track so that’s why I used a front and rear axle from a Toyota Supra. They were put in complete on the frame and when I had the factory set-up measurements I simply attached the upper and lower arms coming from the wheel hub and took out the subframes. This left me with all the control arms in the right positions and made it easy to run the framework in the correct way so I could make good connecting points.
The first part of the frame to be put in was the main rollover bar, and now I could start to plan the seat and engine position. I started to see the Delta body as a really small cockpit and that the rest of the build would become a fight to get everything inside. It took four different seats from Sparco to find one that was narrow enough to get the clearance I needed for the engine and gearbox. Also the fight for leg space began. I needed to have enough space behind the seats to fit in the gas tanks so I couldn’t move back too much, and still I needed enough space for the front lower control arm that was intruding on my pedal space.
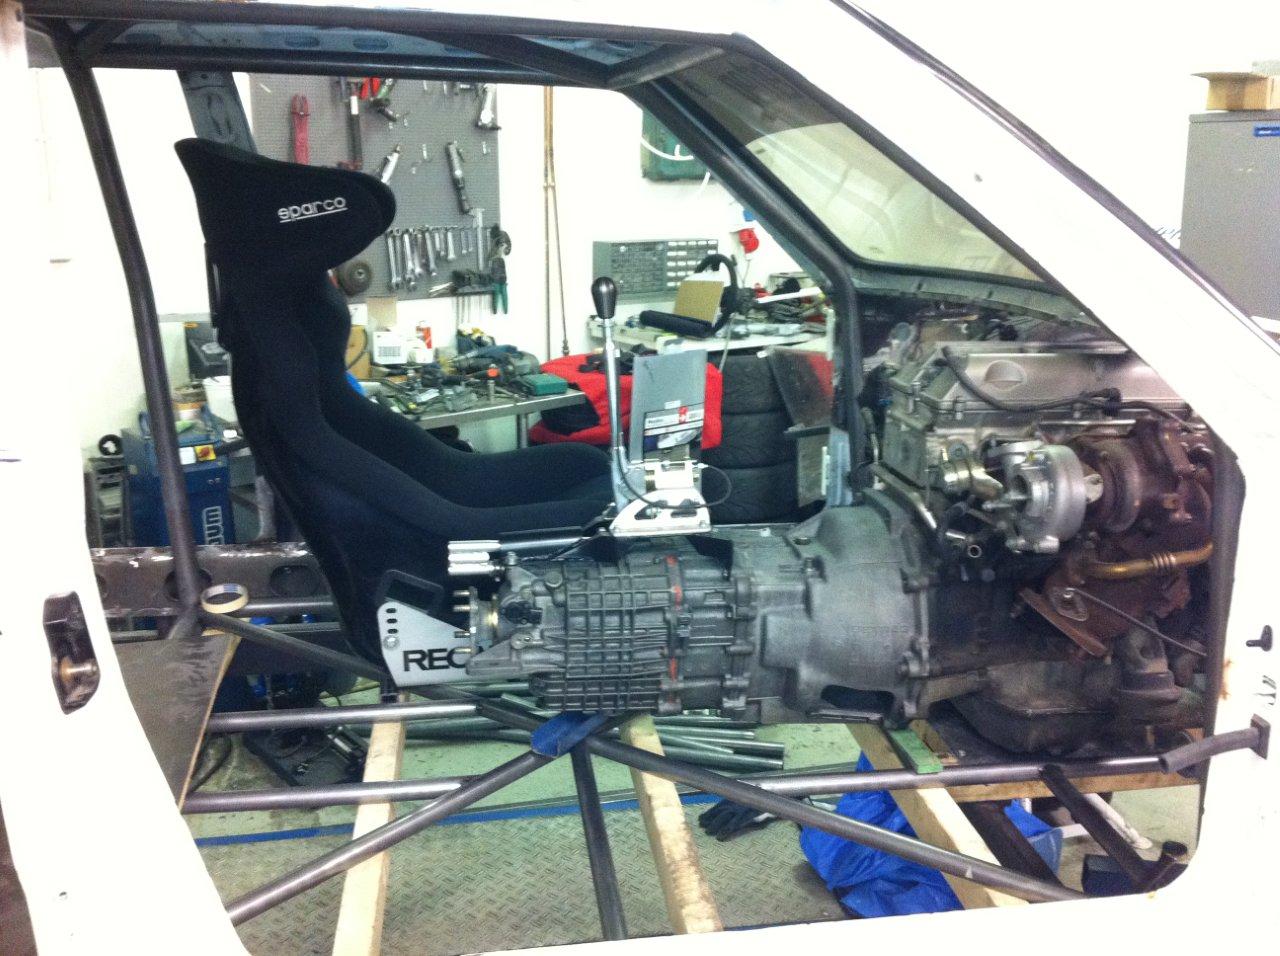
The drivetrain that I ended up using was from a Toyota Supra JZA80 , and the 2JZ engine barely fitted between the windshield and the bottom frame, but it worked after some modification. Now I could start to build the frame forward and back to meet the suspension.

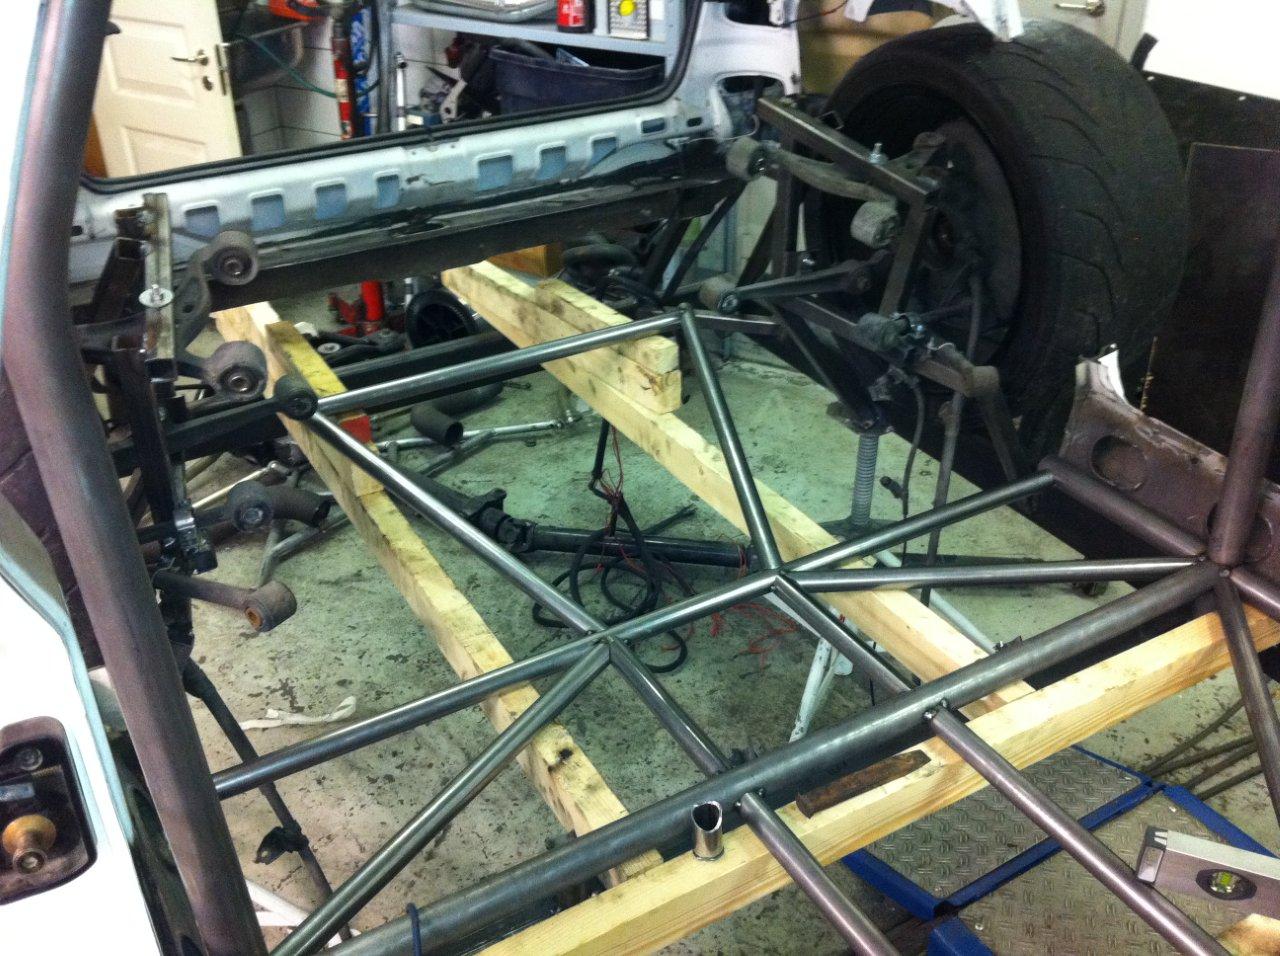
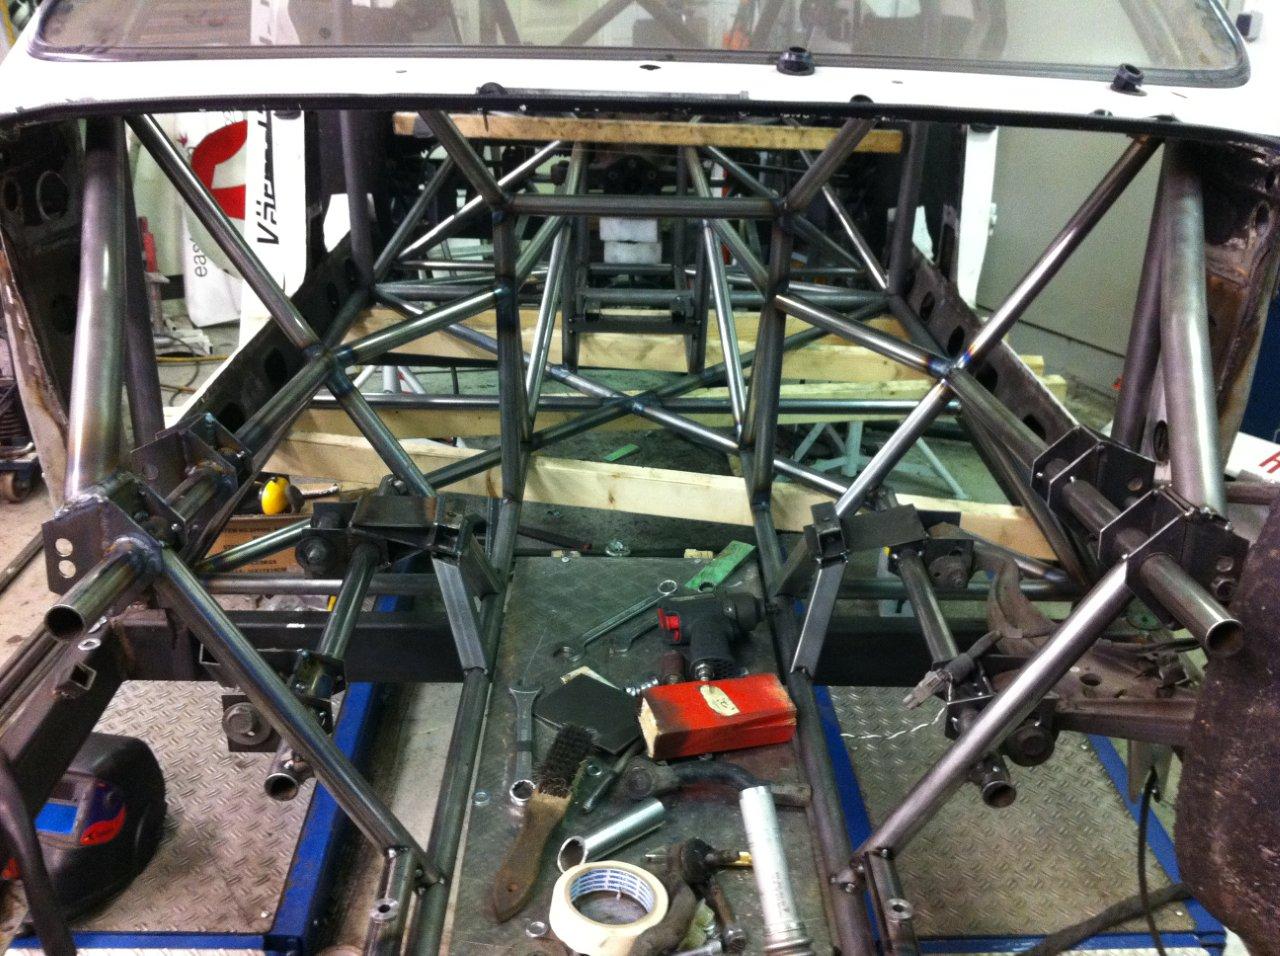
The frame is made out of 30×2 circular piping and the roll cage has the regulation sizing of 45×2,5 in the main overhead roll bar, with the rest of the piping being 40×2. I used a more or less full roll cage with all the X bars and extra reinforcement I could fit. This way I could go a bit easier on the bottom of the chassis.
The frame itself is made from my head and of course some sneak peeks at other builds, both factory race cars and home-made frames. One key point of this was to start racing, so it had to meet rules and regulations. That makes the build a bit more tricky and you spend a lot of time reading and translating the rules.
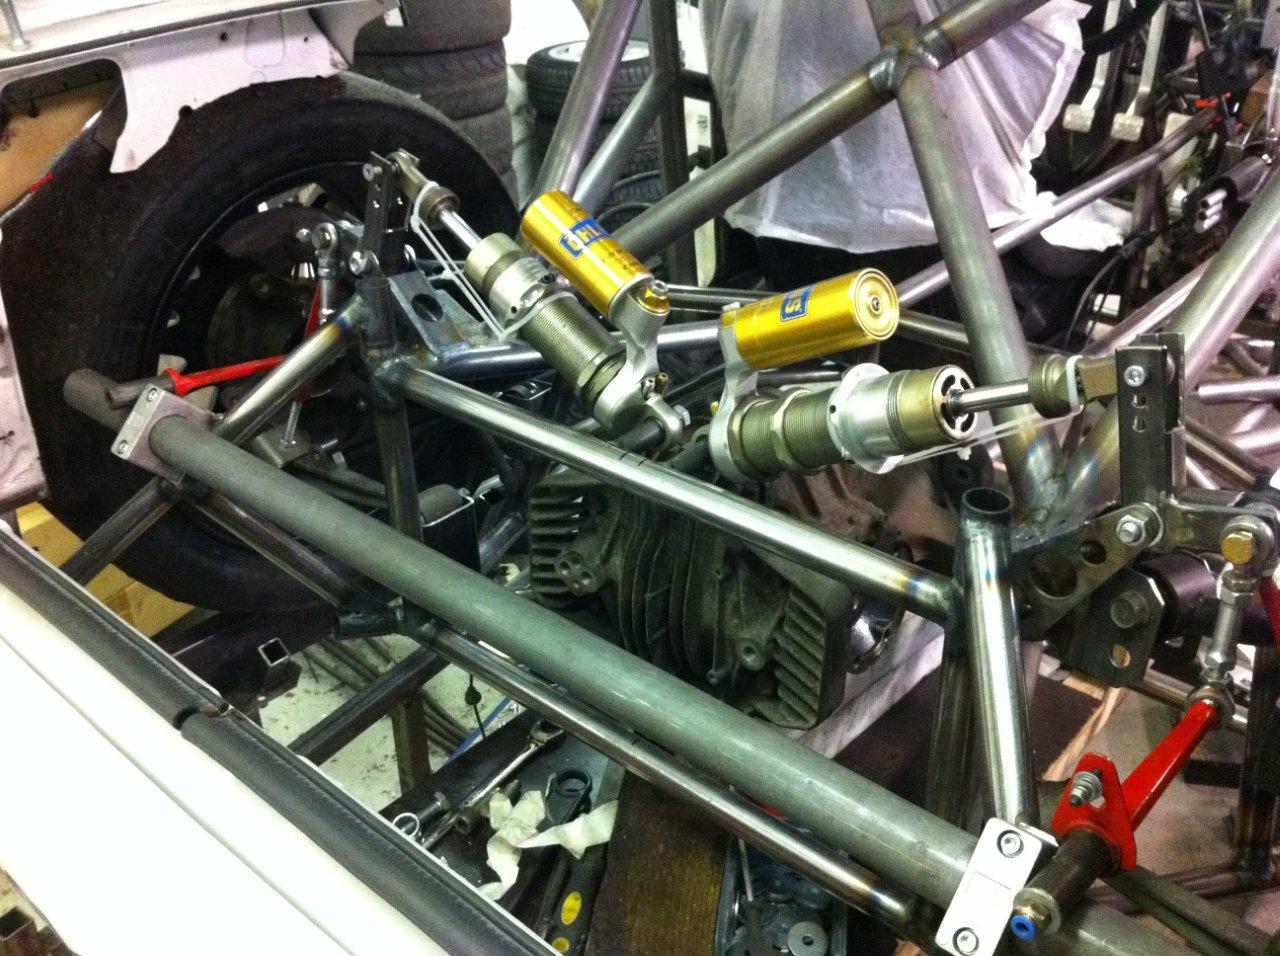
After I had the base of the frame done and could start with placing the parts inside, the challenge began. How will it all fit inside? Because I decided to use pushrod suspension the space in the front and rear was dramatically decreased.
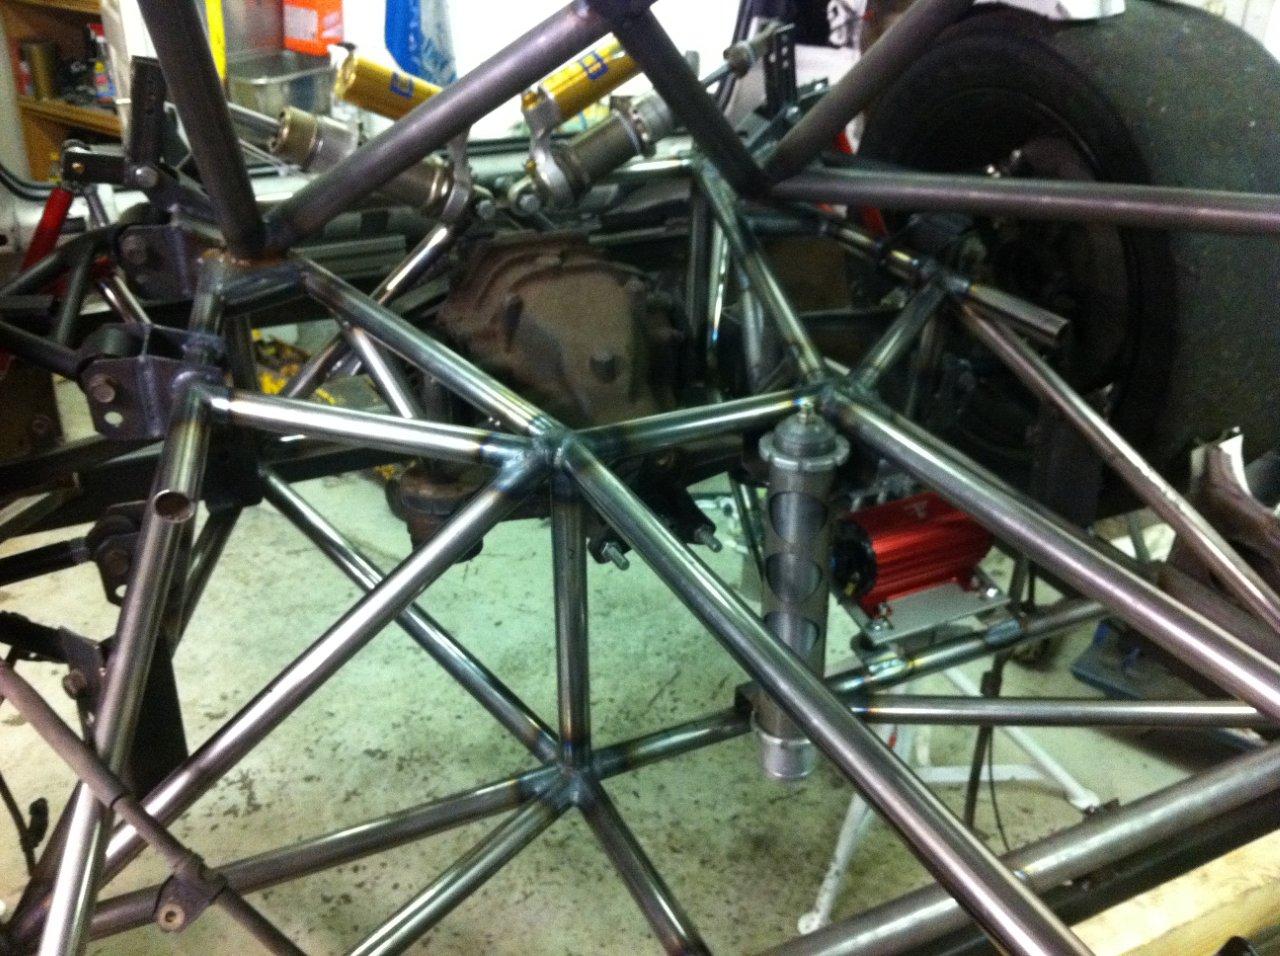
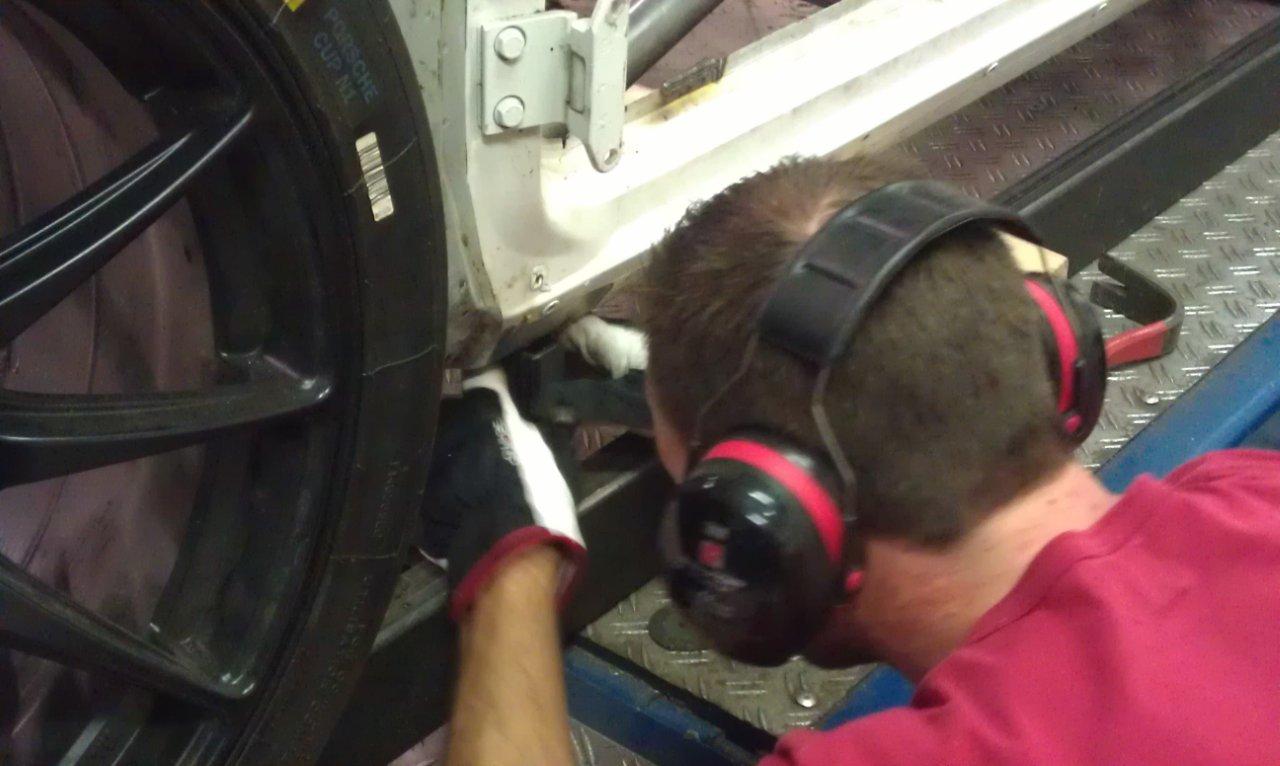
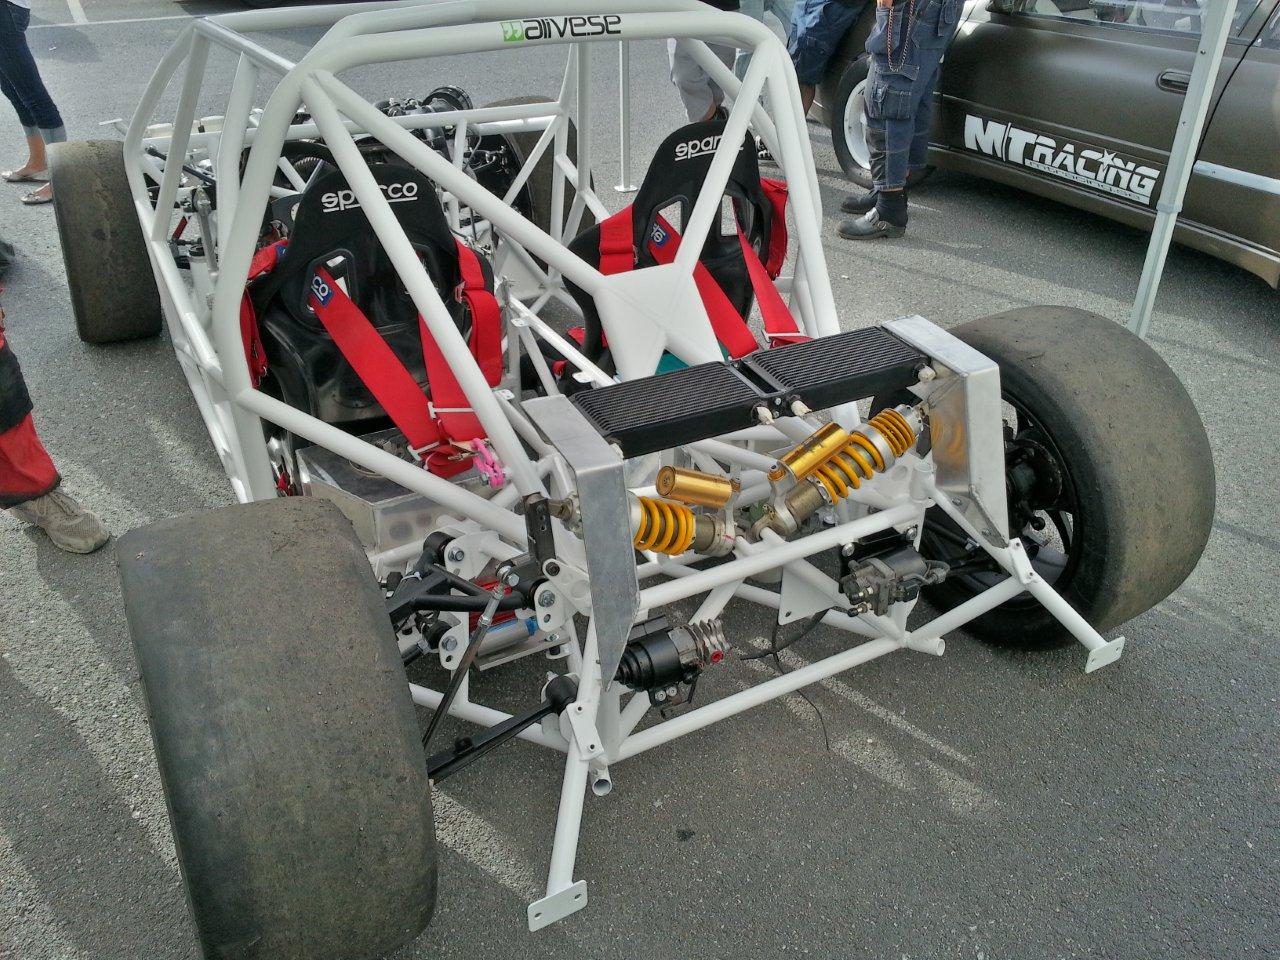
But after many hours of moving the parts around that could be moved, I eventually found a position for everything. In the picture you see the airjack sitting next to the propshaft. Because the angle of the rear diffuser this was the furthest back I could place it. I have three jacks installed which come from a Porsche Cup car. They have two in the rear and one in the front, but since I have a front engine set-up I swapped places and run them the opposite way round.
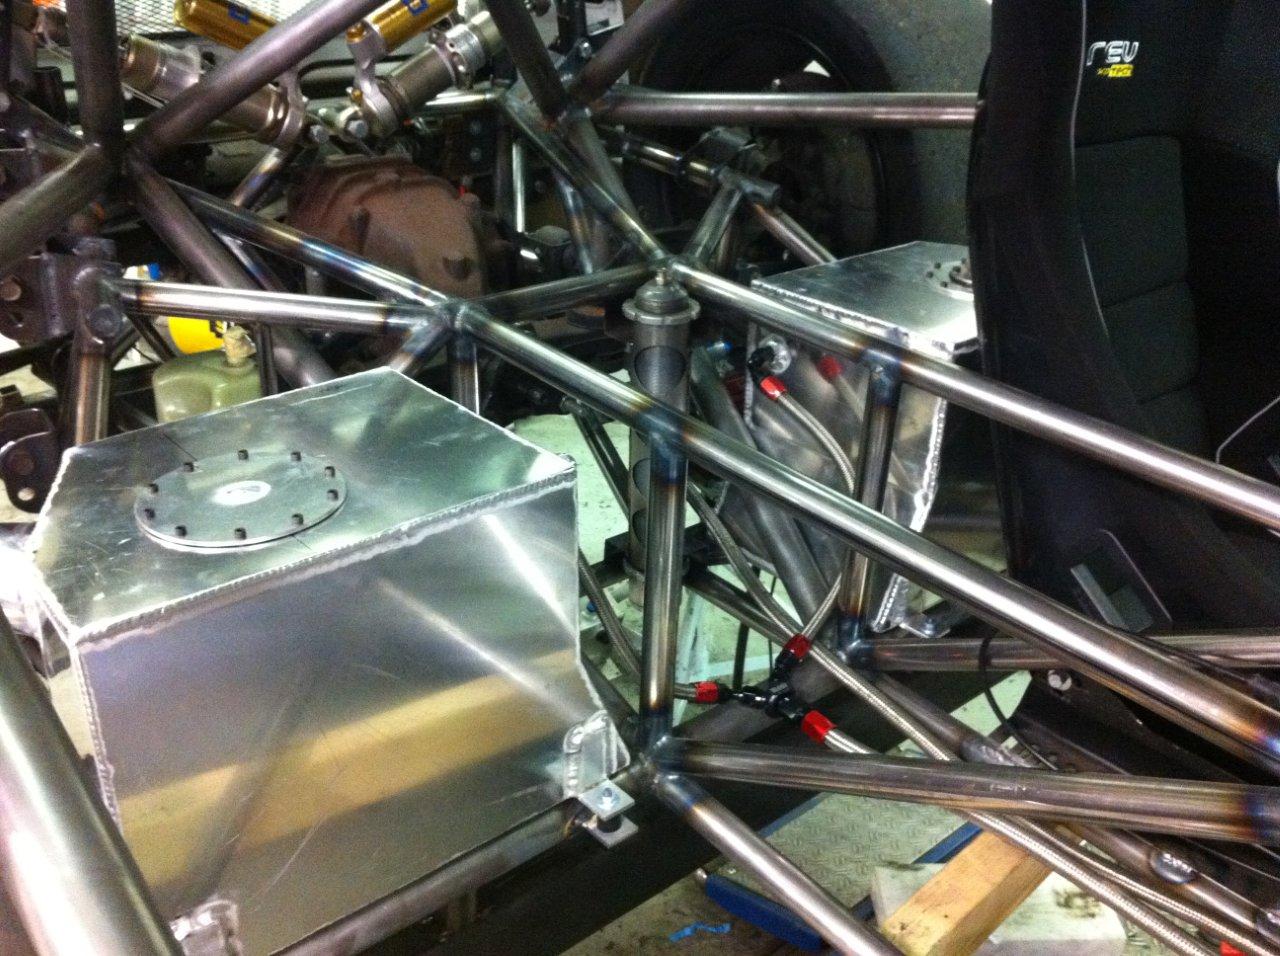
In between the rear section of the frame and the seats I made two custom aluminium gas tanks with internal compartments and one-way valves to keep the gas from rushing back and forth during cornering. The rest of the tanks are foam filled. The capacity ended up at 22 liters per tank so 44 liters should be enough for a sprint race.
Behind the tank you can see the electrical servo pump sitting low and far back on the co-driver side, and on the driver’s side I have the fuel pumps and catch tank.
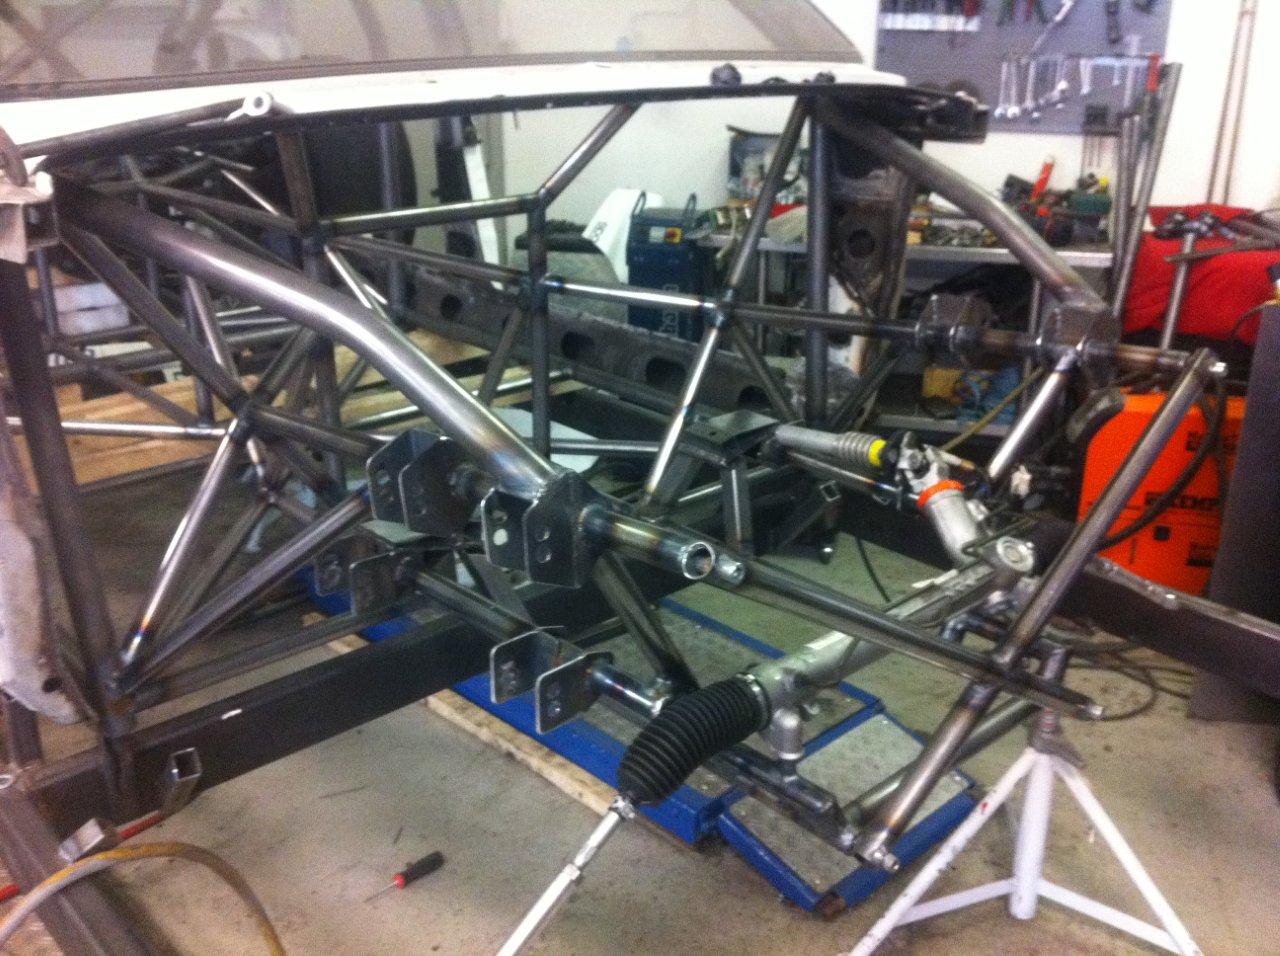
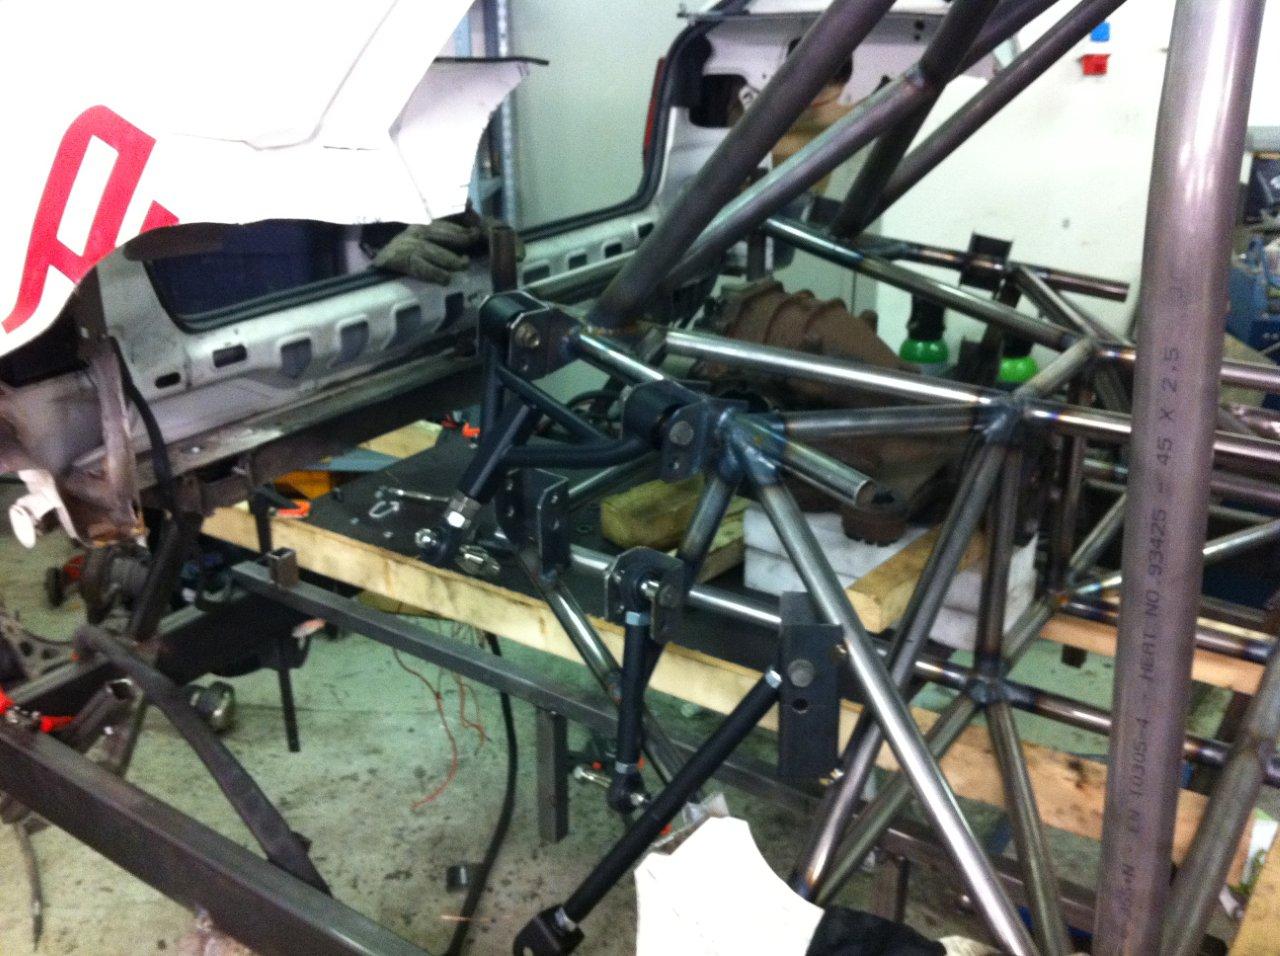
As you can see I’ve chosen to have two possibilities in height for the control arms. This is because I didn’t want to lock myself to only one tire height, so I have the option to run 680mm or 650mm and still run Toyota factory geometry. Or I can use them to adjust roll center, bumpsteer and camber gain in both front and rear. To adjust bumpsteer in the front I can raise or lower the steering rack or adjust the steering joints on the wheel uprights.
I had the feeling that the front section would be easier than fitting everything in the rear section. But I was so wrong.
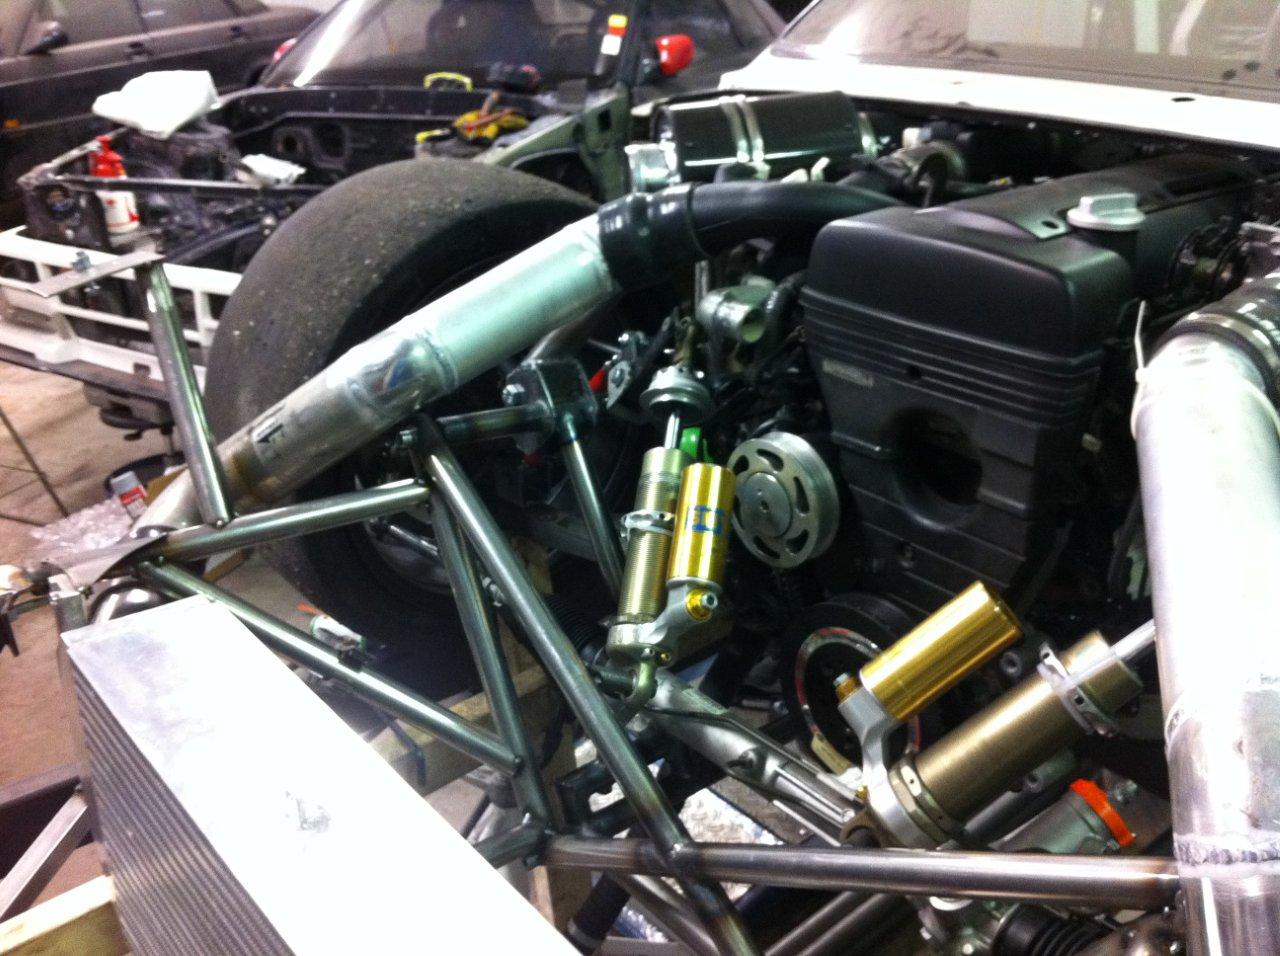
Not only is the 2JZ engine a pretty big monster, but in front of that I had to place the shocks, radiator, oil cooler and intercooler. All this inside the relatively small engine compartment of the Lancia. Lucky for me I had moved back the engine as far as I did.
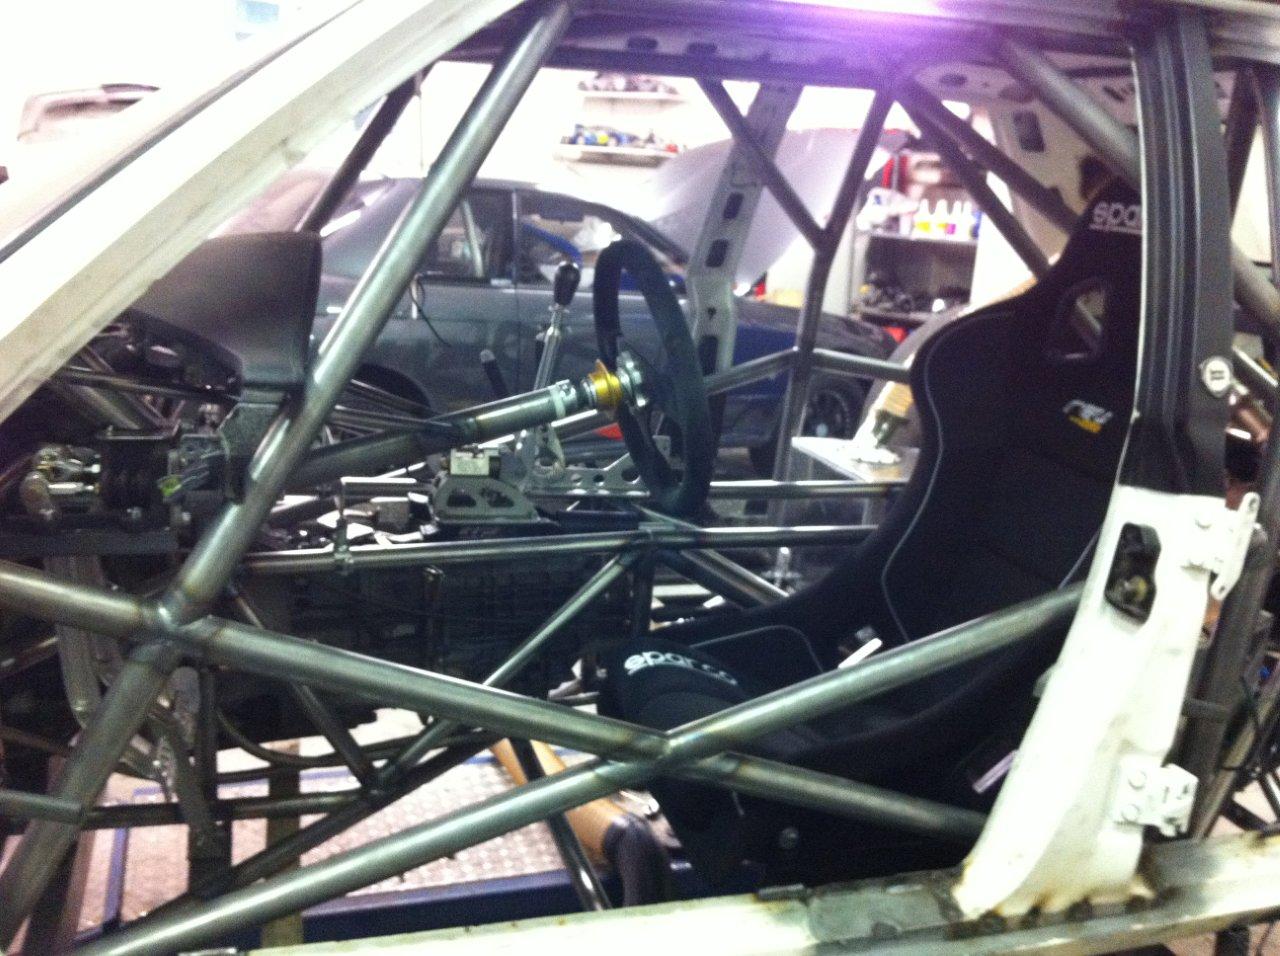
I ended up with a hanging pedal box from Tilton because of the narrow space. It became a compromise that affected my angle of the steering column. At first I wanted to use a standing pedal box to have a straighter steering column, but it just wouldn’t have worked so I ended up with this.

And sometimes it isn’t how it seems. All the small points that annoyed me from the beginning quickly disappeared the first time I took it on the track. The pedals have a 1:7 ratio and together with the Brembo brakes it feels perfect! I didn’t get the feeling of pushing your foot through a brick wall, instead I got the smooth pedal that allows you to apply just the correct braking pressure.
Finishing the chassis
At this point I’d used up around one year of building and finally I could see the light at the end of the tunnel for sending the frame out for powder coating.
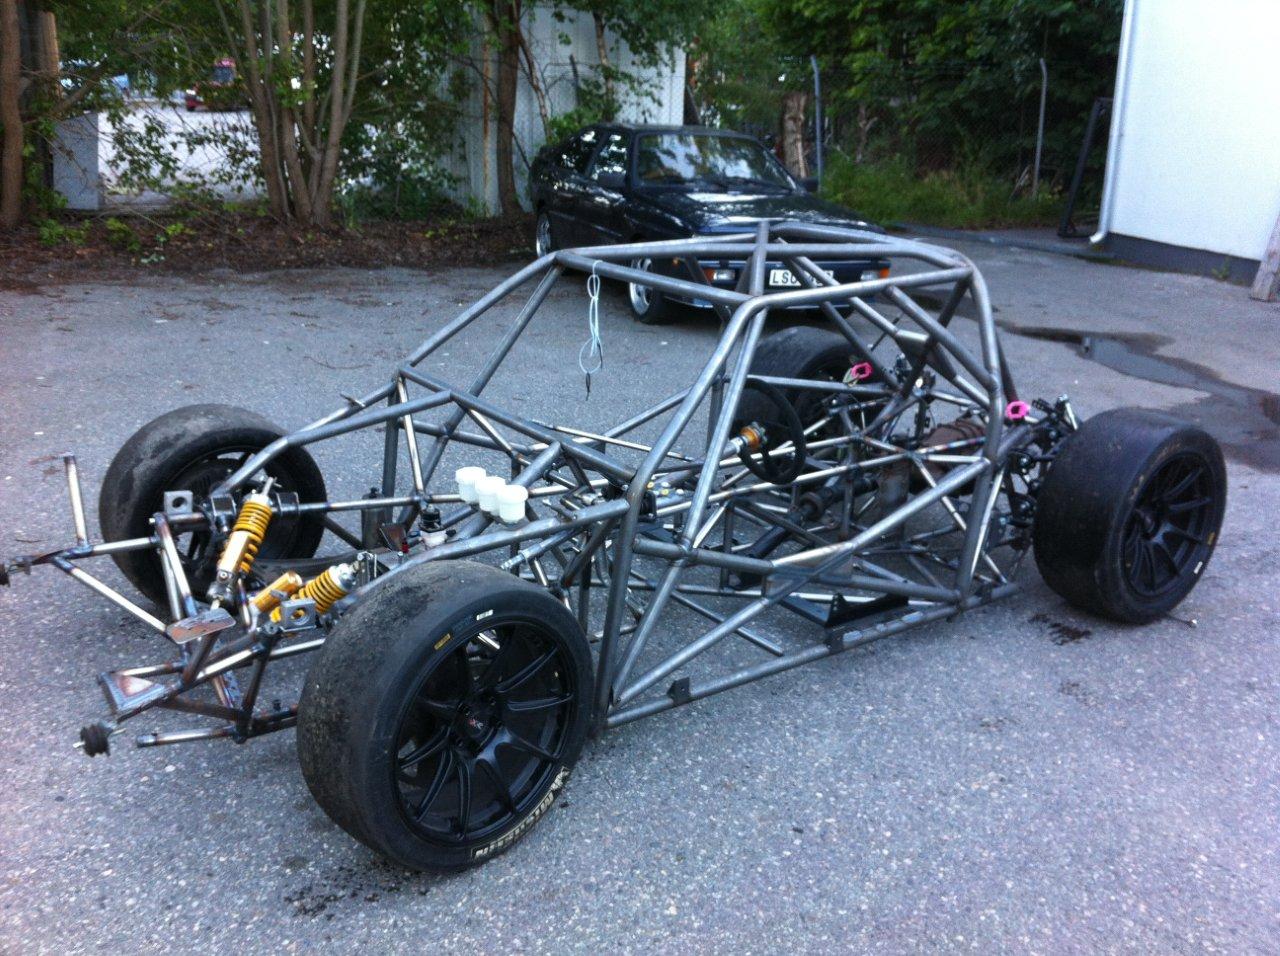
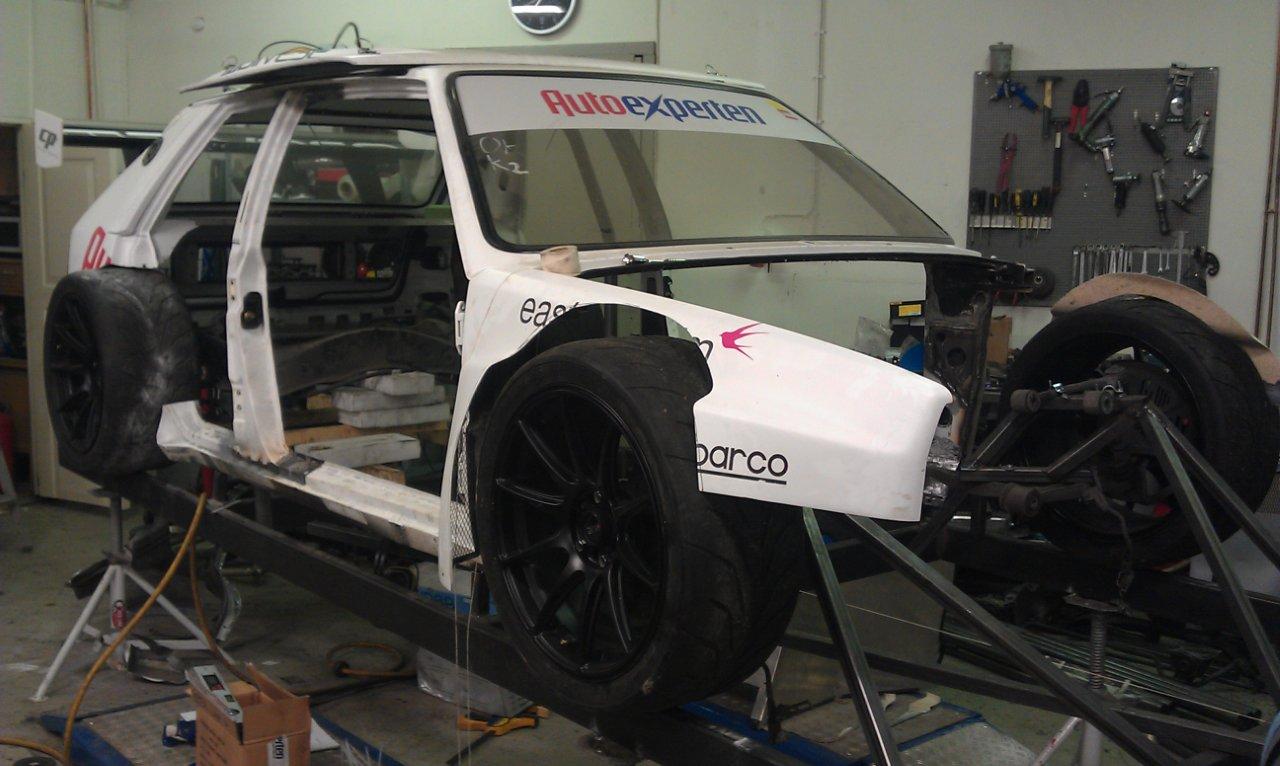
We cut it off the jig, lifted off the body and for the first time since the start I could see the chassis on its wheels outside of the garage. This was the biggest milestone in the build. After this it felt like the finish line was just around the corner…
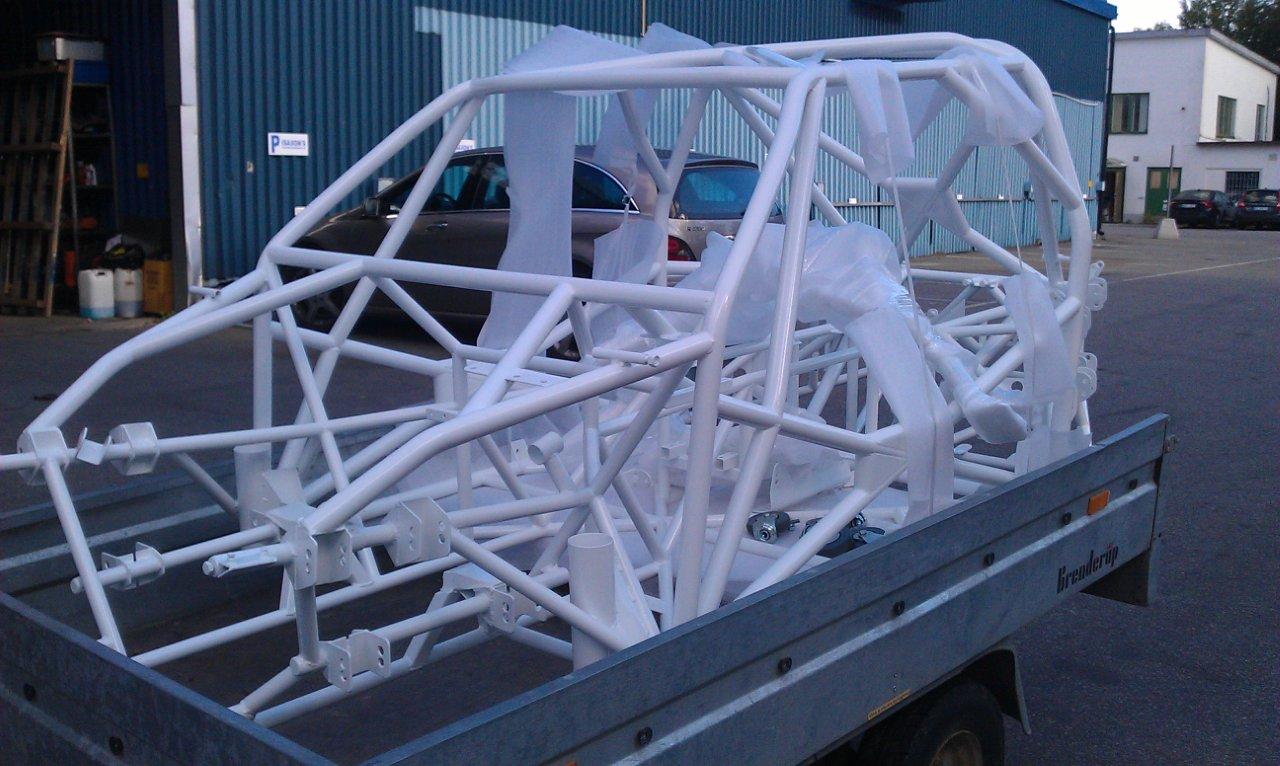
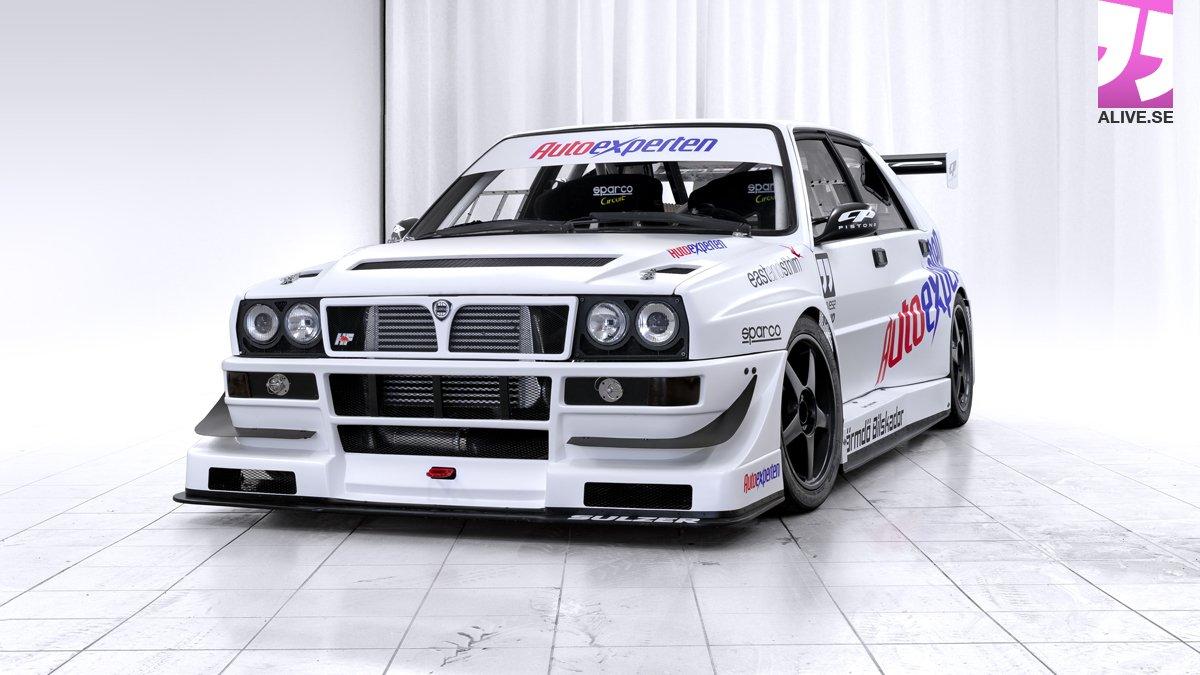
It was now stripped down and sent out for paint. After paint, I didn’t have much time to get it back to a rolling chassis before the car would have its public debut at the Alive.se yearly car meet.

And finally we could reveal it…
When the evening came and the car meet was over, we took it back to the garage and plans began on how to proceed with the bodywork.
But I will tell you about that the next time…
Peter Pentell