
Anybody who has used a camera in anger will know that the split second it takes to activate a shutter is just the beginning of a workflow, which you have to manage carefully or waste time at your peril. We’ve covered a lot of ground over the last few months with these guides and we’ve no intentions of stopping any time soon. In this instalment, we’re going to deal with what happens when the action stops and you retire to your quiet place to review what you’ve just captured…
As always, I like to preface each guide with a small note: don’t take what you are about to read as gospel. Instead, glean from it what you like and incorporate it into your own workflow. This is what works best for me but it’s something that I’m continually refining. It might not suit your style at all or it could be a perfect fit. Only you will know.
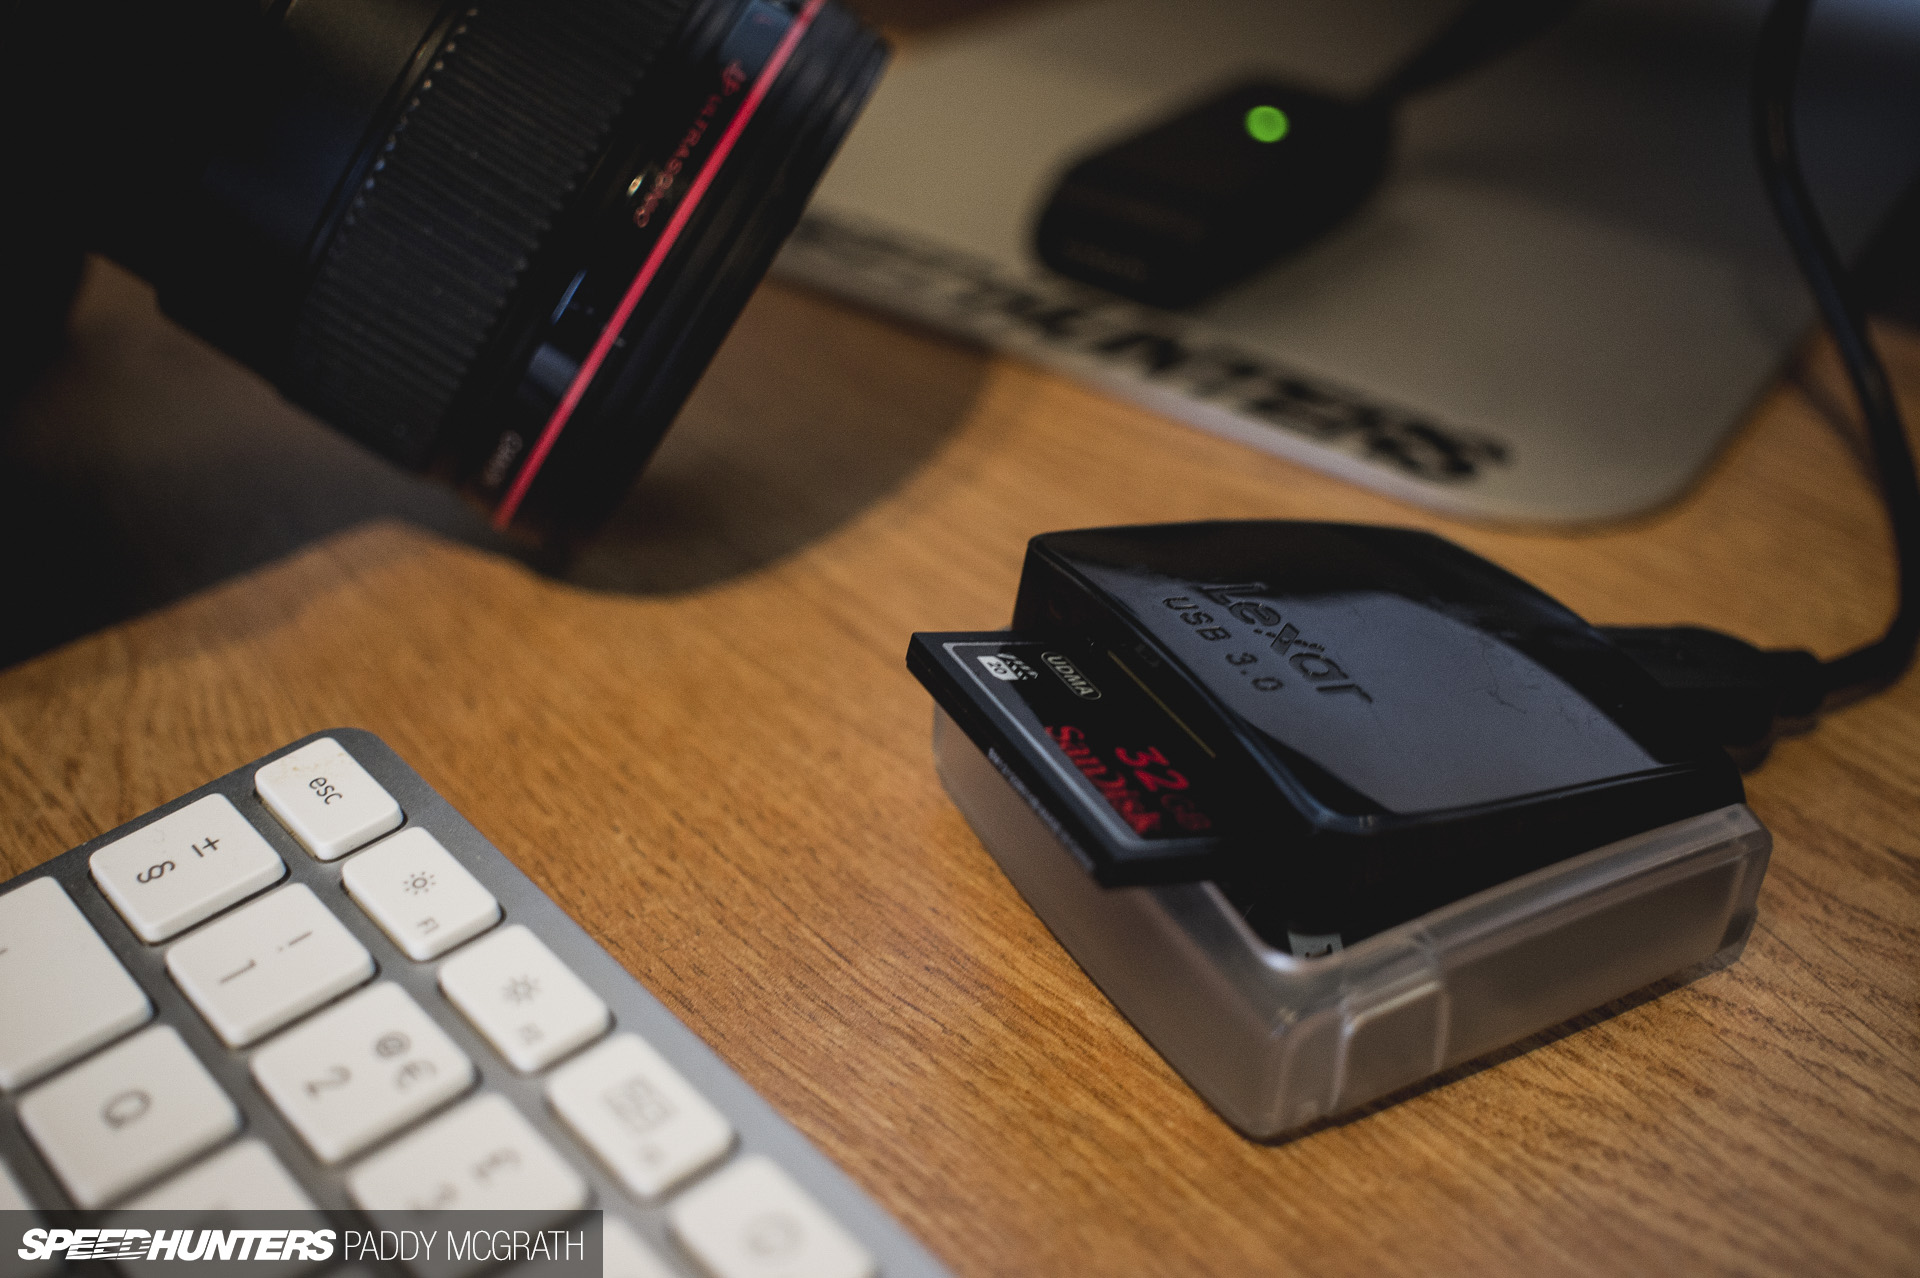
The first step in your workflow should involve getting your images off your memory cards and onto your computers. Obviously, if you’re shooting tethered (with you camera connected directly to a laptop or other computer on location) you won’t need to do this, but the vast majority of us will. You can connect your camera directly to your computer and copy your photographs across that way but it’s far more effective to use a card reader (built-in or external). It’s usually much faster than taking the images straight from the camera with the added benefit of saving your camera’s battery.

Next, what software to use. The majority of the Speedhunters crew that I’ve worked with on location all use Adobe Lightroom. It’s a pretty comprehensive piece of software in that it allows you to catalogue and make non-destructive edits of your photographs amongst a host of other features. Some people prefer Aperture or just working within Photoshop and using Adobe Camera Raw to process their RAW files. Again, these are all personal preferences. I tend to use Lightroom for dealing with the majority of my editorial work and only export certain images to Photoshop if they need more intensive image manipulation (usually for commercial work).
I pretty much only use the ‘Library’ and ‘Develop’ modules within Lightroom and hide the rest of them so I’m free from distraction. I’ve a pretty crude method of naming and sorting my photographs but it’s a system that works well for me. If you’re shooting more often, you should consider using keywords, categories and tags etc. My current import process is something like this:
- Select images to be imported (usually everything on the card)
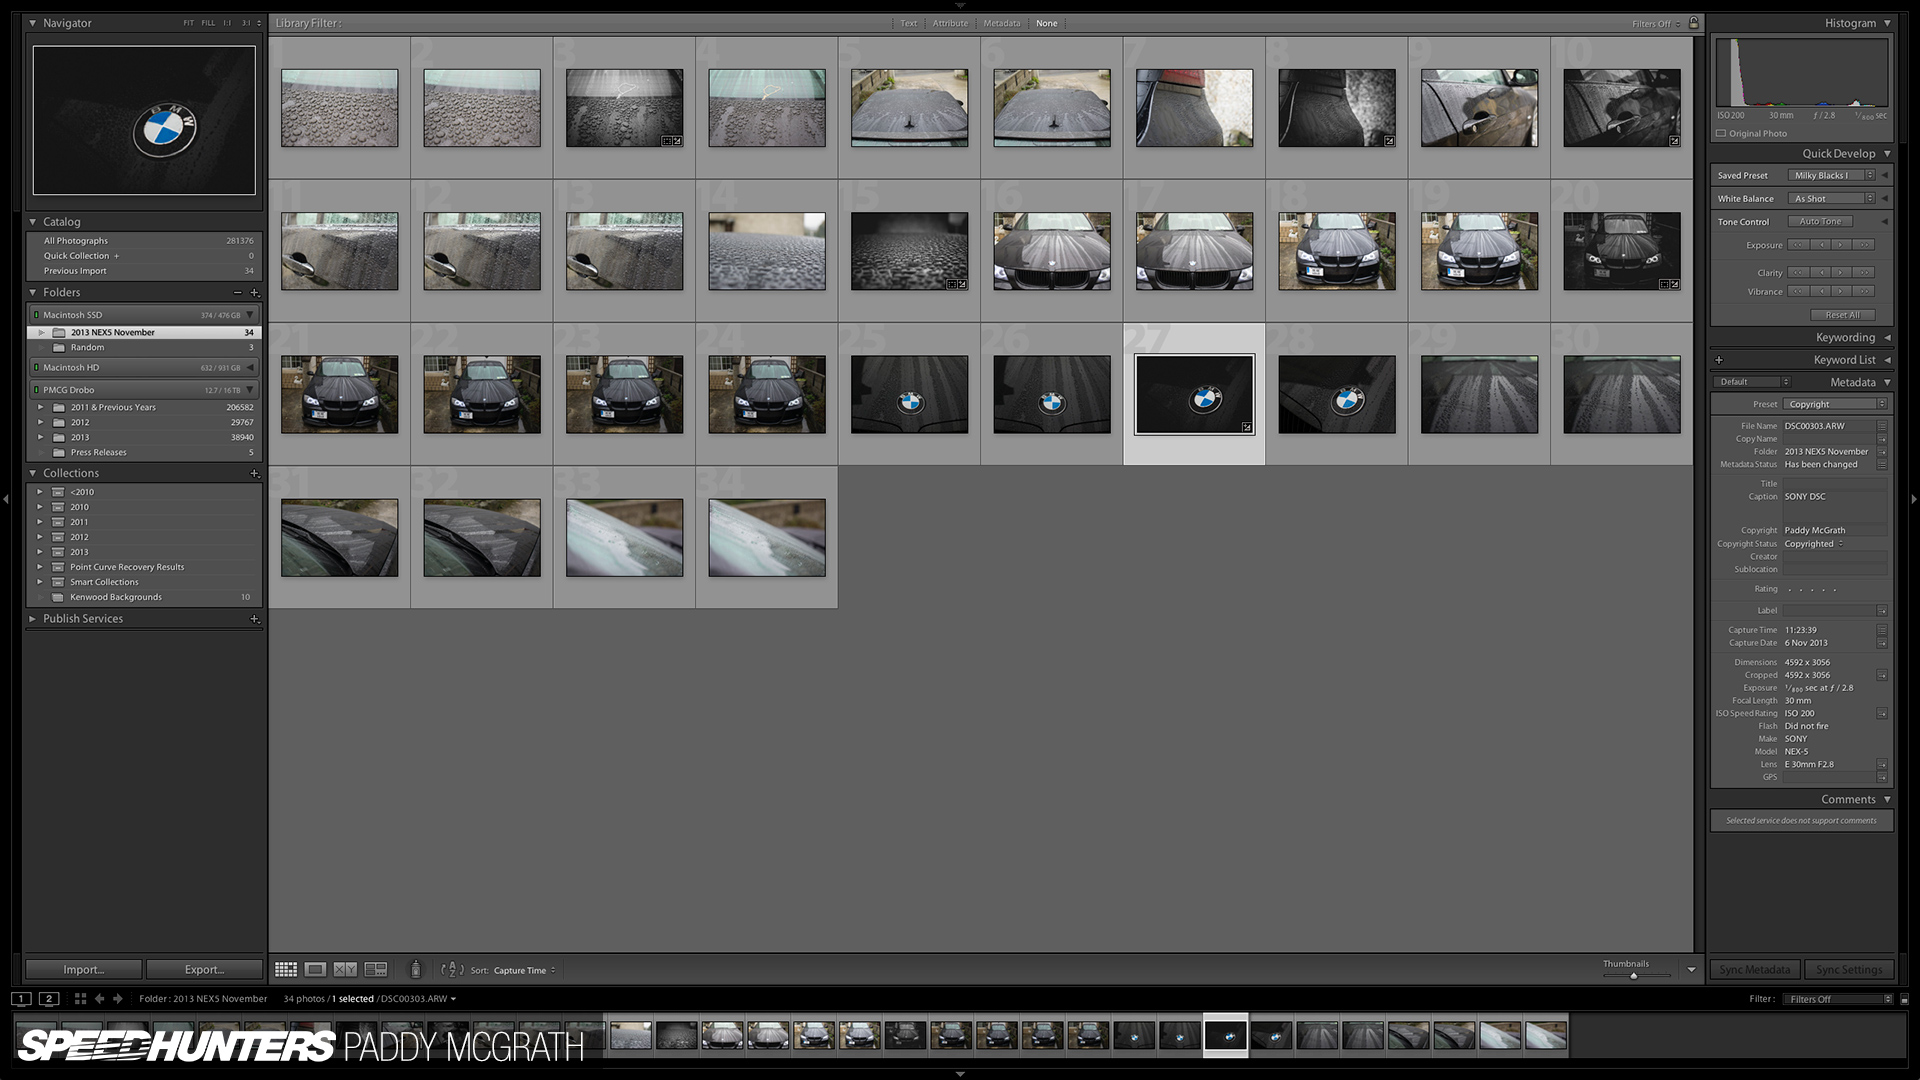
- Import them into a new folder named with the year and a descriptive title (i.e. ‘2013 Gatebil Rudskogen’)
- I always import them onto the same drive that Lightroom is installed on (in this case, Macintosh SSD)
When I’ve finished editing everything and the work is completed and sent wherever it needs to go, I move the folder off my main hard drive and onto an external Drobo. I can always access the photos at a later date, but the speed difference in working through everything is noticeably slower. This is usually not an issue as I’ll generally only be looking for a specific photo to send to someone or make small changes. I can always move the folder back onto my primary drive (from within Lightroom) if need be.
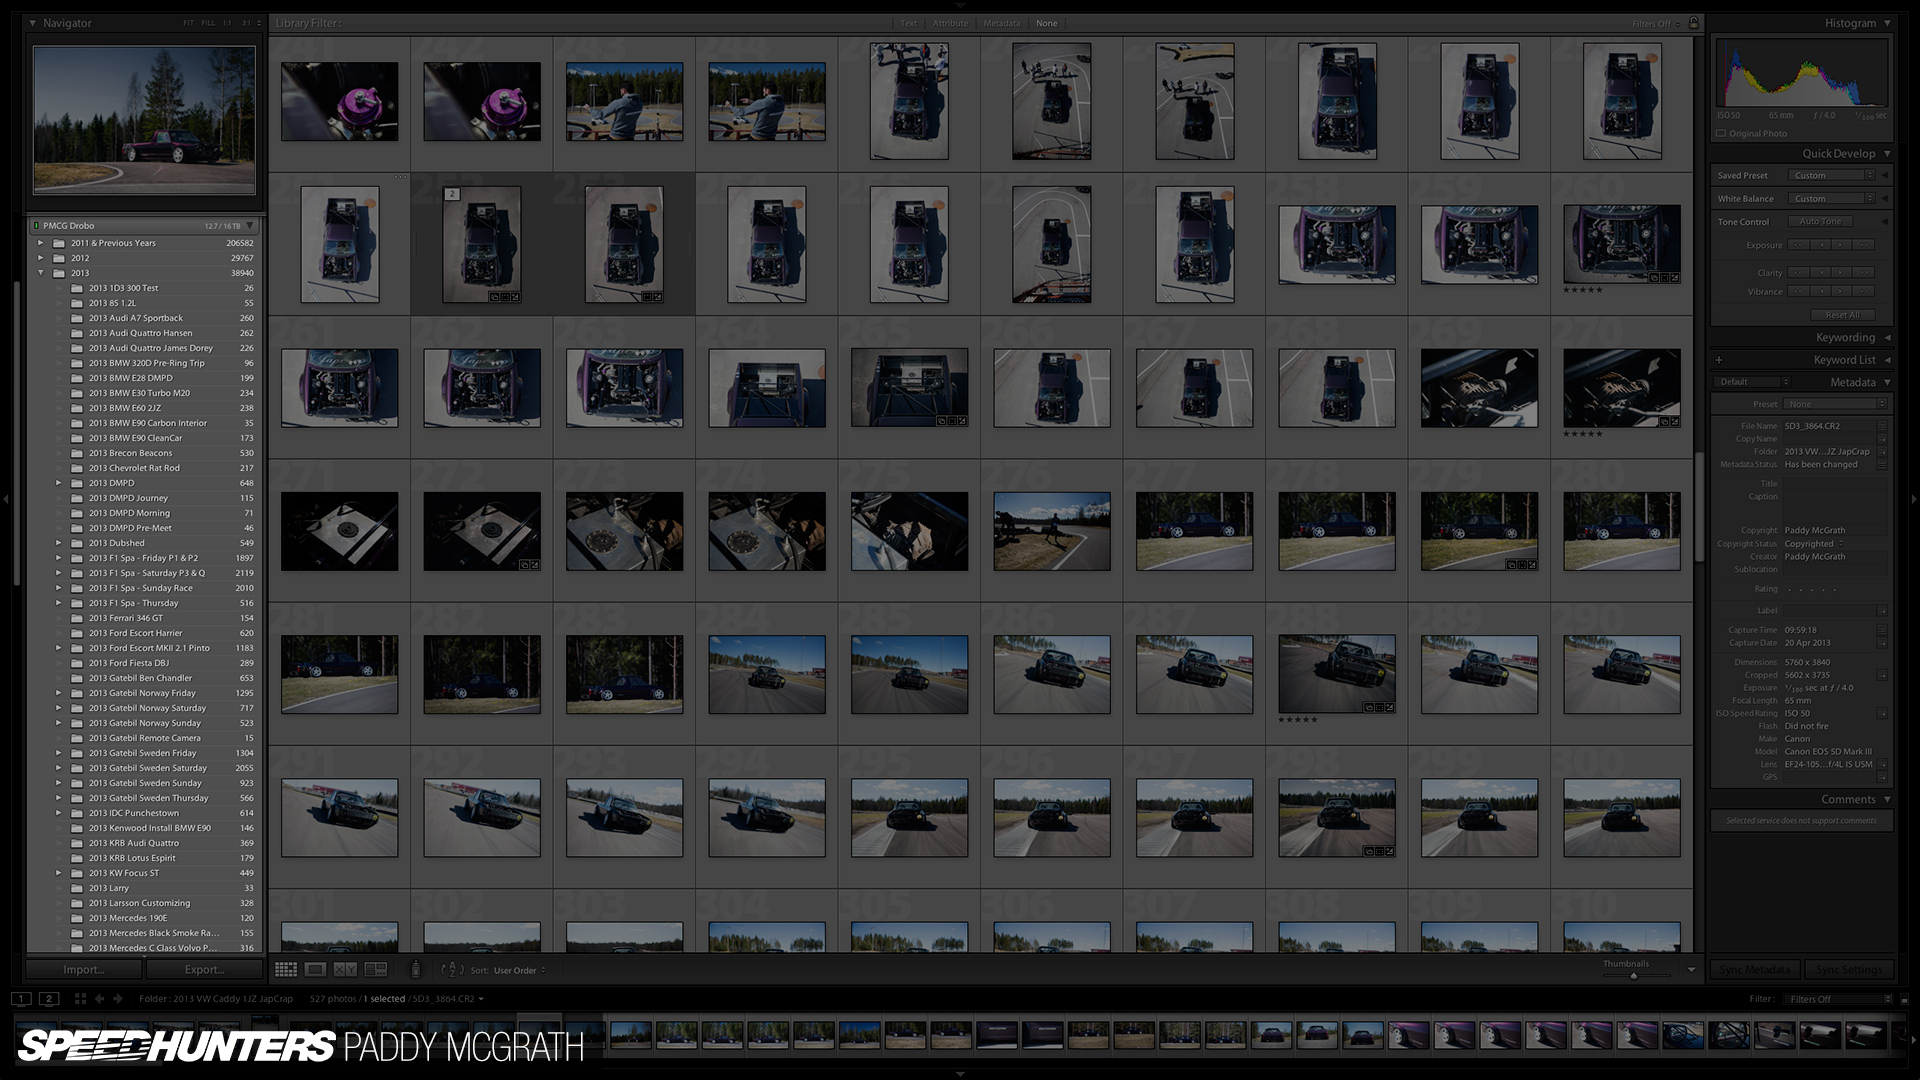
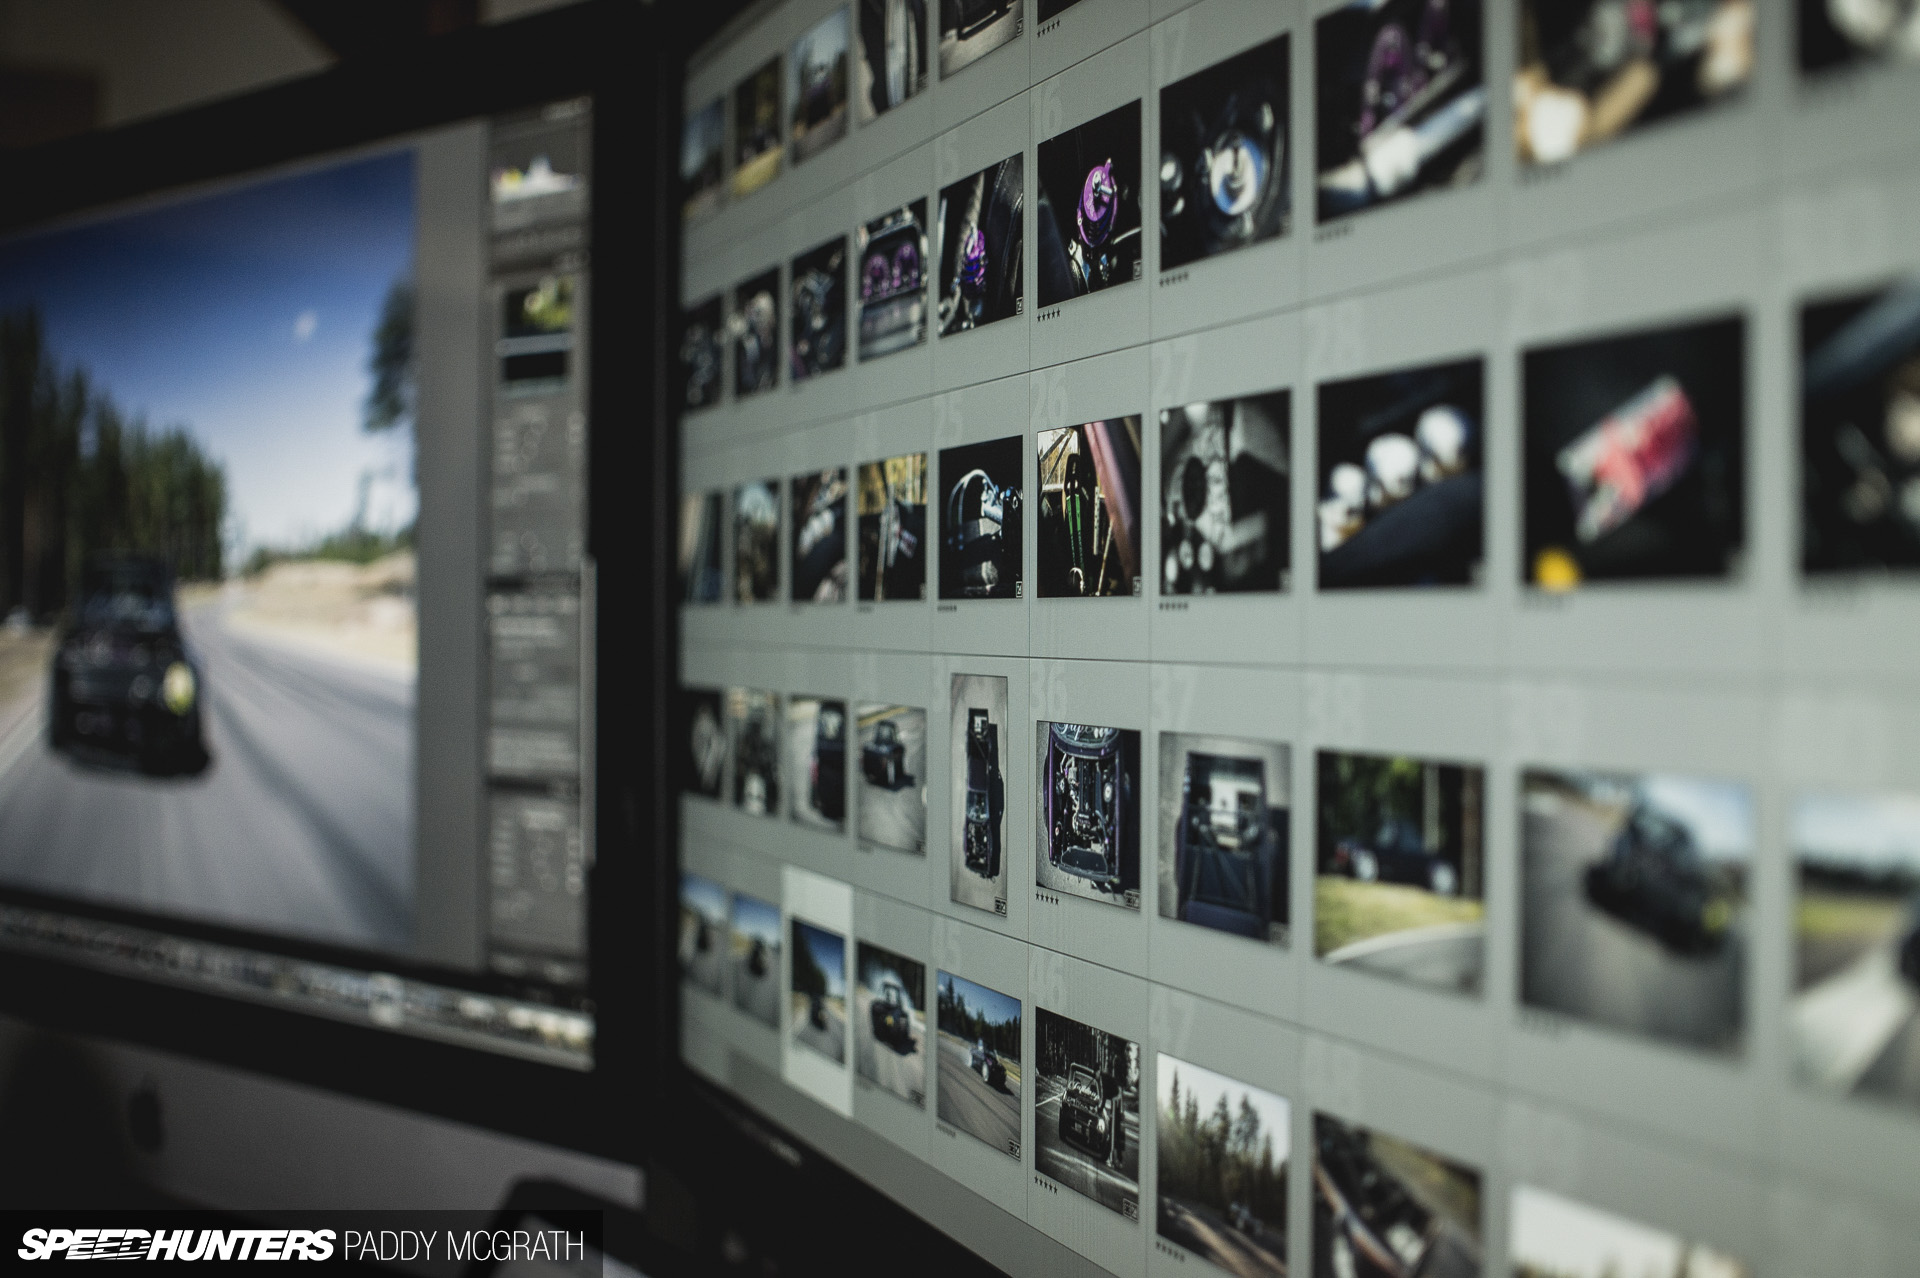
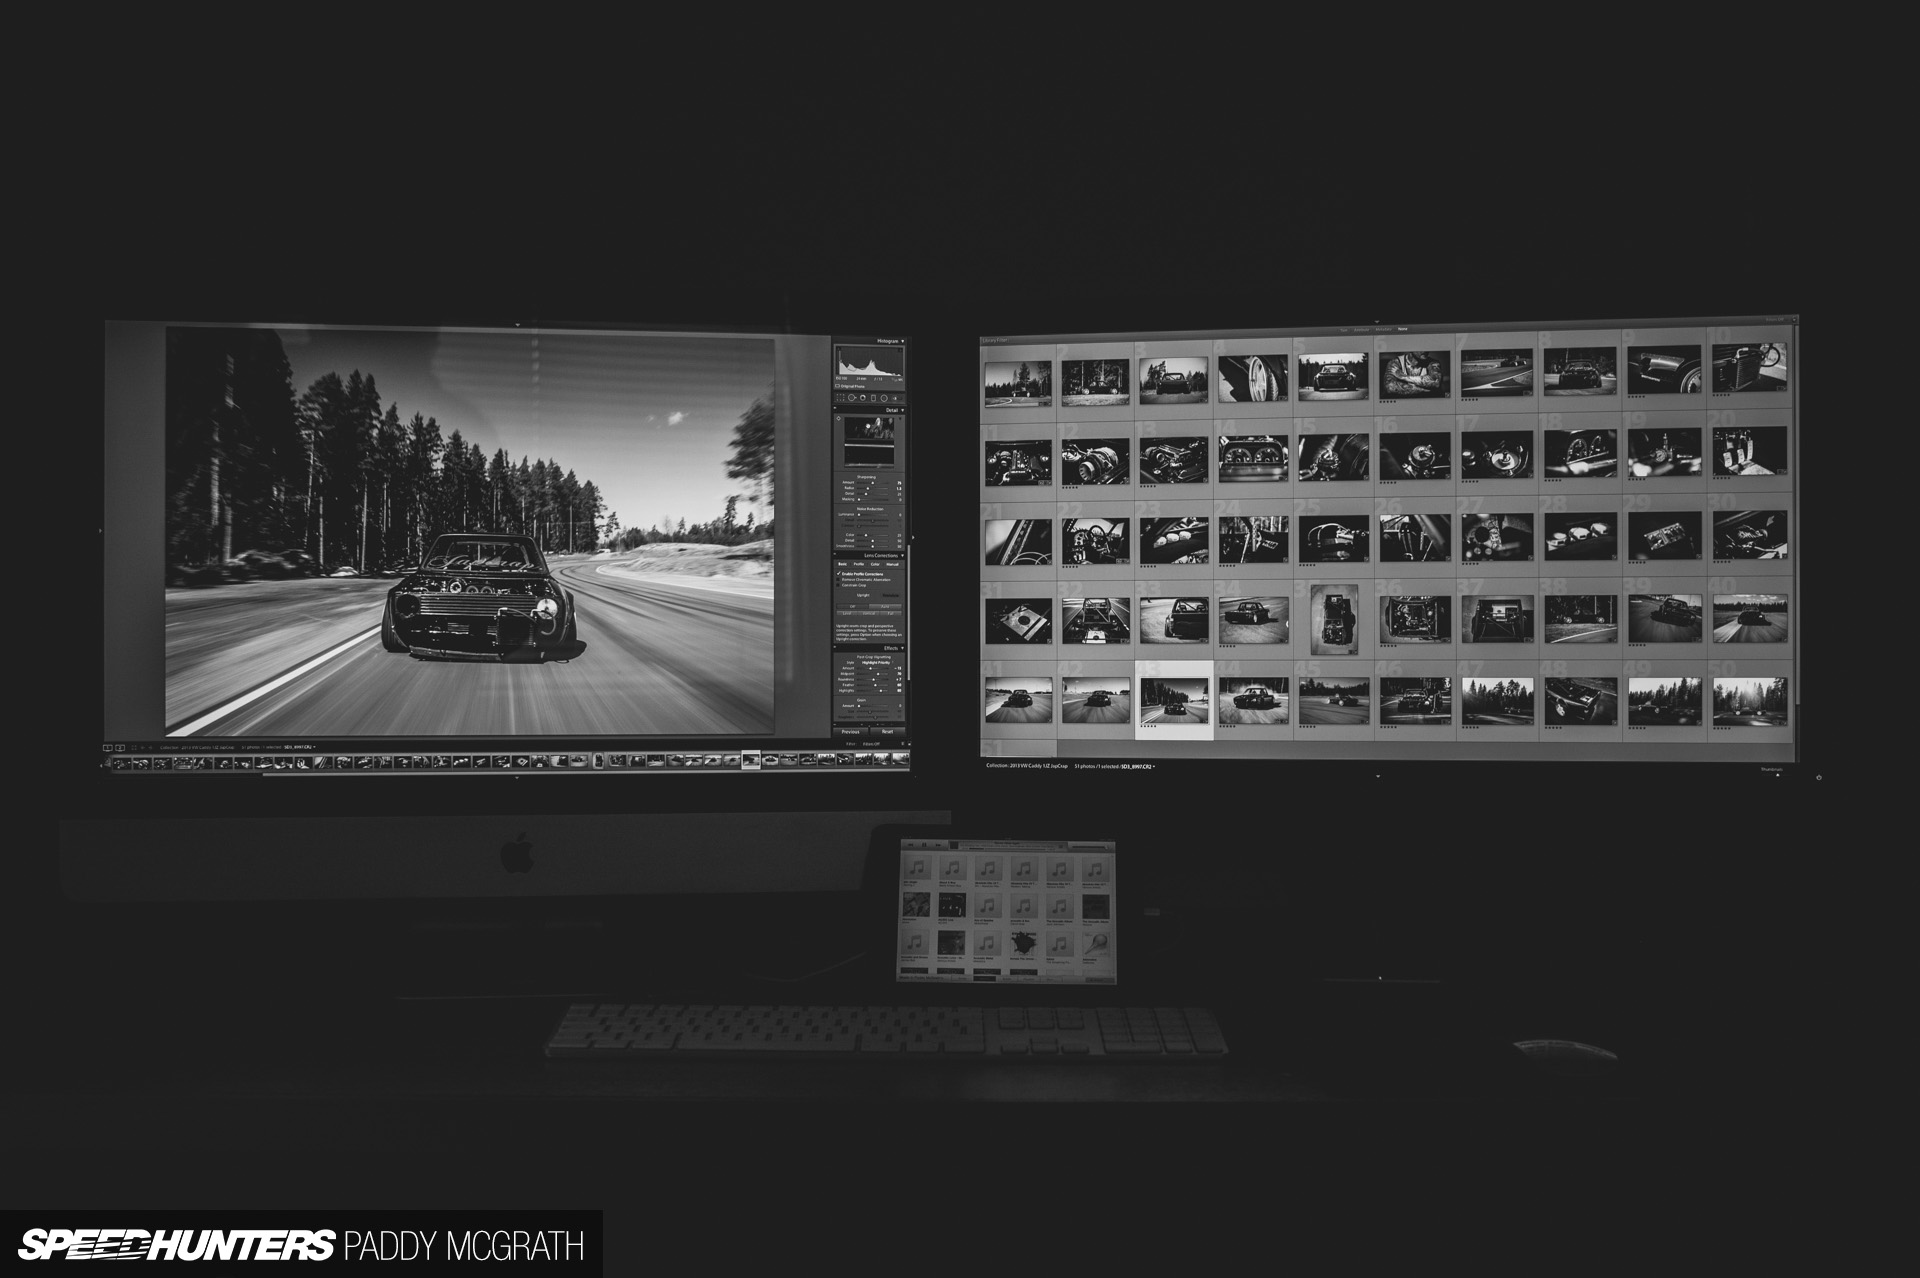
With the images imported into Lightroom, my next stage is picking out the images I’m going to want to edit and eventually use. Always ‘overshoot’ so you have plenty of options afterwards. You can see in the highlighted pane the number photographs taken for each shoot. I never delete images, even if they’re completely unusable. I live in hope that someday, someone will invent software to fix my errors. In this particular instance, there were over 500 photographs taken…
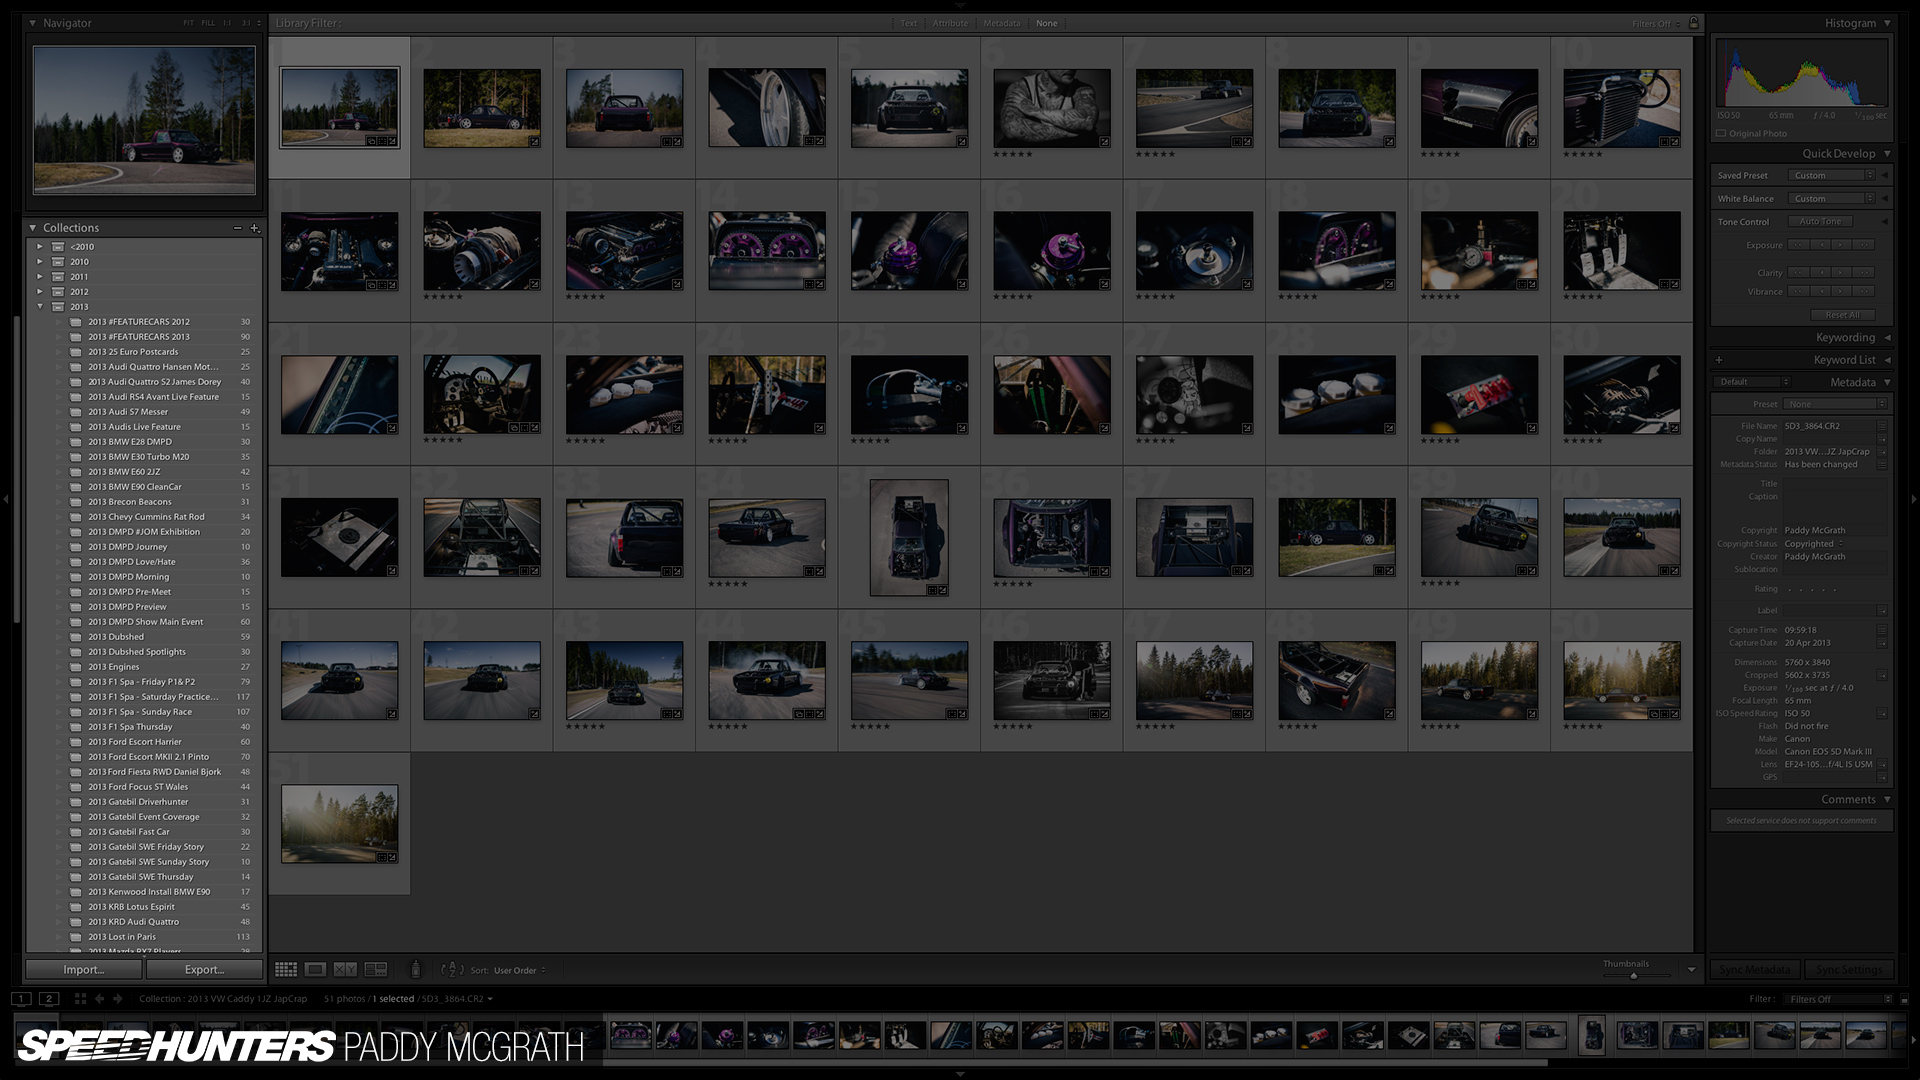
… which I narrowed down to around 50 with the quick collection tool (which is then saved as a permanent collection with a similar folder name. In this case ‘2013 VW Caddy 1JZ JapCrap’.) I then know that these are the images I’m going to work through and process.
Processing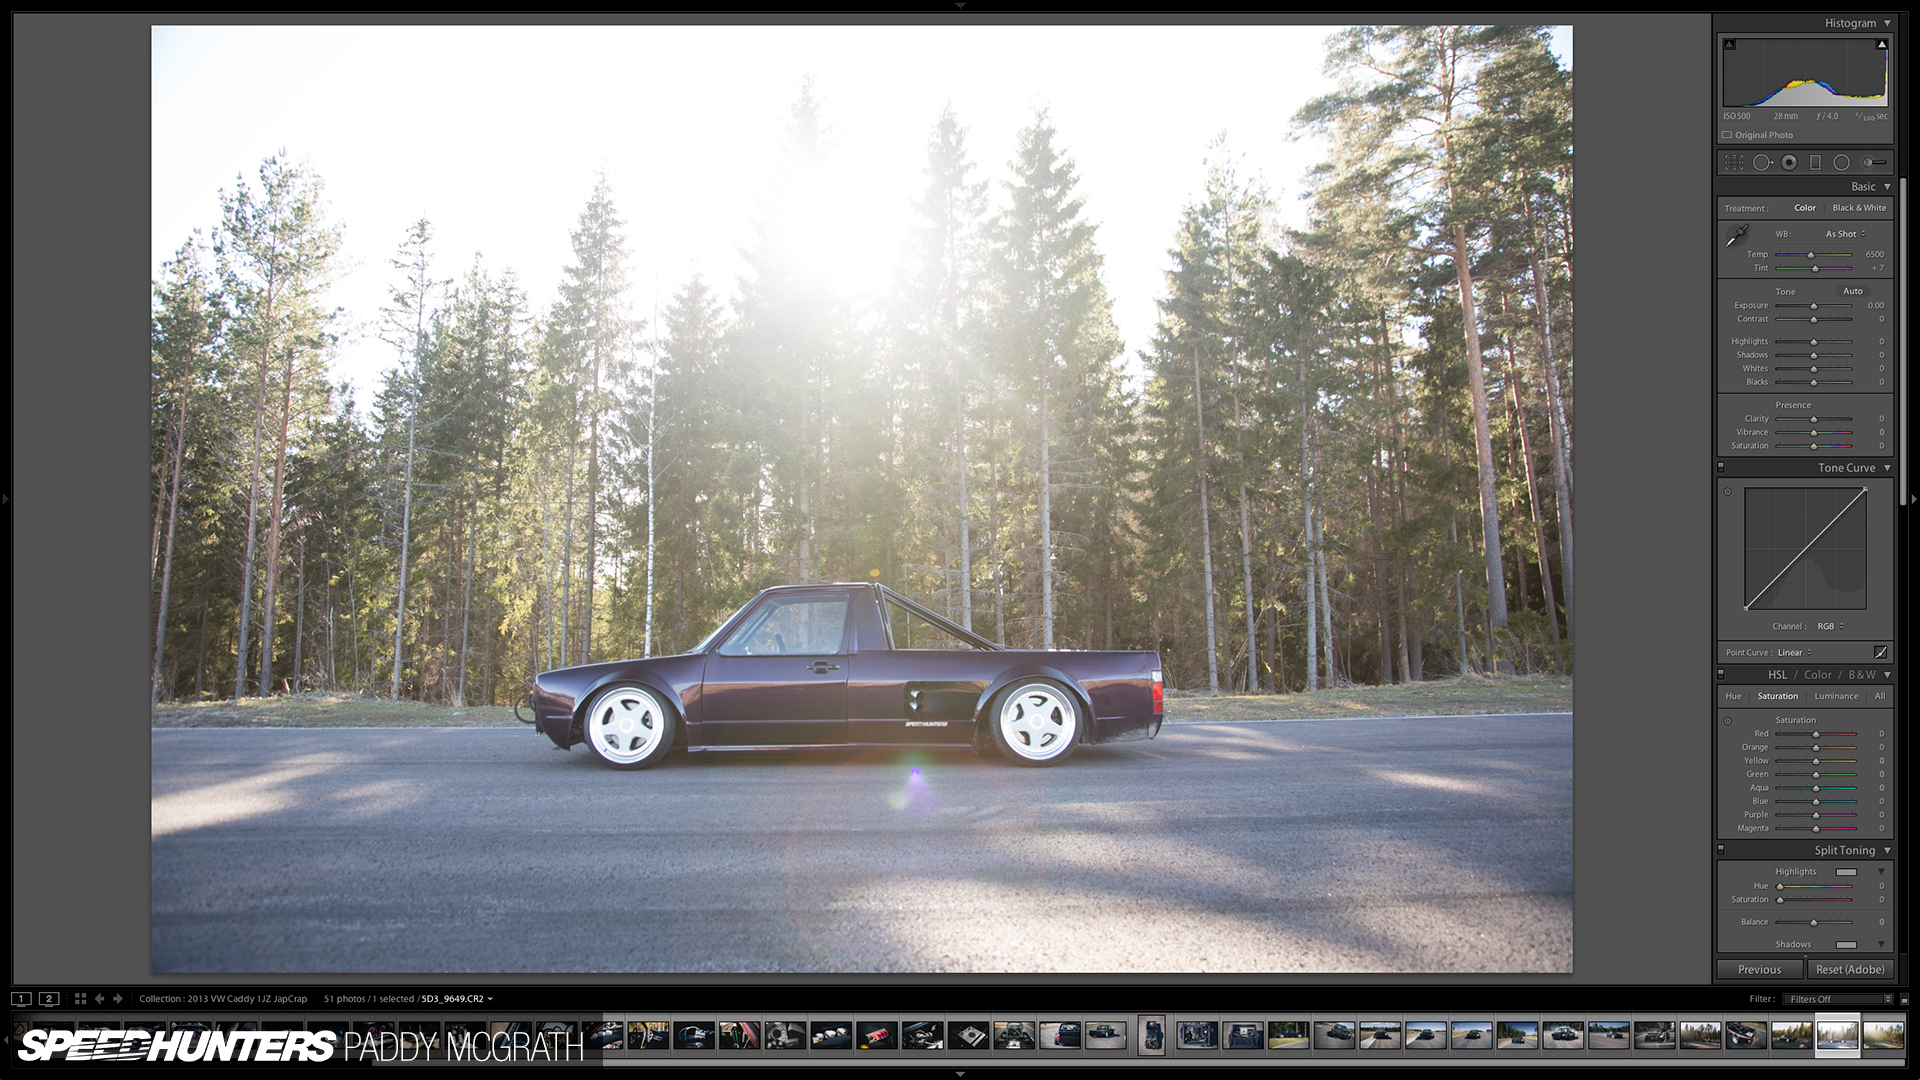
Once in the ‘Develop’ module of Lightroom, your toolset completely changes. On the left hand side is your ‘Presets’ bar which I hide to give me more room for the image. It’s quite common for those new to Lightroom to go preset crazy but I promise, you’re much better off working on images on a case-by-case basis. Although, that said, I do have general presets which I can quickly access or modify like gradients, vignetting, lens correction, sharpening and noise removal.
Up until even quite recently, I had the really bad habit of just whacking sliders full left or right. The results, whilst often dramatic, look cheap and amateur. Instead, and after some discussion with Mr. Klingelhoefer, what you need to be doing is making lots of small changes with consideration to how each change affects other aspects of the image. It might not feel as instantly gratifying as reckless slider control, but in the long run, it will definitely work out much better. Don’t be afraid to come back and edit old shoots too with any new skills you’ve learned. The beauty of Lightroom is that the original image is always there.
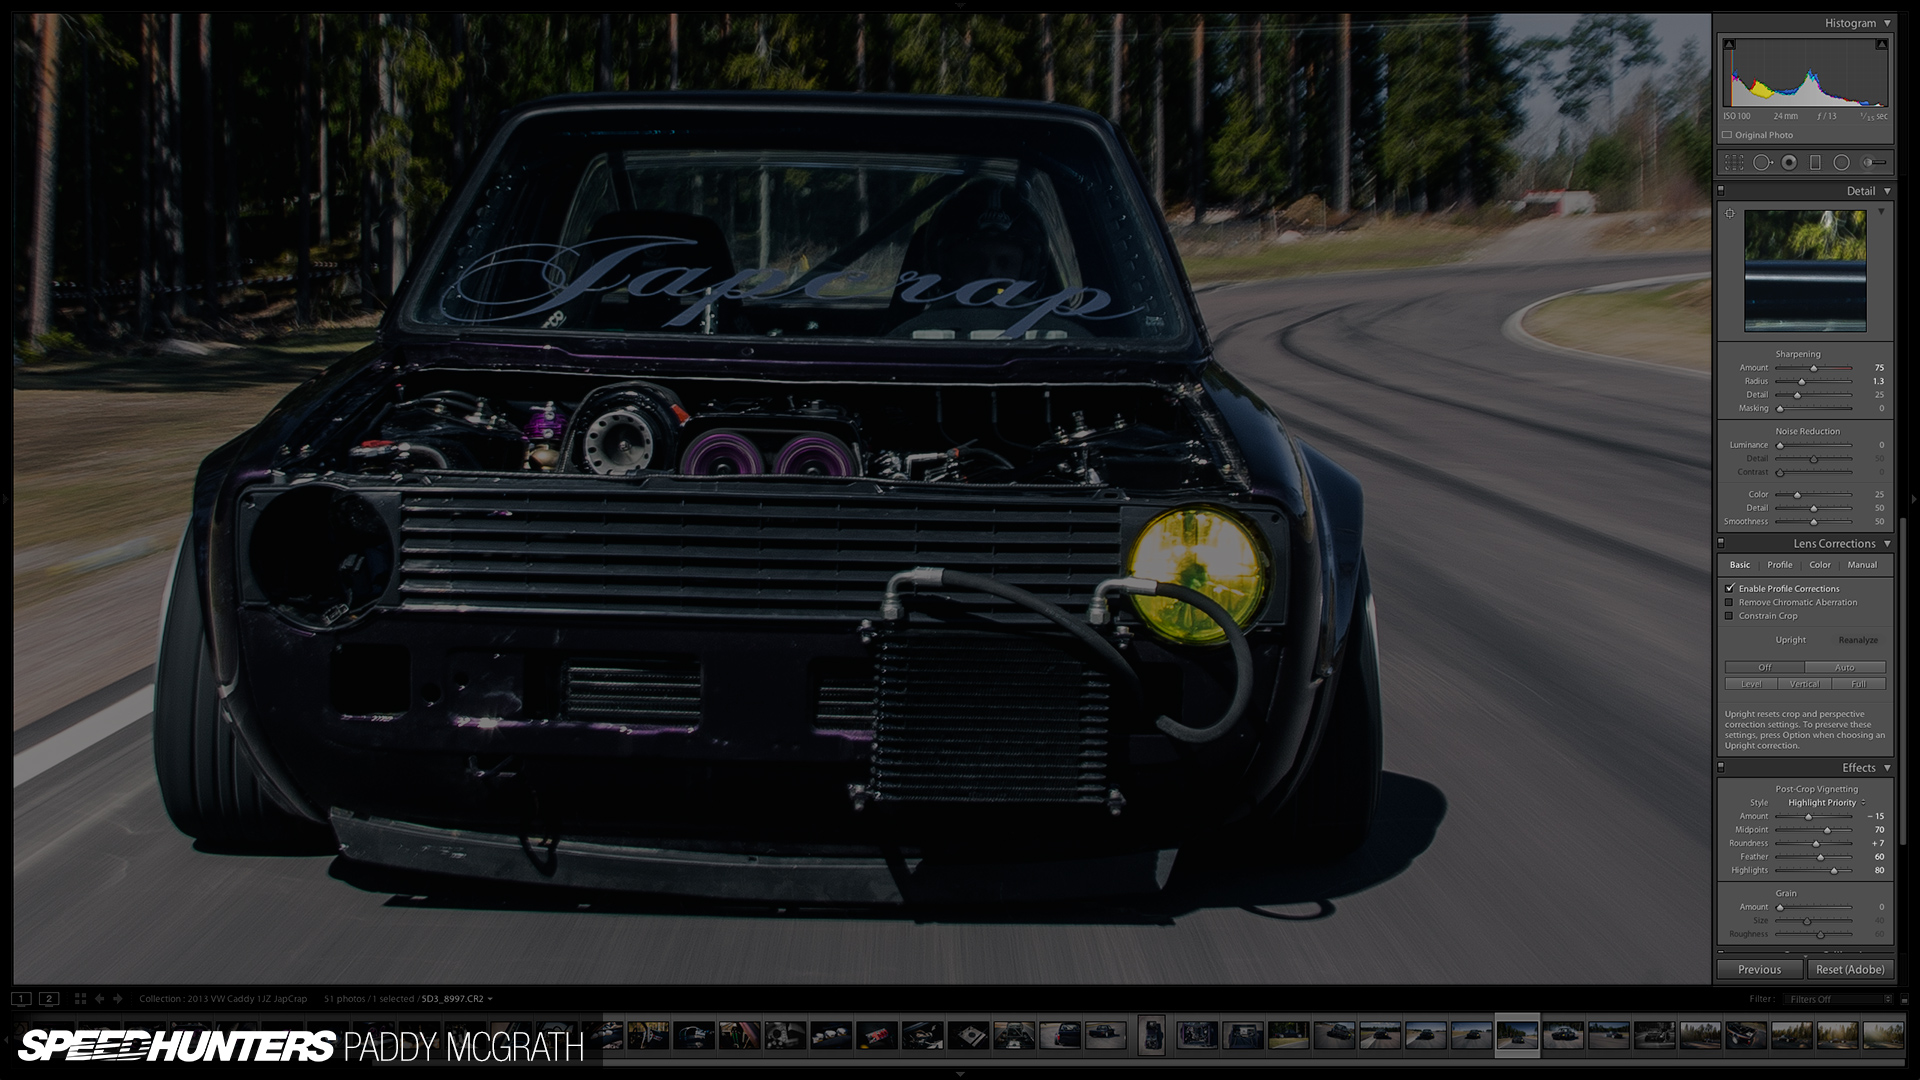
The develop tools are deceptively powerful. You need to pay close attention to the effect each one is having. As I said, make your changes in small increments and swap back to the original often to see how far you’ve taken your image (the keyboard shortcut from within the Develop module is ‘\’ for a before/after toggle comparison). You should also swap out to a thumbnail view to examine the set for consistency. You should always aim for a similar look across a complete set rather than wildly varying edits.
Once you’re happy, you can export your photographs with Lightroom’s simple and powerful exporting tool. You can specify image size, resolution, custom file and folder names along with colour modes and any extra sharpening before you upload your work online or send it to print.
One key note to make here, is to always ensure you have backups of your work. If you lose them due to a hard drive failure, there ain’t no getting them back. Once I’ve imported everything onto my iMac, Time Machine creates a copy of it. When I move it off the iMac and onto my external Drobo (which has built in disk redundancy) another program makes a scheduled back up off all my photography work onto another external hard drive. At the end of each year, I disconnect this last external drive, label it and store it with other external drives from previous years. It sounds complicated, but it’s actually pretty straightforward and means that I have backups of backups from a unit that should a hard drive fail, I can replace with no incurred data loss.
I think I’ve covered everything, but if there’s anything else you would like me to elaborate on, let me know in the comments below. Similarly, if you want to talk about your own workflow, have at it. This is only the start of the conversation.
Paddy McGrath
Twitter: @PaddyMcGrathSH
Instagram: speedhunters_paddy
paddy@speedhunters.com
The Speedhunters Photography Guide
Photography Related stories on Speedhunters