
Last month I introduced you to my Z432-inspired Z31 restomod project, and now that’s out the way it’s time to get a bit more technical and dive head-first into the details of the build. Let’s begin with the chassis…
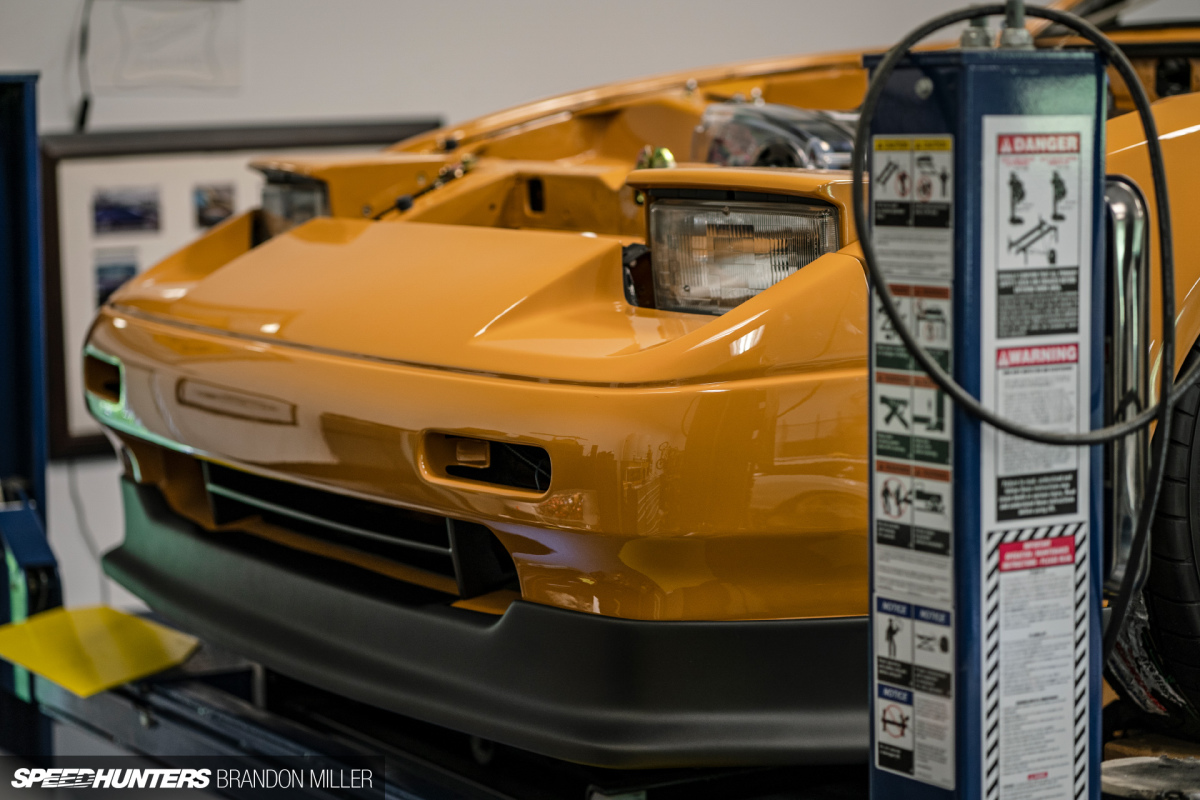
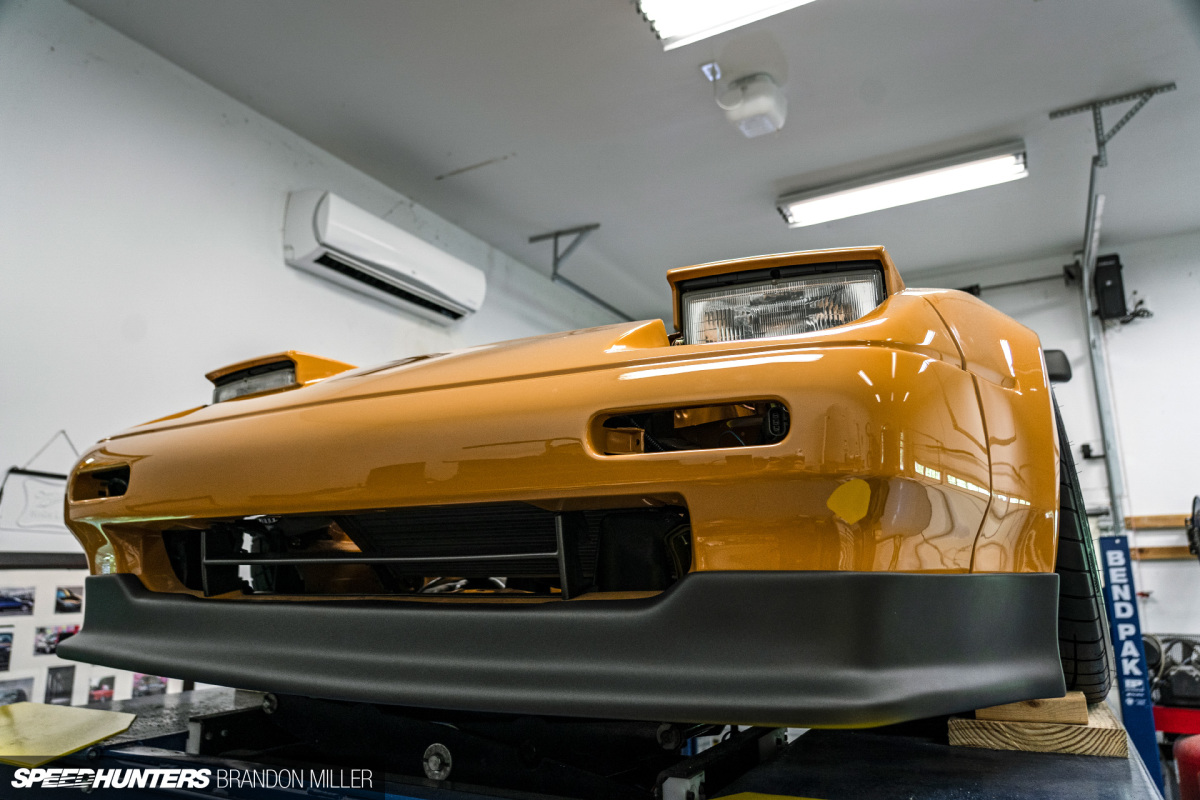
I chose a 1986 model year Z31 as the base for my project because it shares the more organic fenders of the ’87-’89 car while retaining the taillights from the ’84-’85. This, in my opinion is the best of both worlds. The ’86 also allows you to fit the bumper, hood and headlights from the ’87-’89 car with minimal work.


Even with the perfect combo of exterior parts from the full year range of the Z31, there were still some issues that needed to be addressed. Mainly, the incredibly long rear bumper, and the odd trim strips which wrapped around the front fenders to where the hood meets the bumper. It’s puzzling because these just stick out and ruins the lines of the Z31. There really seems to be no real reason for it either.

As mentioned previously, Concept Color in Richmond, Virginia took on the task of bodywork and paint. Paul ‘Seamus’ Rogers proceeded to bond the trim strips to the body, and then sand them smooth so they disappeared. This is clearly how Nissan should have done it from the factory.
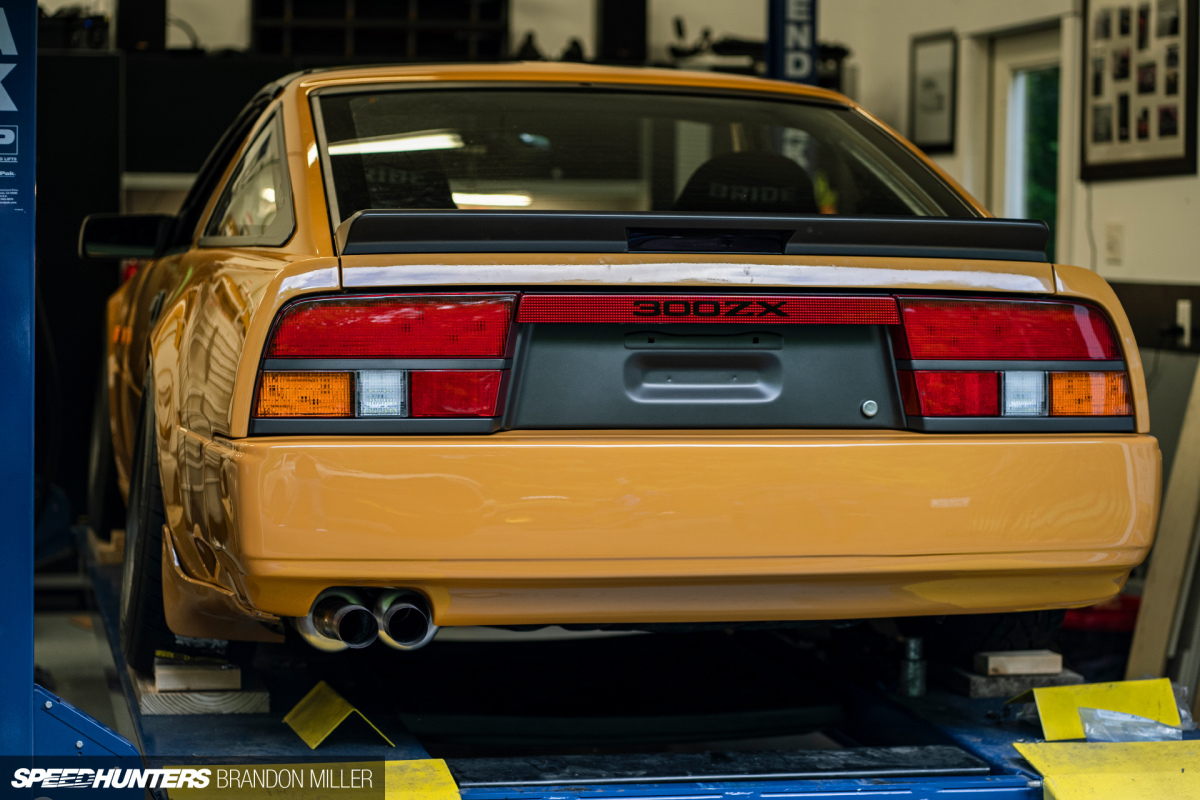
Seamus also cut the rear ’86 bumper into seven pieces, then shortened and shaved it. I asked him to model the length to be more like the R34 rear bumper as I think the side profile has the perfect proportions.
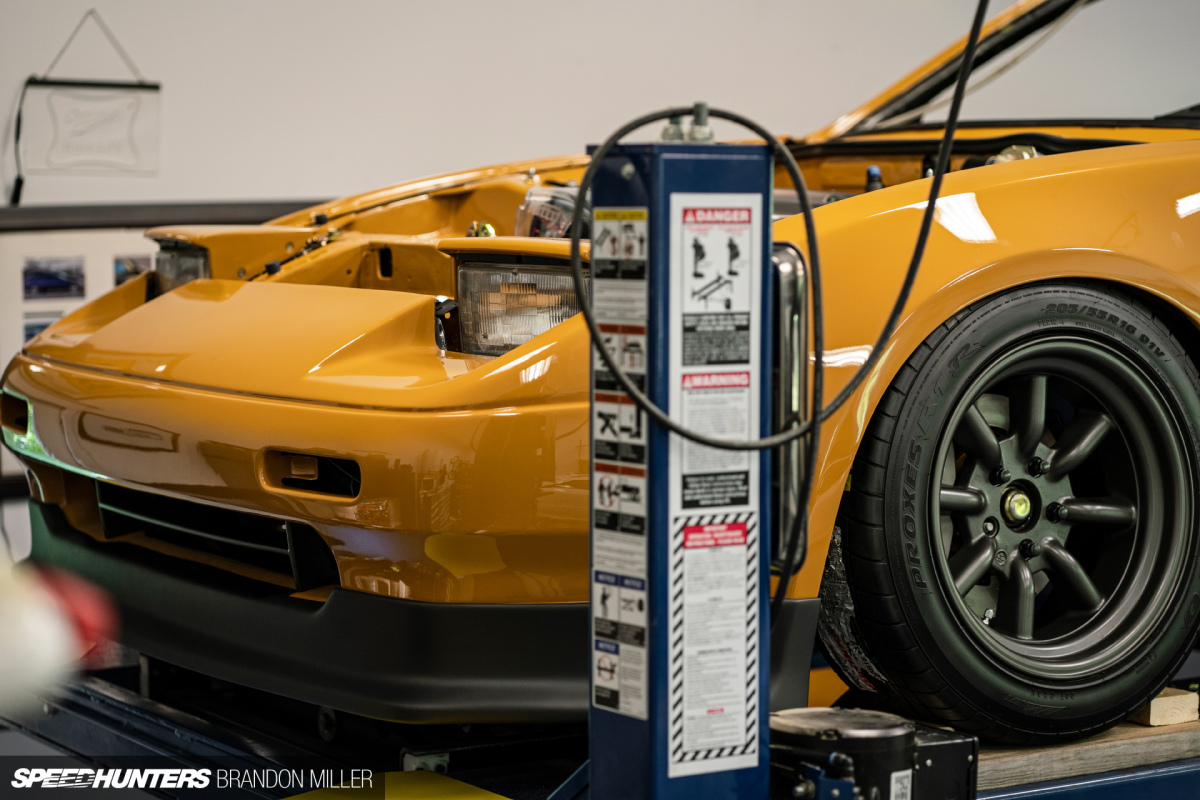
In addition to all of this work, Seamus shaved the antenna, side trim, as well as the side markers. I opted for the JDM markers as safety was a concern for making lane changes. The rest of the body components remain stock with the exception of the JDM-style TBO front lip. The side and rear skirts were taken from a gray ’87-’89 car and repainted.
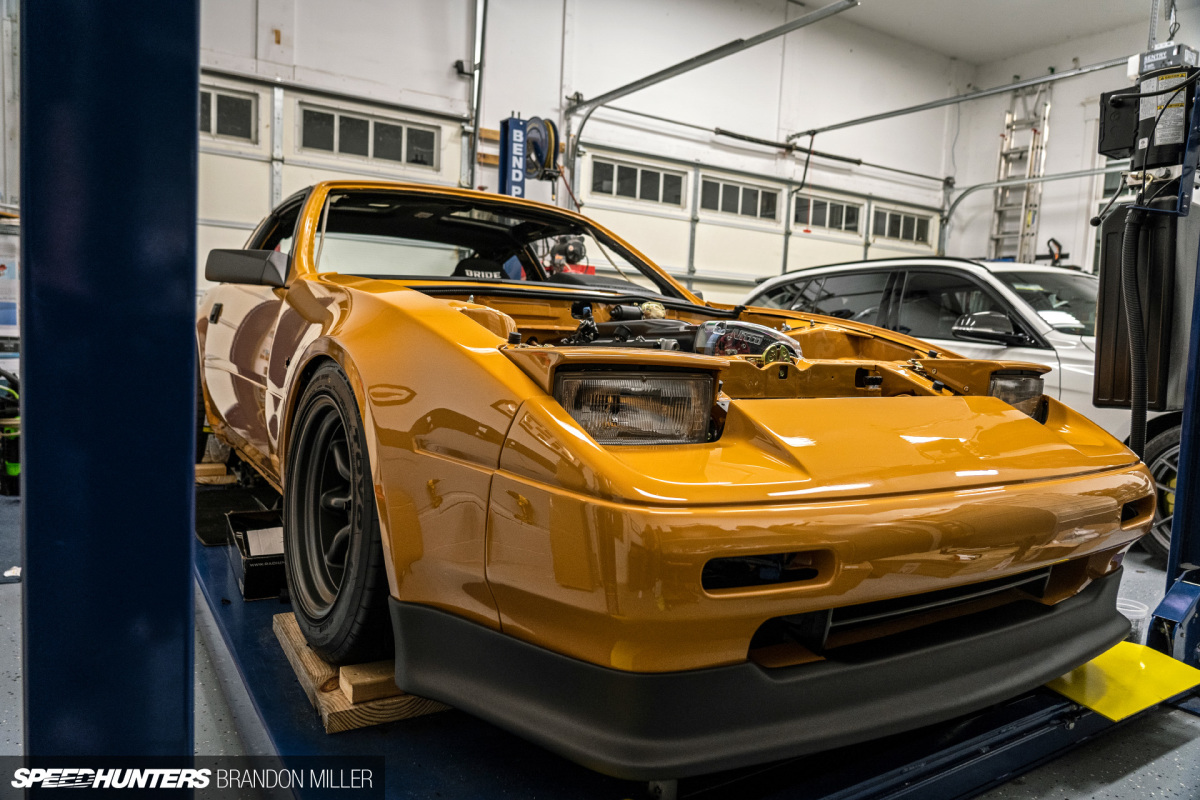
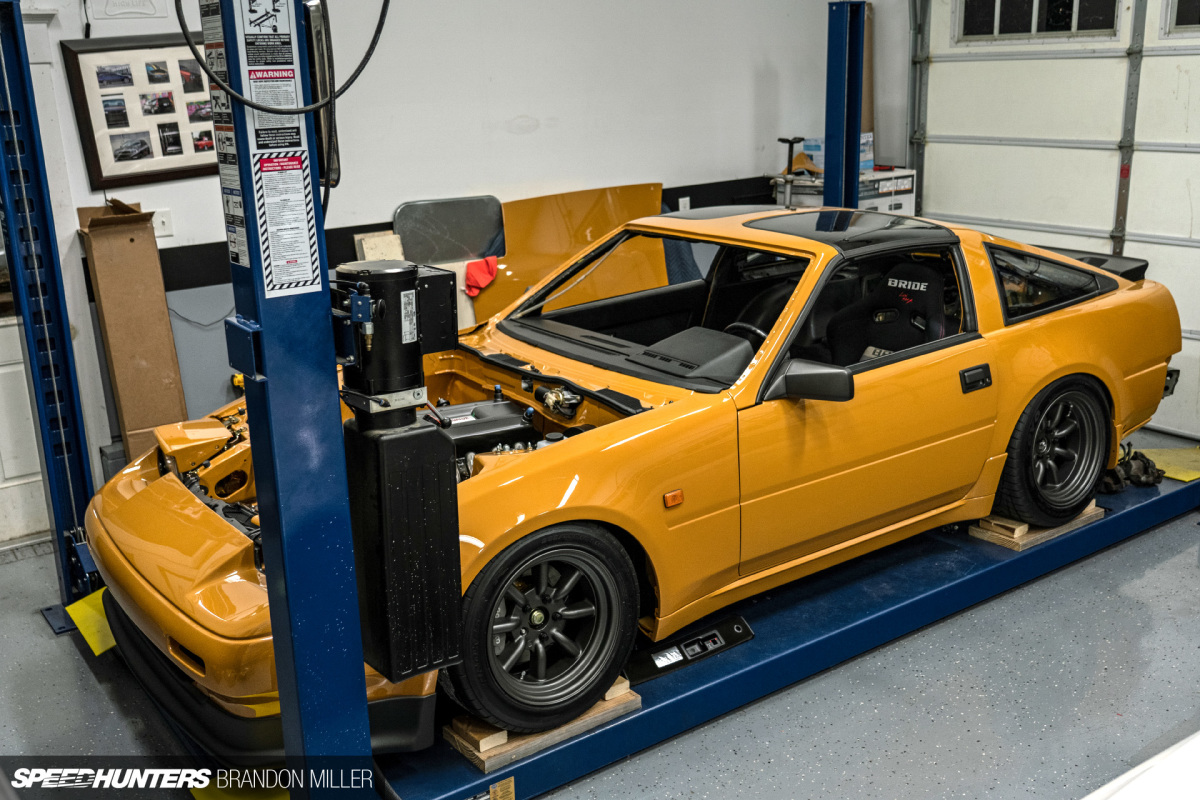
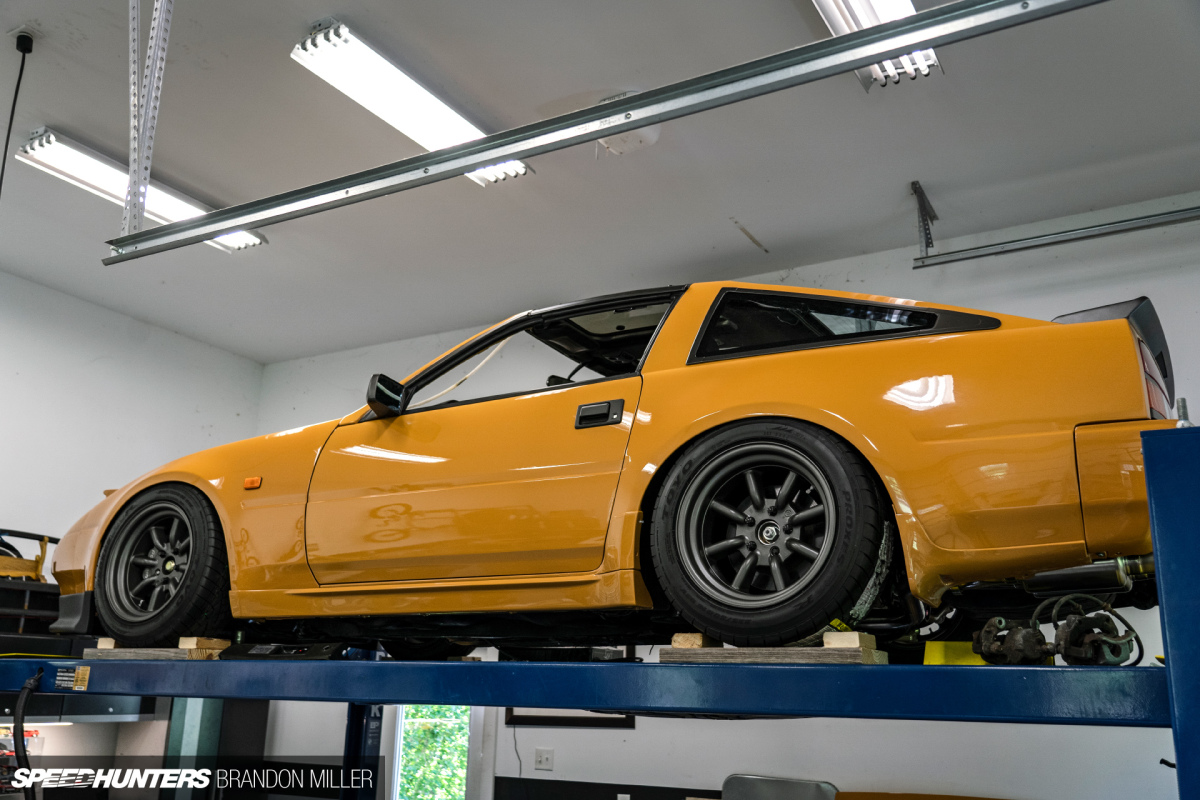
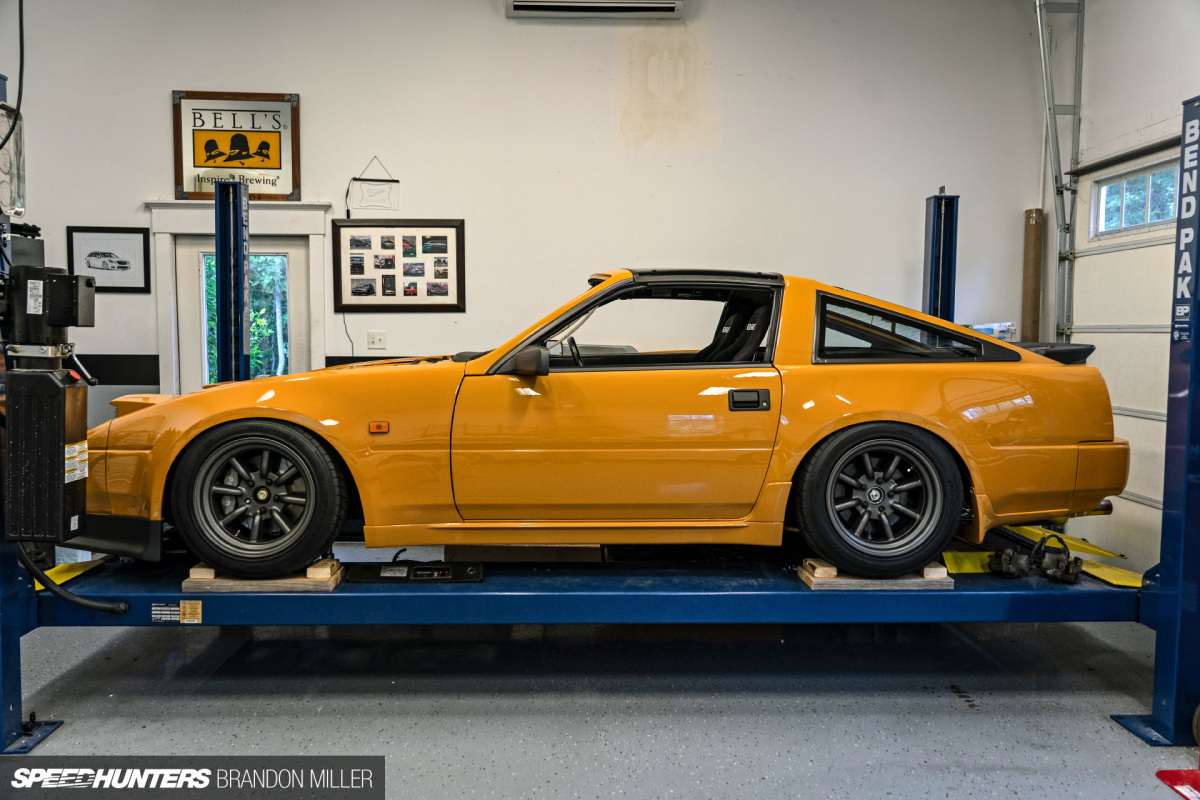
Speaking of color, the car is finished in my personal favorite Nissan color: 920 Safari Gold. It is extremely difficult to accurately capture this color with a lens, but it’s a very warm and rich solid dark mustard. Although it wasn’t the most popular color in the ’70s, it was still used on the GT-R Hakosuka and 240Z/432. Many other Nissan/Datsun models went on to wear this shade as well.
My personal connection to this color comes from a 240Z I found as a teenager; a car that my dad was finally able to purchase after 10 years of trying. Over the following three years we restored the Z to a concours level, and it went on to win 2nd at Z Nationals several years ago.
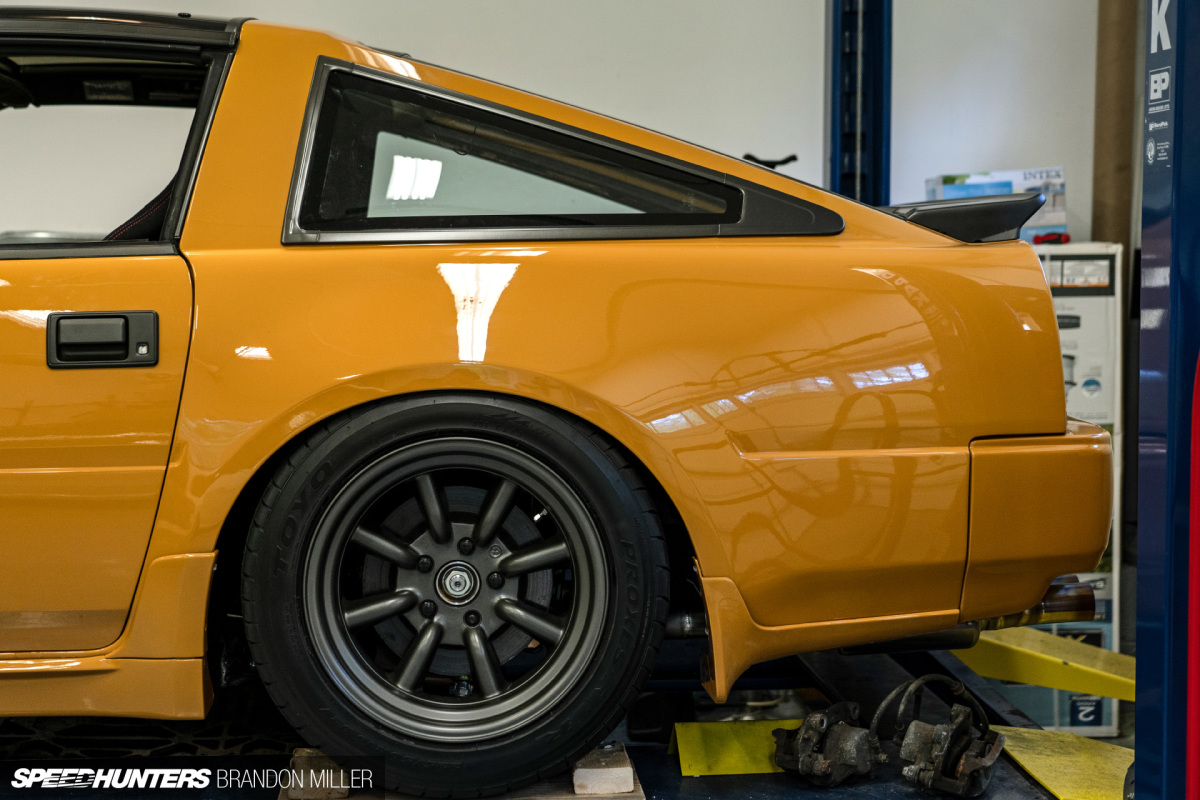
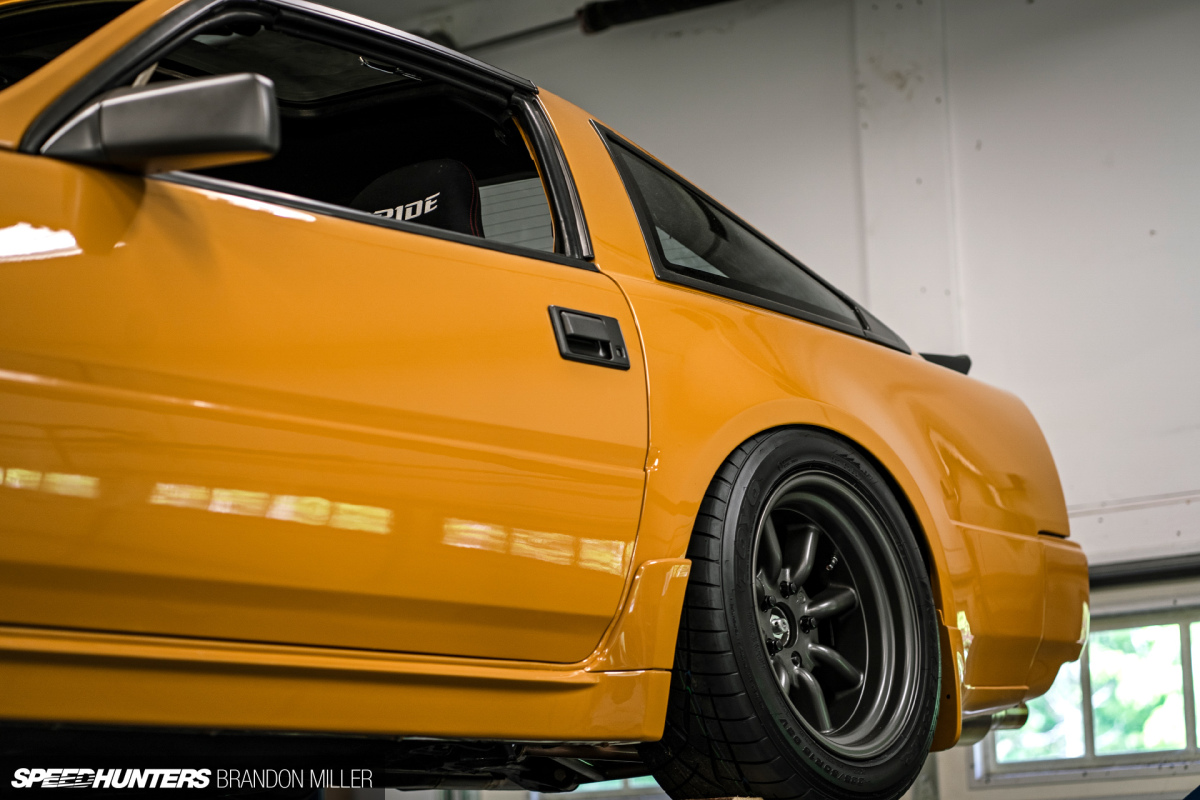
I fell in love with the color when I first saw it, so it had always been the front-runner for this Z31 project. The color also pairs well with gunmetal gray, which was the other color chosen for the build. The ’87-’89 turbo cars came with trim painted in an excellent shade known as Dark Pewter, and from my daily US/Japan parts searches, I was lucky enough to pick up a NOS T-top and NOS exterior door handles in this finish. With these in hand, Concept Color was able to match the hue and finish using matte clear with only 5% gloss. This color has been chosen for the trim, mirrors, valve covers as well as the front and rear spoilers, and the RS Watanabe Eight Spoke R-Type wheels are a near-perfect match.
The body was stripped down to bare metal and great care was taken gapping the panels after the subtle custom bodywork.
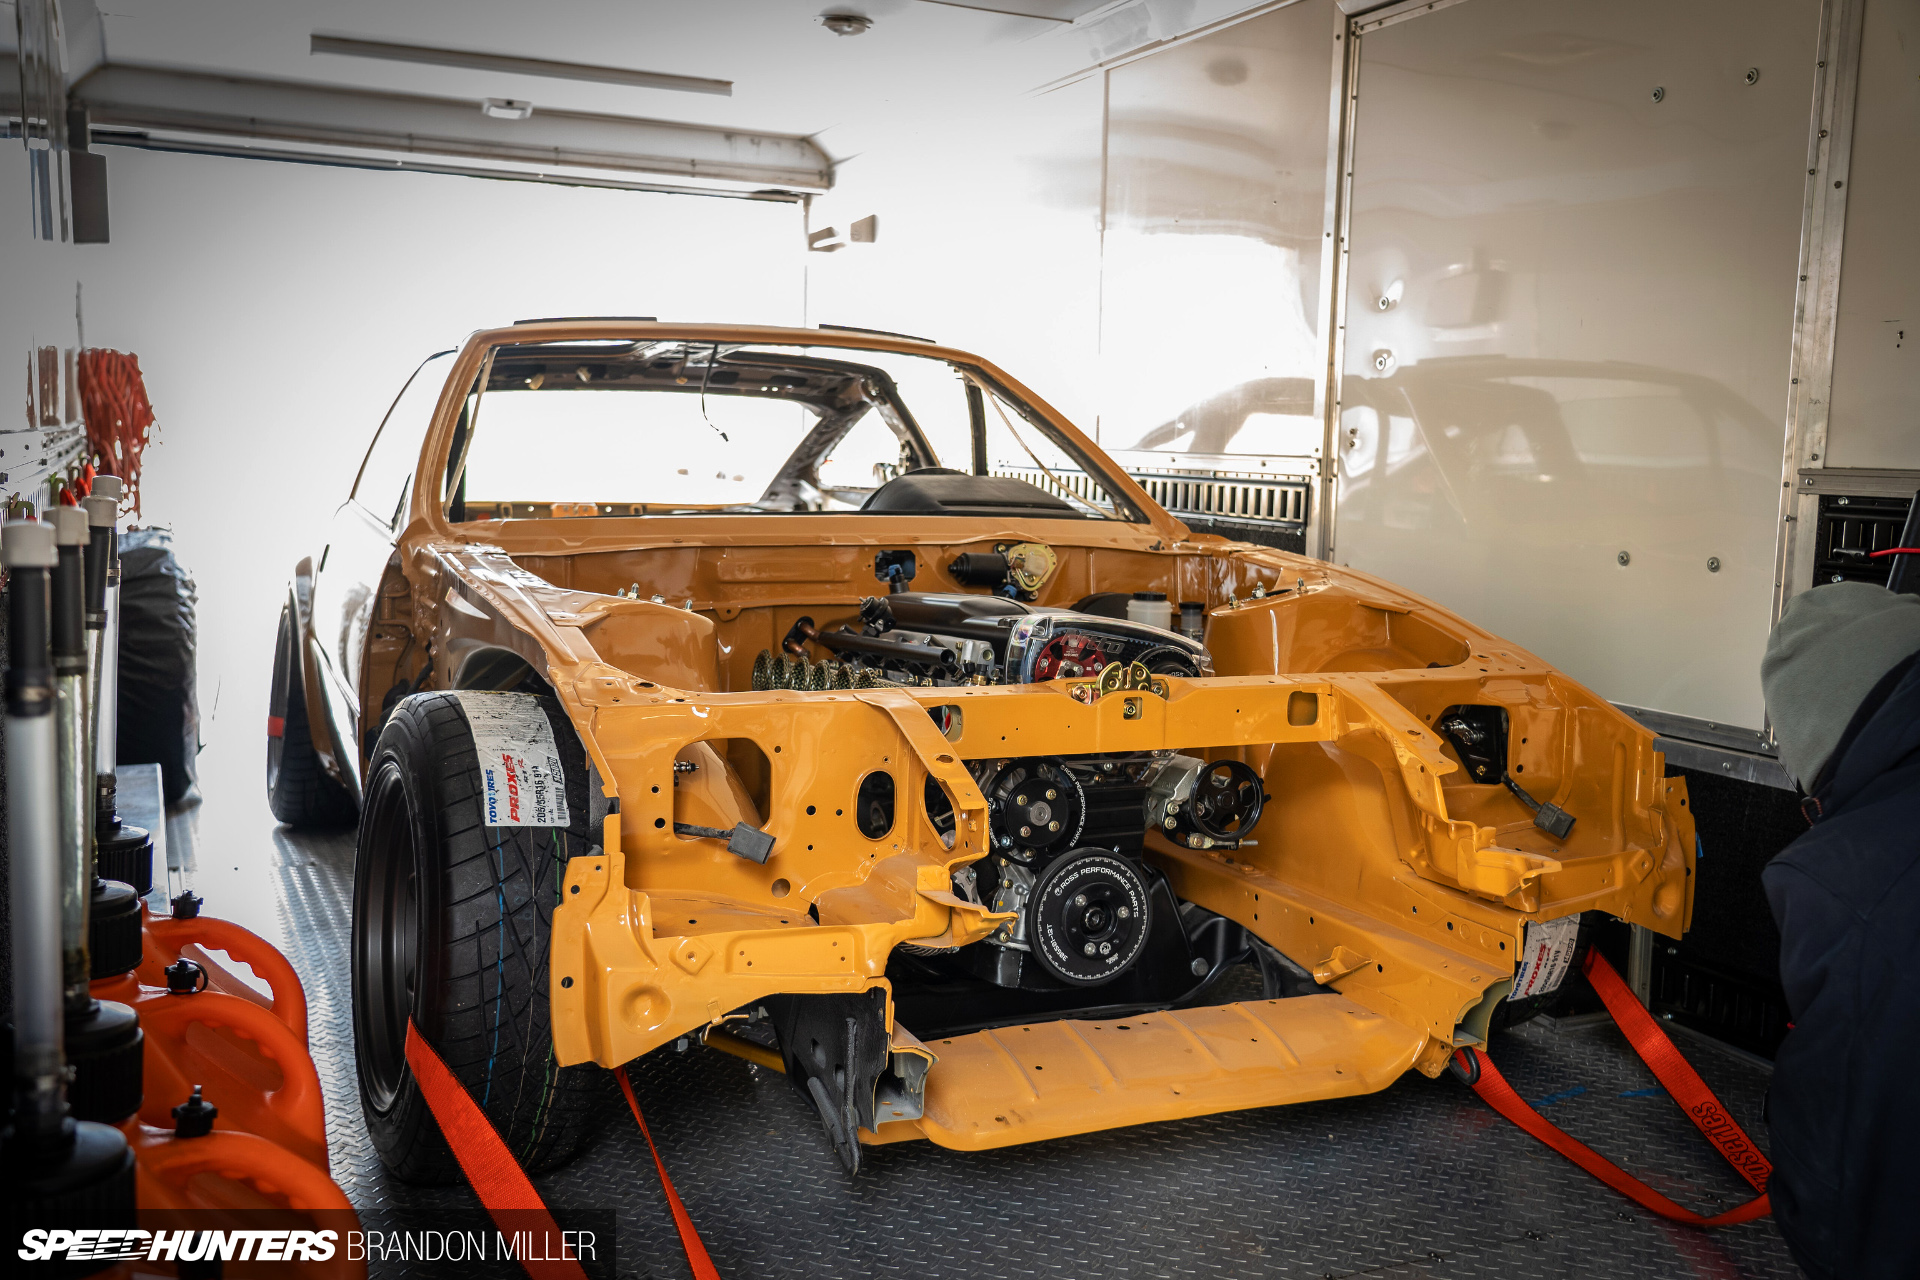
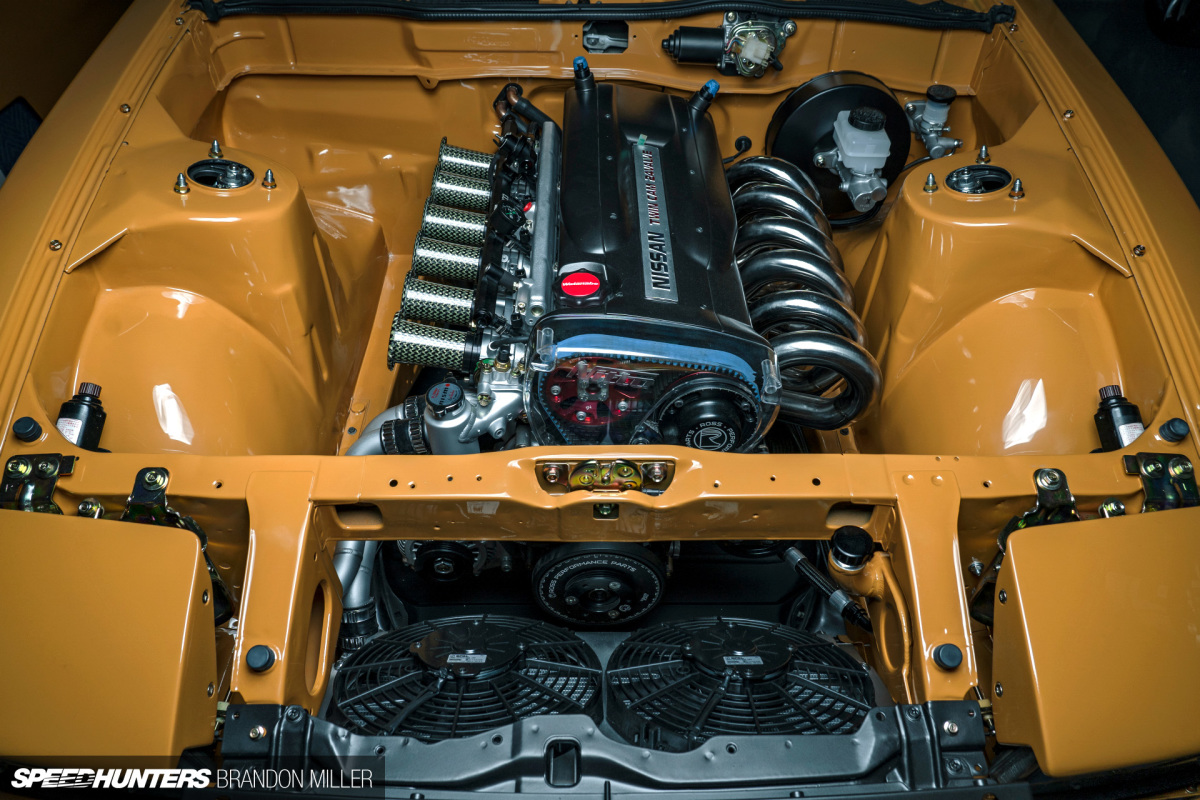
The engine bay was the next area of focus. Having been inspired by a red Z32 with a minimalistic shaved engine bay I saw online, I knew I had to achieve something similar. Countless hours were spent welding up holes and fixing irregular-shaped indentions in the engine bay, and all seams were stitch-welded with silicone bronze. Once all the metalwork was done, a skim coat of filler was applied before being sanded smooth.
After epoxy and fill primer, four coats of 920 followed by three coats of clear was applied. Even though the finish is near perfect as is, the paintwork will be extensively wet-sanded and polished before being wrapped in XPEL clear film.
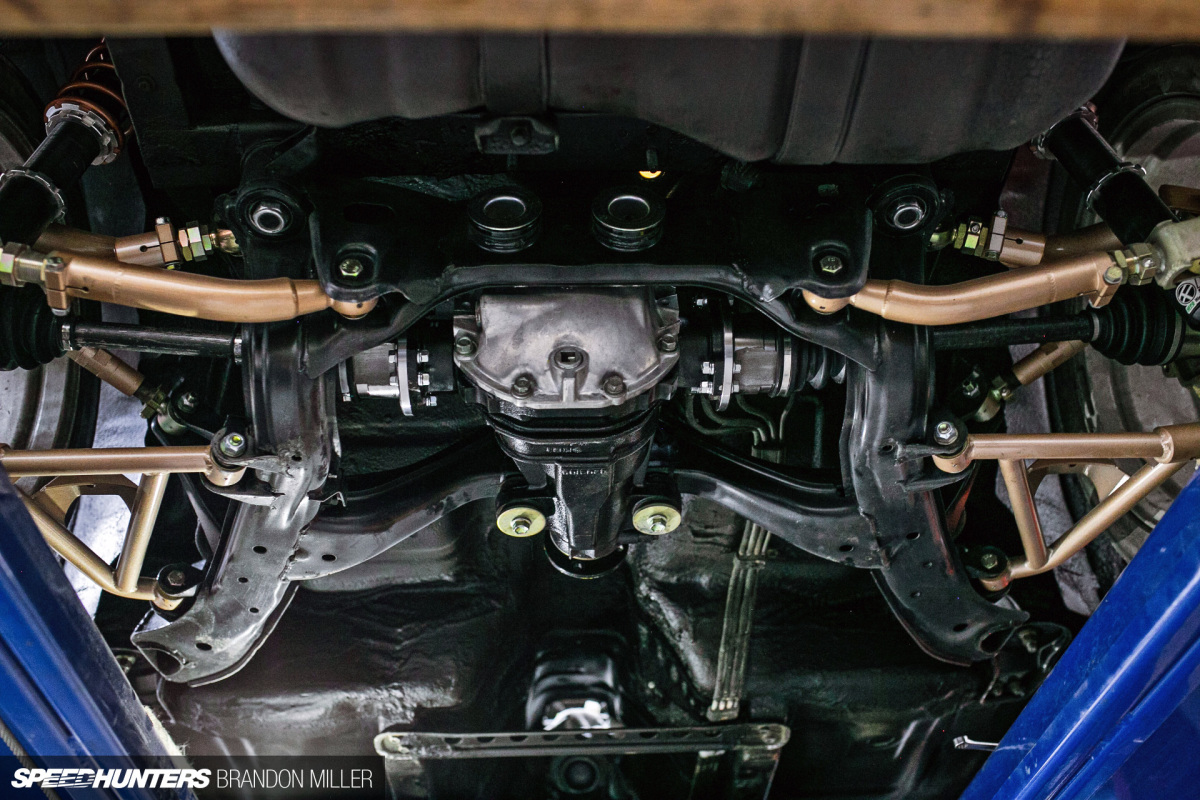
Underneath the bodywork, the Z sits upon a heavily modified drivetrain and suspension. In factory form, the Z31’s antiquated trailing arm design – which has limited aftermarket support – leaves a lot to be desired, so it was ditched in favor of an S14 subframe. Luckily for me, at the time I was looking for solutions there was still a kit available to swap an S-chassis subframe into the Z31.
One of my oldest and best friends, Mike Poore, who does much of my fabrication work took on the subframe installation. Mounting posts were welded in for the rear, and the front ears of the Z31 subframe were welded onto the S14 frame. With this subframe installed, the availability for aftermarket parts increased dramatically.
All rear arms and drop knuckles were sourced from Parts Shop Max. The arms are all fully adjustable with heim (rose) joints, the knuckles allow for a 1.5-inch drop right off the bat, and the S-chassis subframe allows for a broader range of differentials to be used. Coilovers were sourced from Feal suspension who created a set of one-off rears for me with Z31 upper mounts, S13 lower mounts and custom heim joints on the bottom to accommodate for the mounting angle change and the close proximity to an adjustment bolt.
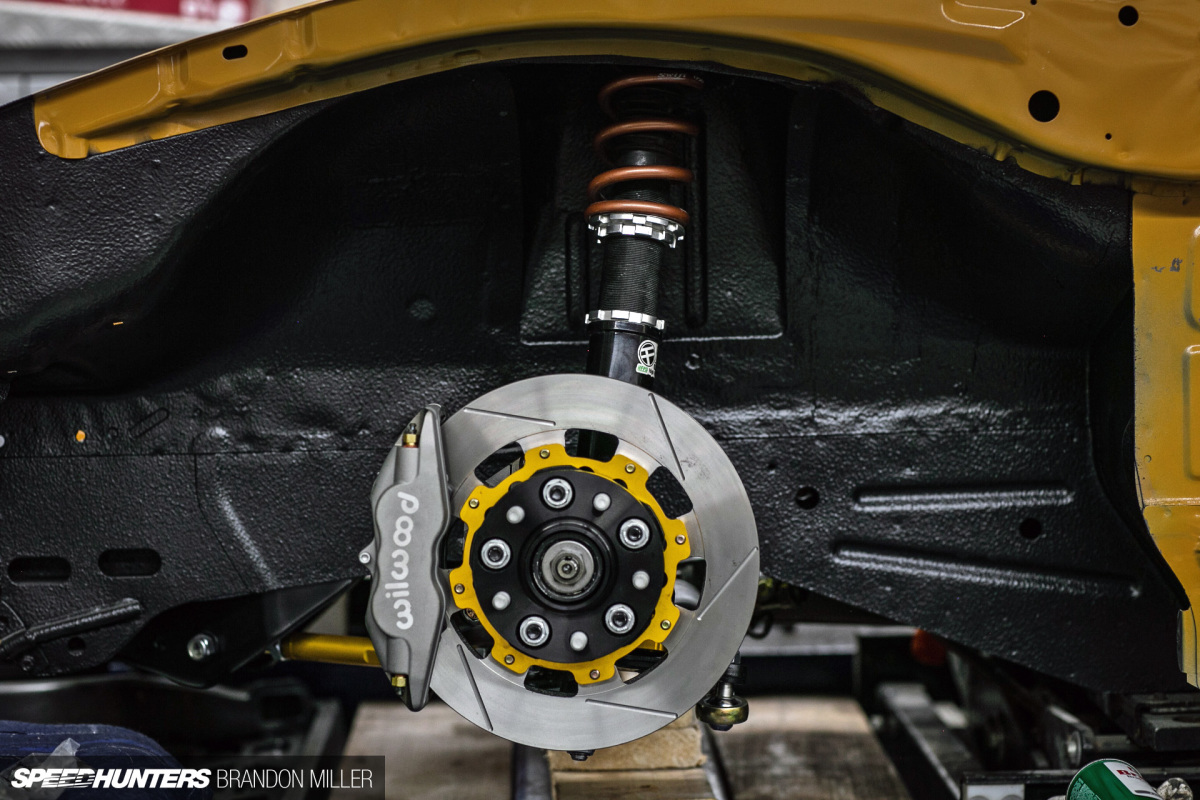
Up front, the car features Techno Toy Tuning control arms, tension/tie rods and a Brembo big brake kit in addition to the Feal coilovers with Swift springs. Cusco sway bars and strut bars will be ordered soon.
The RB engine fits into the car using a JDM 200ZR crossmember, engine and trans mounts. Enjuku Racing provided the rear sump oil pan.
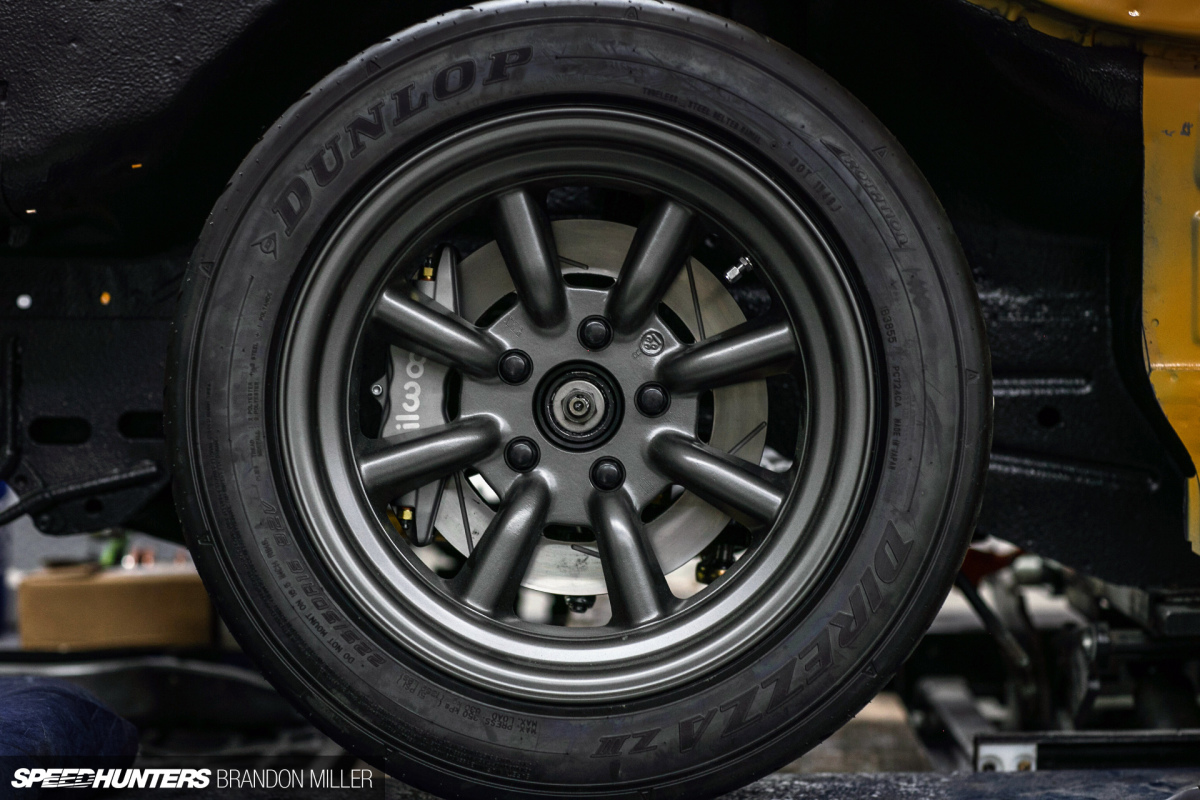
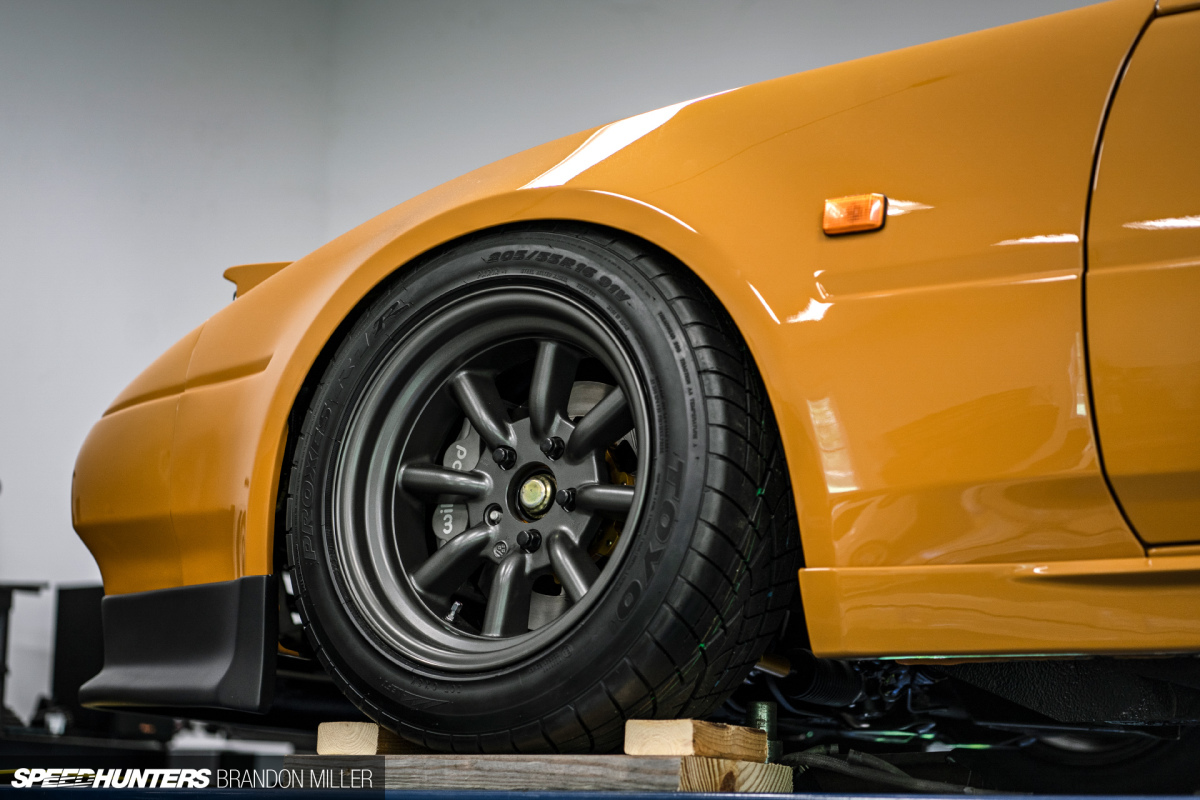
My wheel of choice for older Japanese cars has always been the Watanabe R-Types. I sourced these (and a previous set) from The Lonely Driver in Canada, who is now a good friend and also has the best prices. 16×8-inch fronts and 16×8.5-inch rears were chosen to get the most width with no poke.
Fitting the Brembo calipers proved to be a challenge too, but in the end there was still about 2mm of clearance from the caliper face to the back of the spokes. There was even enough room for a slip-on 2mm spacer from Parts Shop Max. Toyo Tires was kind enough to sponsor the project and provided a set of Proxes R1Rs in 205/55R16 and 225/50R16 front and rear respectively.
I still haven’t chosen rear brakes, as fitting anything decent behind the R-Types is a major challenge. Parts Shop Max knuckles do allow for a wide range of caliper options, though, and finding the solution is next on the to-do list – even if that means fitting stock 240SX rear calipers.
The LSD differential was taken from an Infiniti J30, and the 3.9 final ratio should do well with the drivetrain. I will likely upgrade the diff at a later time and might go with a 350Z variant.
Now, let’s get into what most consider the best part of this project – the engine.
As mentioned in my intro post, the original plan was for a built L-series engine, but the high cost of what I wanted to achieve led me to consider an RB20/25 or 26. When I went to go see my friends at Japan Parts Service and saw a naturally aspirated RB25 with long-tube headers, I immediately knew what had to be done. A high-revving naturally aspirated RB with ITBs and header would be the perfect engine choice to create a restomod 432 from a Z31. After all, the S20 that powered the 432 featured four-valves-per-cylinder and twin cams in a crossflow head, and triple carbs.
With the engine goal in mind, I reached out to Raw Brokerage who has since been my single biggest source of parts for the RB build. They agreed to a partial sponsorship which has been a tremendous help. Ricky and Don helped me carefully craft a list of the best components for such an unusual build.

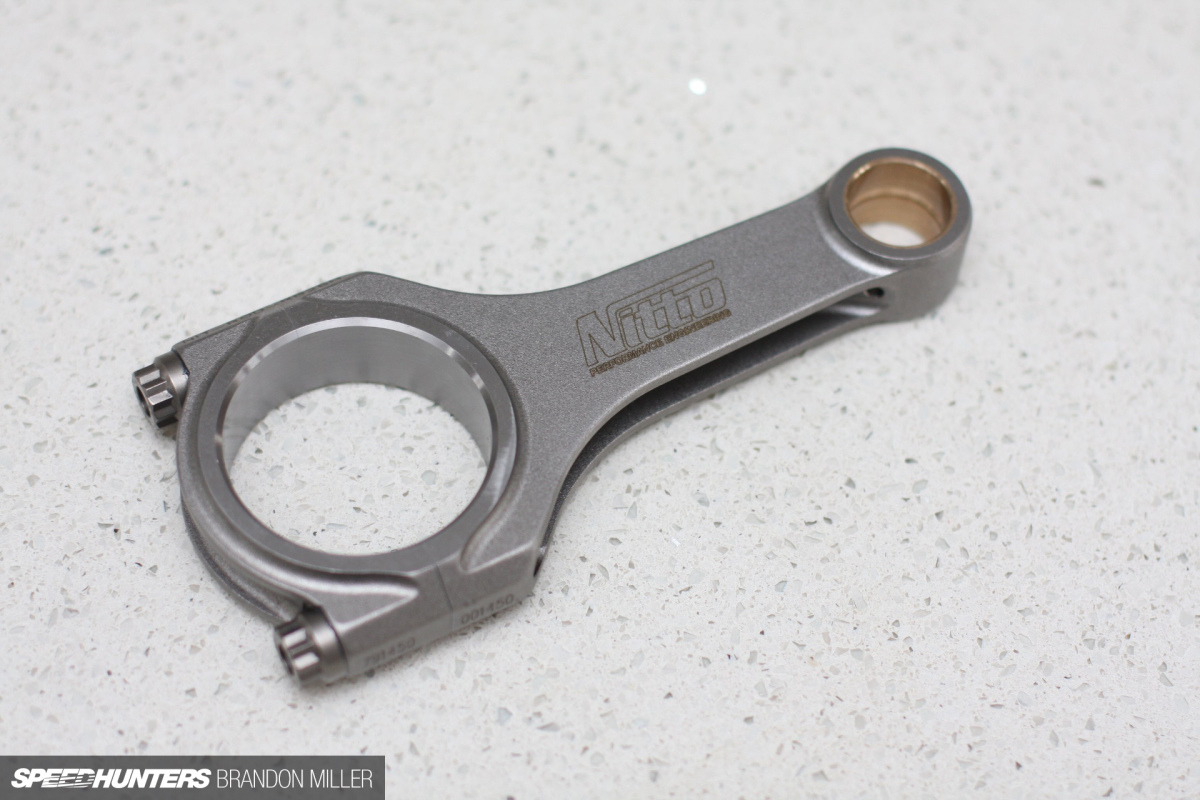
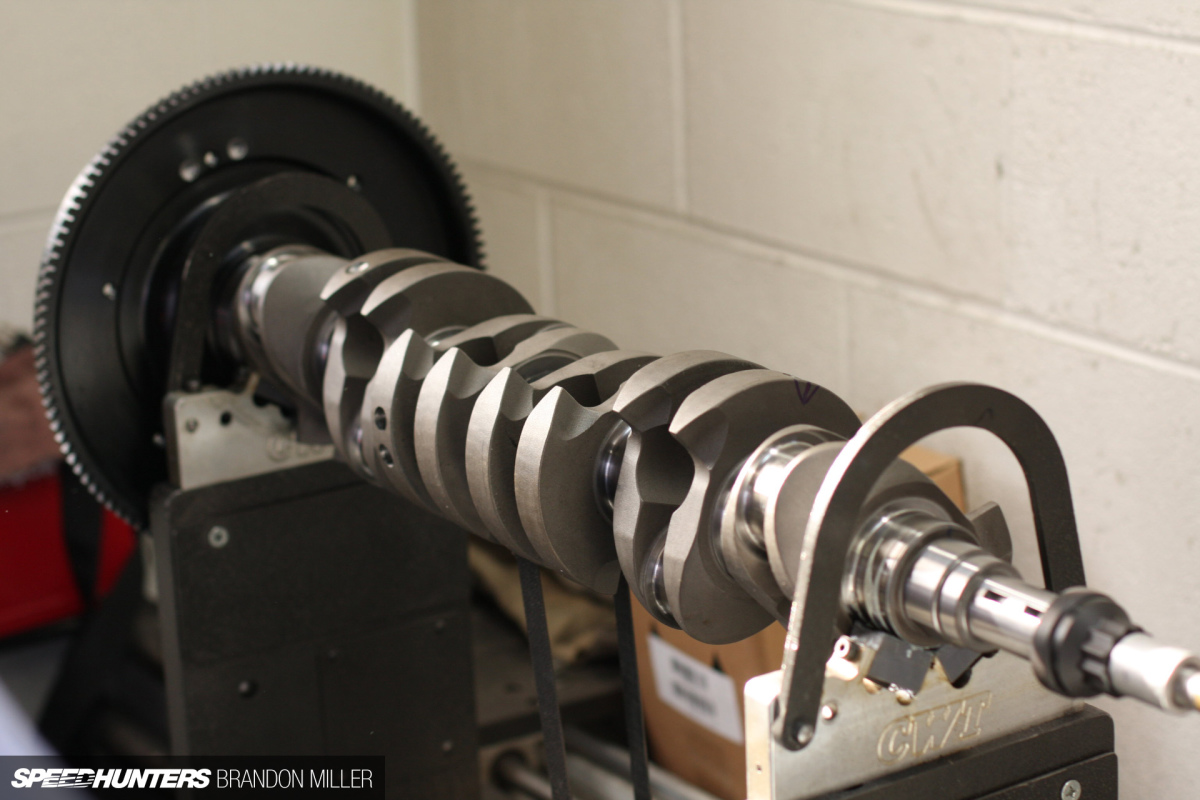

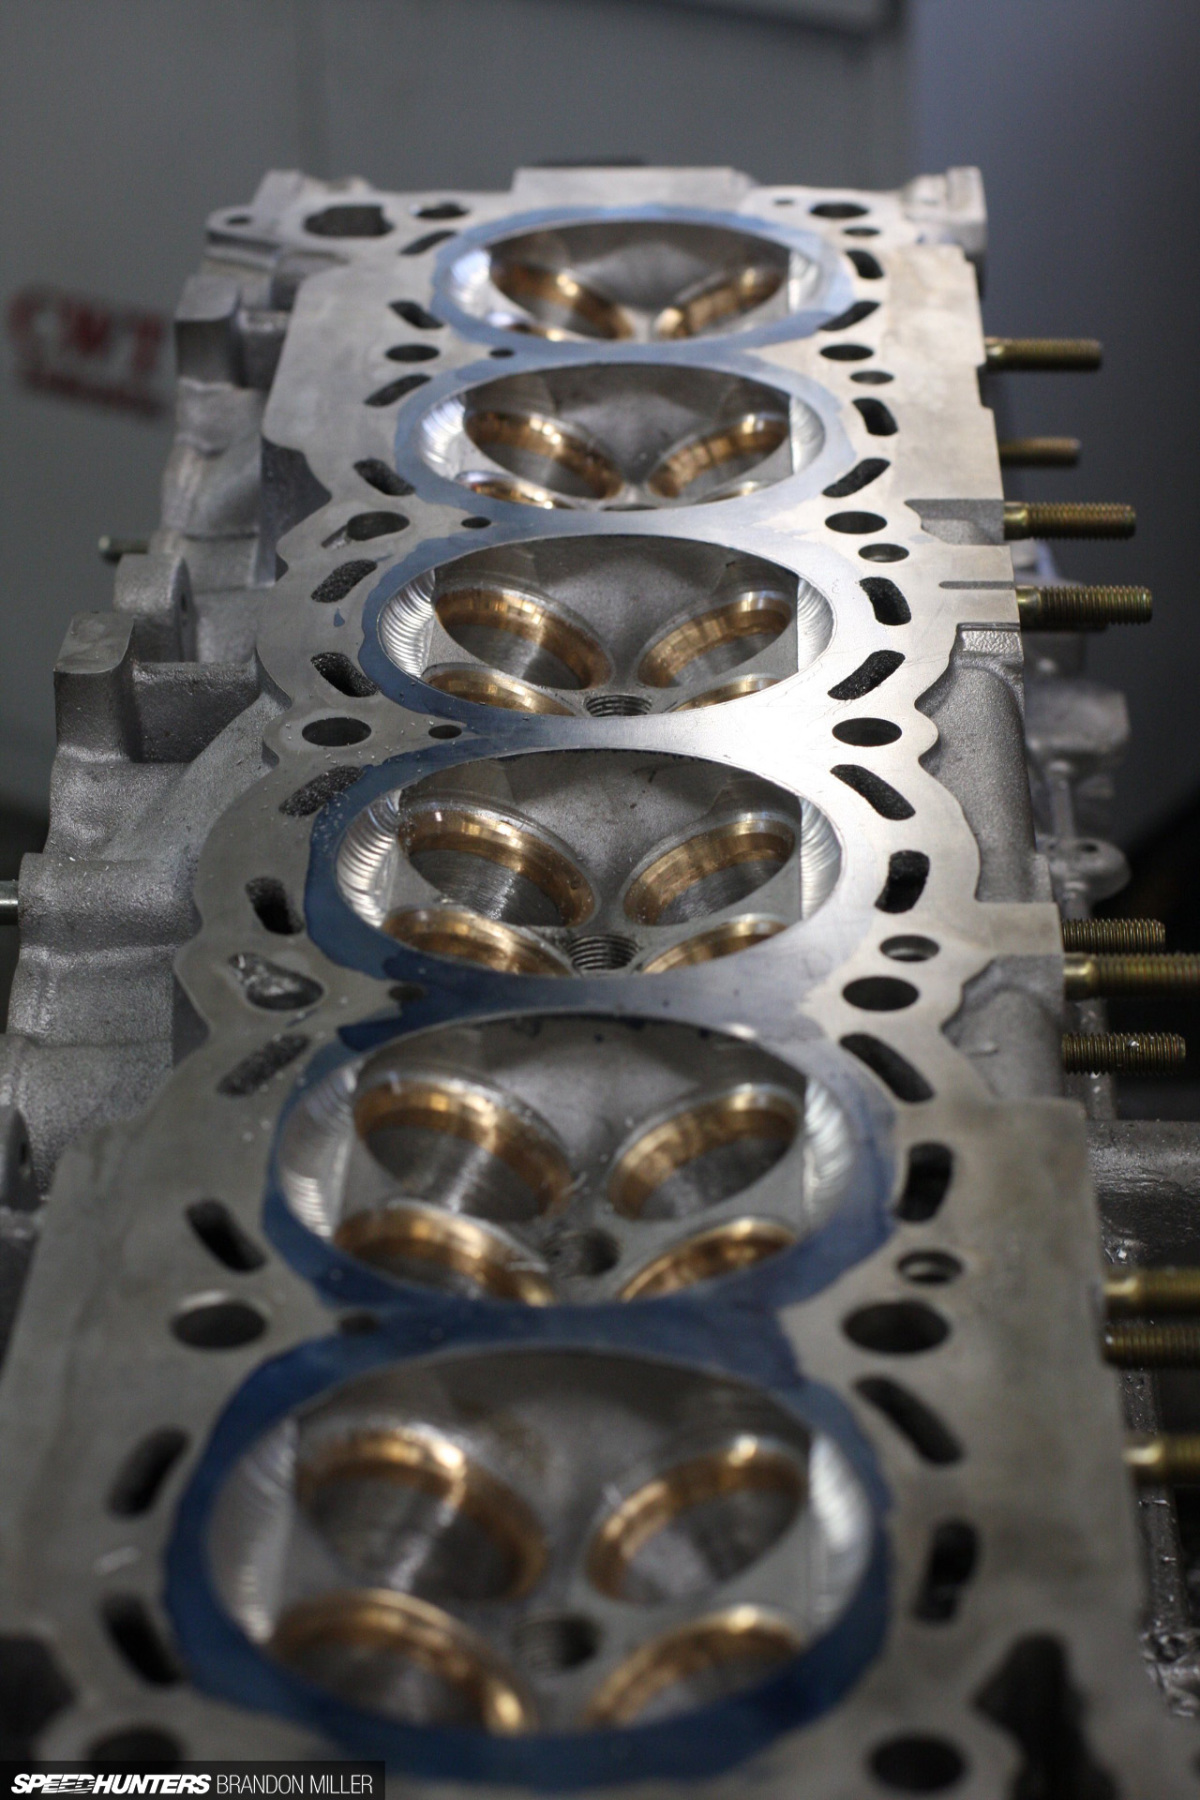
It started with the naturally aspirated RB25, but only the block ended up being used from the initial purchase. Raw Brokerage provided a brand new RB26DETT head which was void of any valve train. The balance of parts are as follows: Nitto 77.7mm forged stroked crank, Nitto H-beam rods, CP-Carillo custom-made 11.6:1 pistons with WPC-treated skirts and ceramic-coated domes, Tomei 273-degree/10.25mm-lift cams, Tomei beryllium copper seats, Tomei cam gears, Tomei head gasket, Supertech oversized valves and 245lb dual springs, R34 N1 oil pump with cryo-treated billet gear upgrades, R34 N1 water pump, ARP hardware, Ross Performance damper, Ross Perfomance crank fire ignition setup, Ross Performance water pulley, PRP LS alternator kit, Radium Engineering fuel rail, Radium Engineering fuel pressure regulator, Radium Engineering fuel pressure gauge, 650cc injectors, R35 coil kit and Haltech sensors.
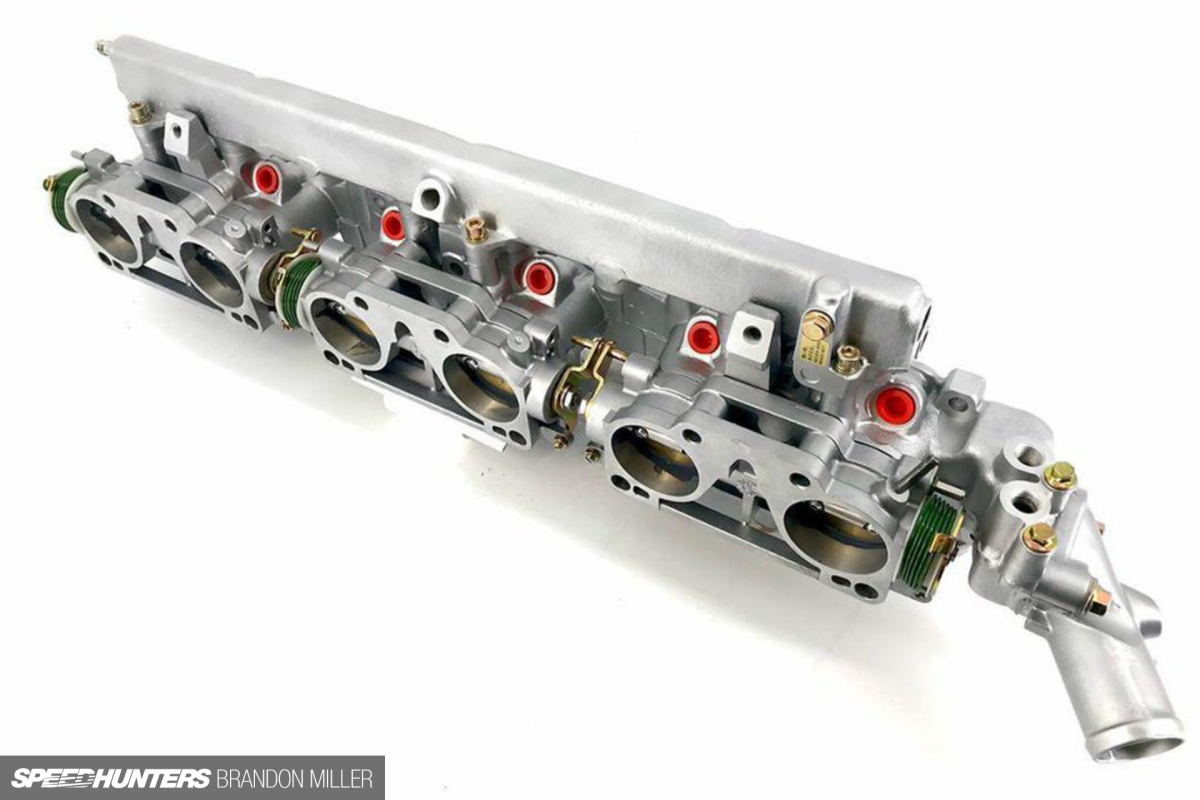


Additionally, the stock RB26 GT-R throttle bodies were shipped to EFI Hardware in Australia where they were over-bored then fitted with new butterflies, seals and bearings. Afterwards, the ITBs along with all of the other external aluminum parts were sent to Ian at Remade in the USA, who in my opinion is the single best GT-R parts restorer on the planet. Ian takes great care in vapor-blasting, coating, re-plating and even recreating all of the factory markings and stickers. I was so impressed by Ian’s work that he has become my go-to source for restoring all parts of this car. He has since vapor-blasted all of the aluminum plumbing and wiper motor housing, and also stripped and cadmium-plated all of my steel parts and hardware.
Without a turbo I would not be using the intake plenum where the stock throttle linkage was, so Stefan at Innovative Engines & Engineering sent me his DBW kit minus the motor. Instead, he created a cable-driven wheel and links to connect all three throttle bodies.

My machinist, Mike Clemons, took the block and bored/honed it. He also heavily modified the head with a full port and polish, doubling the CFMs on the intake side with 75% as much increase achieved on the exhaust side. The combustion chamber was vastly modified with the quench pads reshaped entirely.
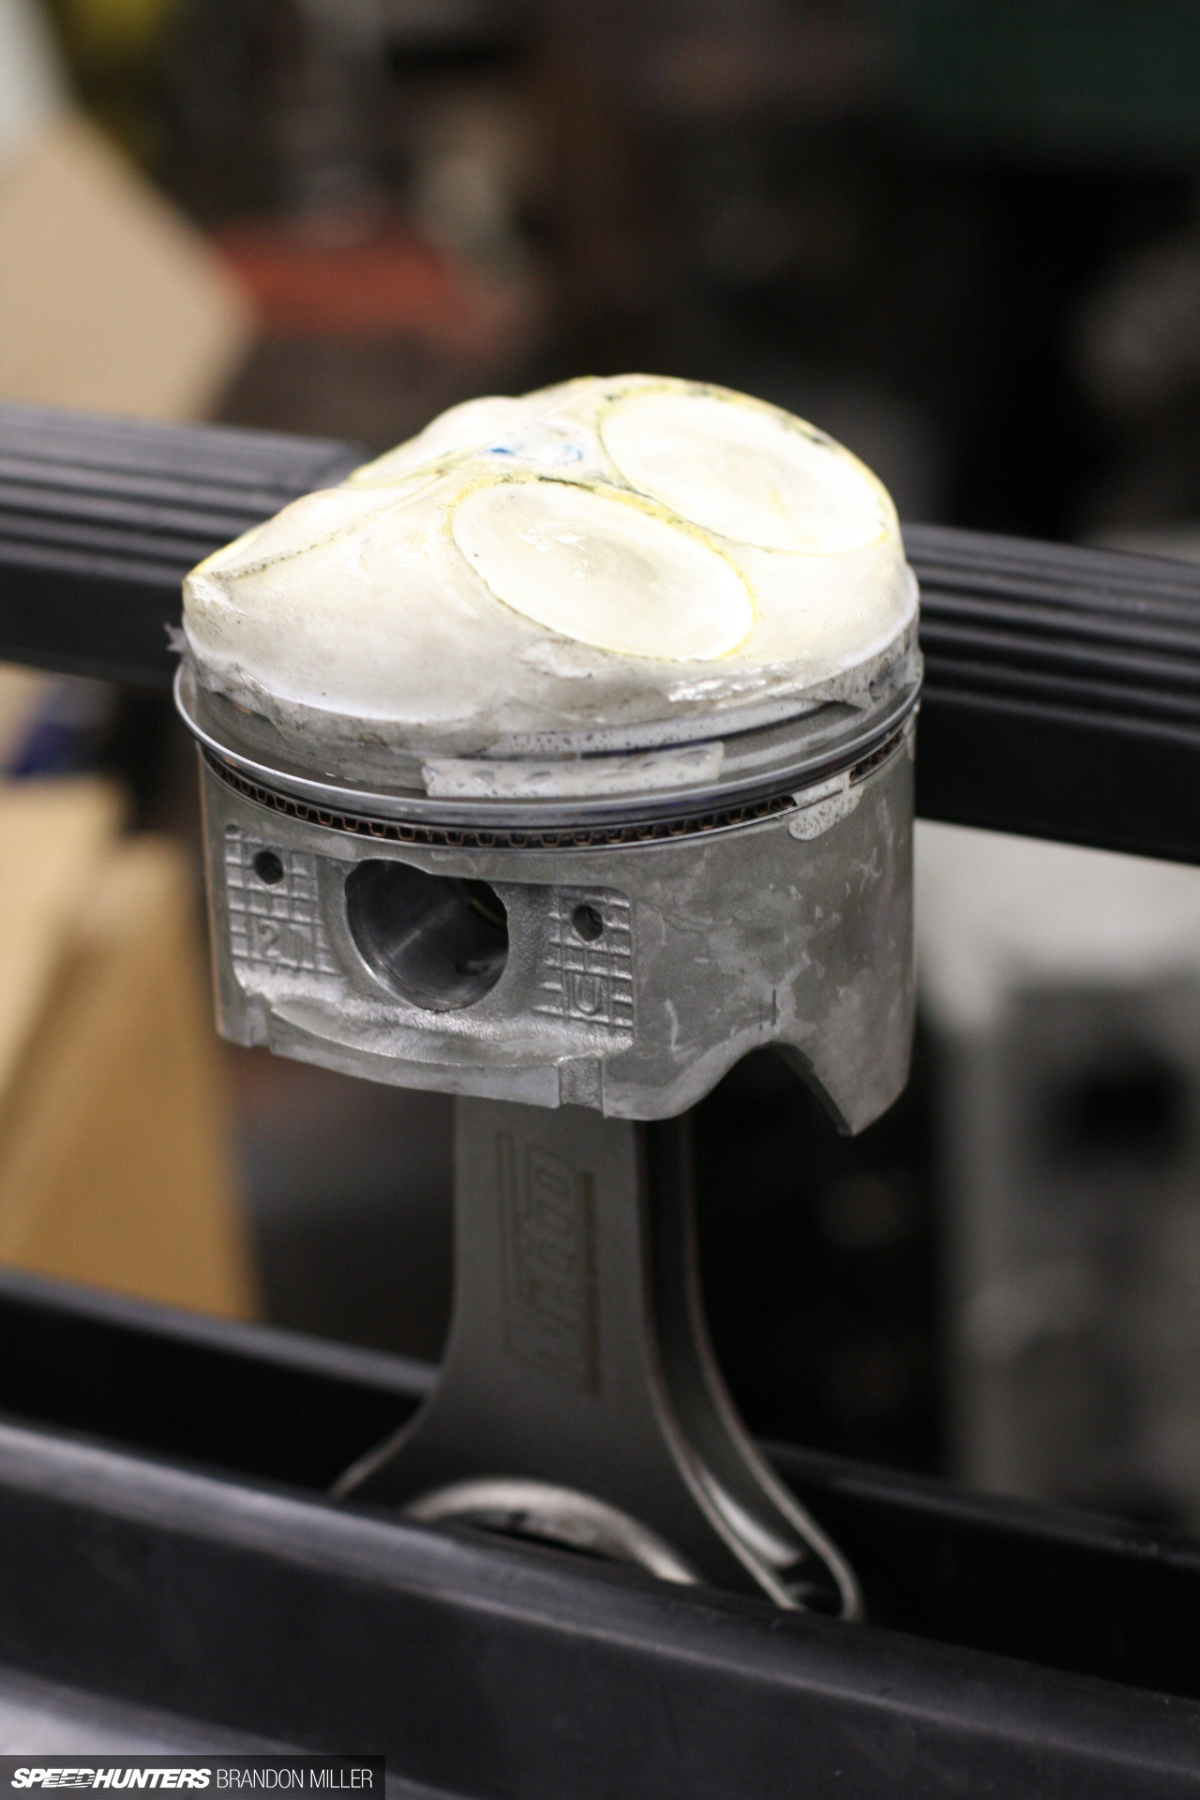
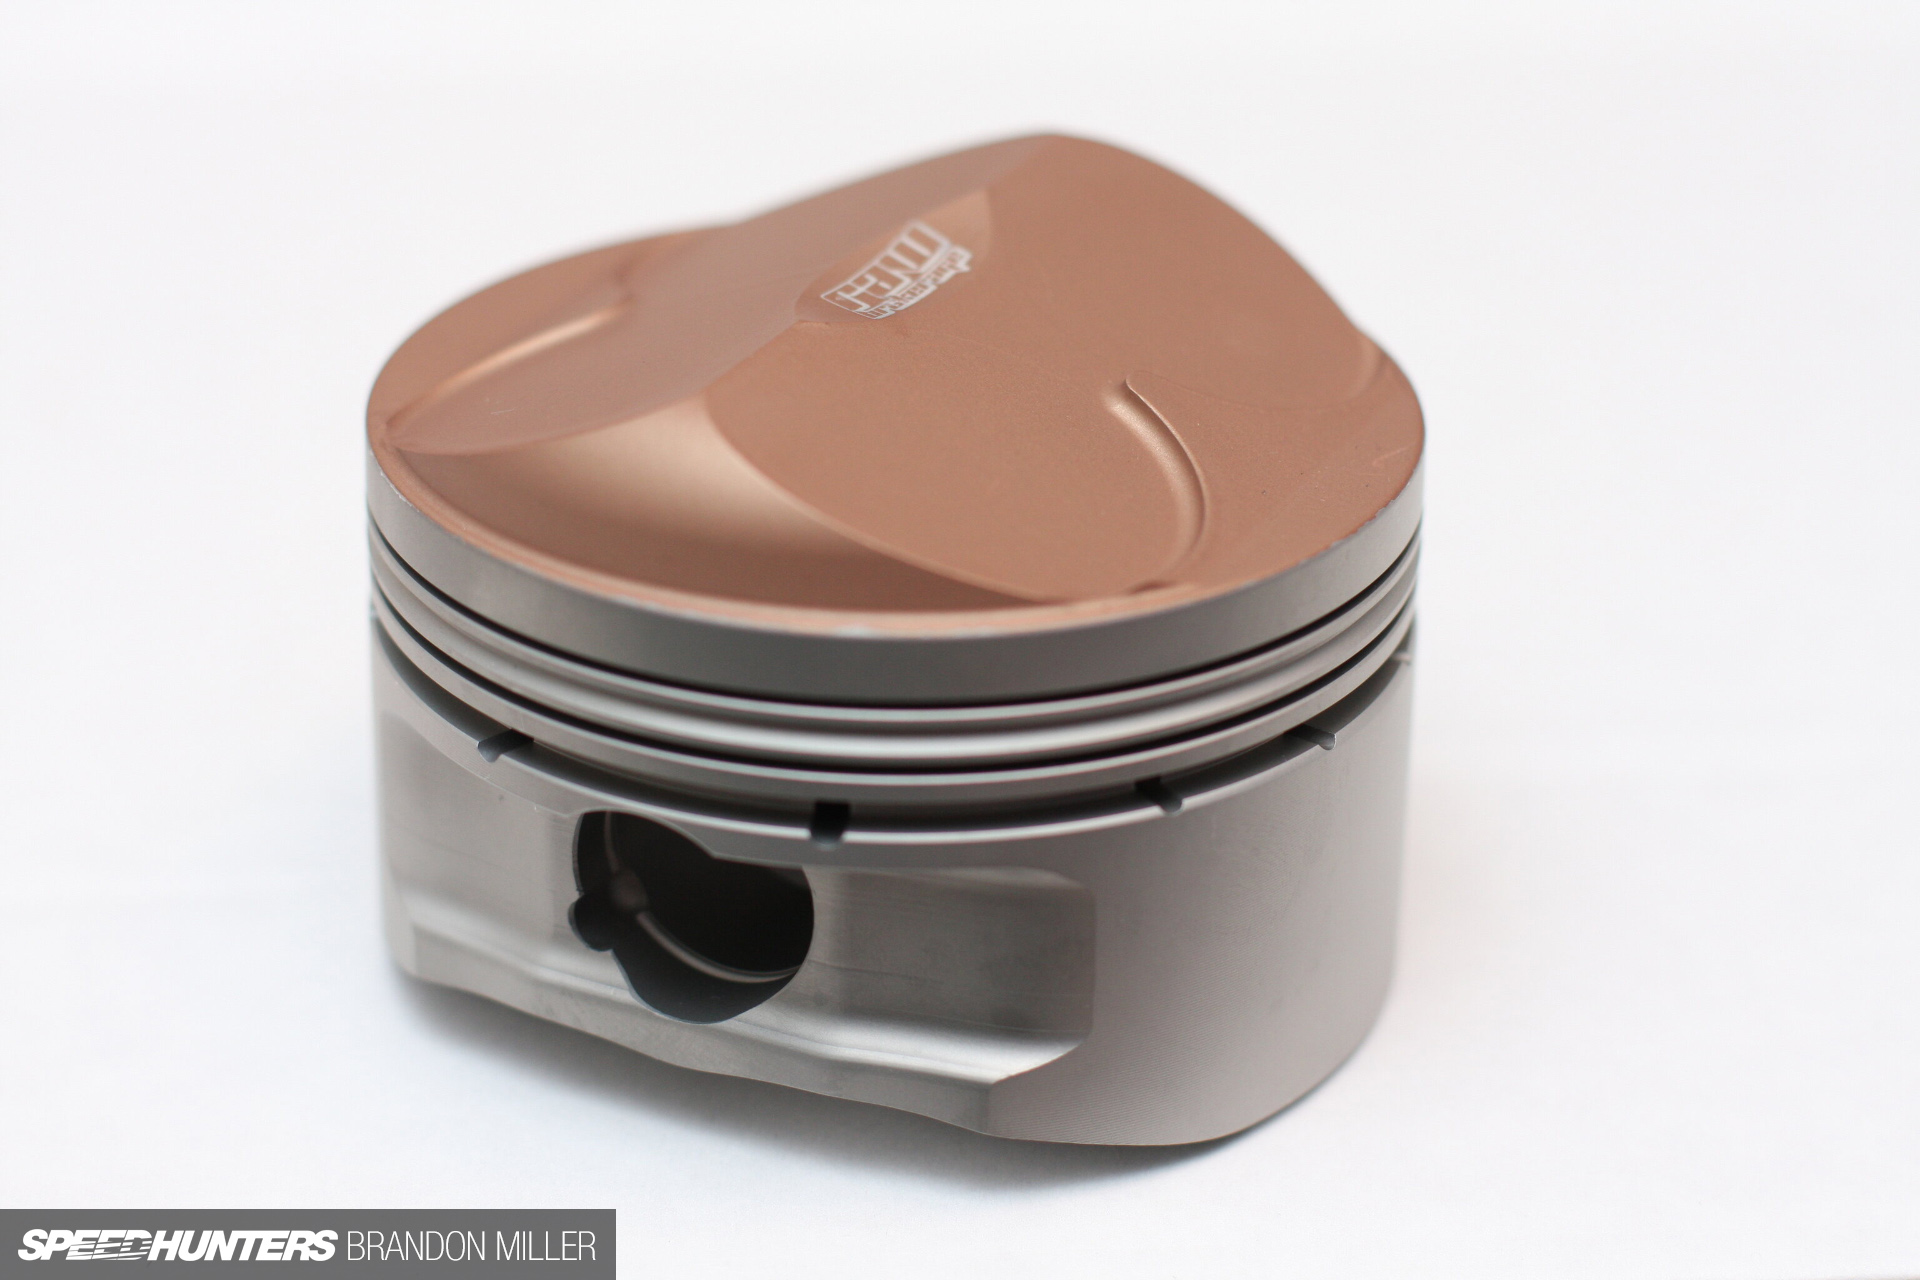
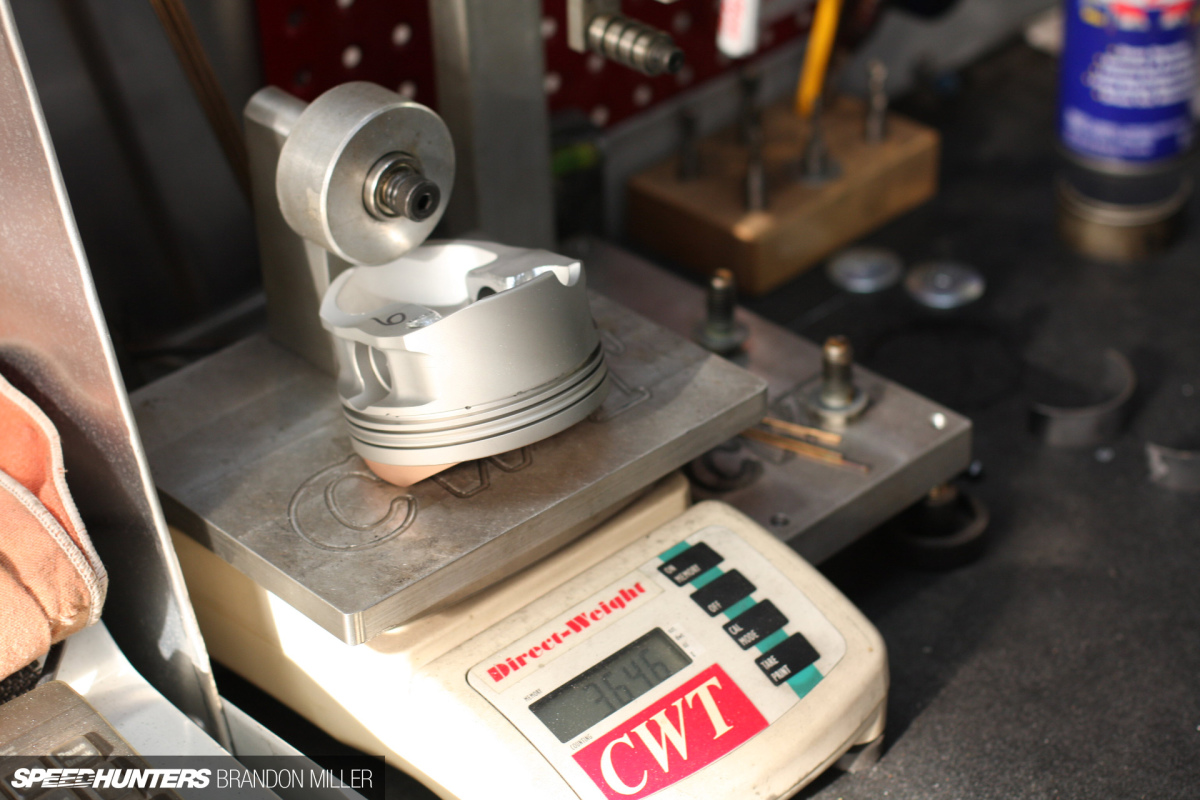
After all of this was done, Mike took a mold of the chamber which was sent to CP-Carillo. They 3D-scanned the mold, which was used to create a set of custom 11.6:1 forged pistons. The crank and pistons were then fully blueprinted and balanced before being put back into the block. And yes, great care was taken to modify the oil passages in order to prevent oil starvation. That, along with the long-nose crank and upgraded pump gear should provide the proper oil flow while being very reliable.
Mike calculated that on race gas the 2.8L RB should be capable of up to 400hp at the flywheel. The end goal was around 250-300rwhp on pump gas and 300-350rwhp on E85, but only time will tell. The purpose of this car was not to be the fastest, but to have the best sound with a super-responsive 12,000rpm rev limit, and to be a fun, well-balanced driver. Admittedly, the car will not be driven very often.
Engine control will be handled via a Haltech 2500 Elite ECU mated to a Wiring Specialties custom harness. Fuel is delivered by an Aeroquip fuel pump, -6AN line and a Flexfuel sensor which will allow for a switchable 93/E85 tune.
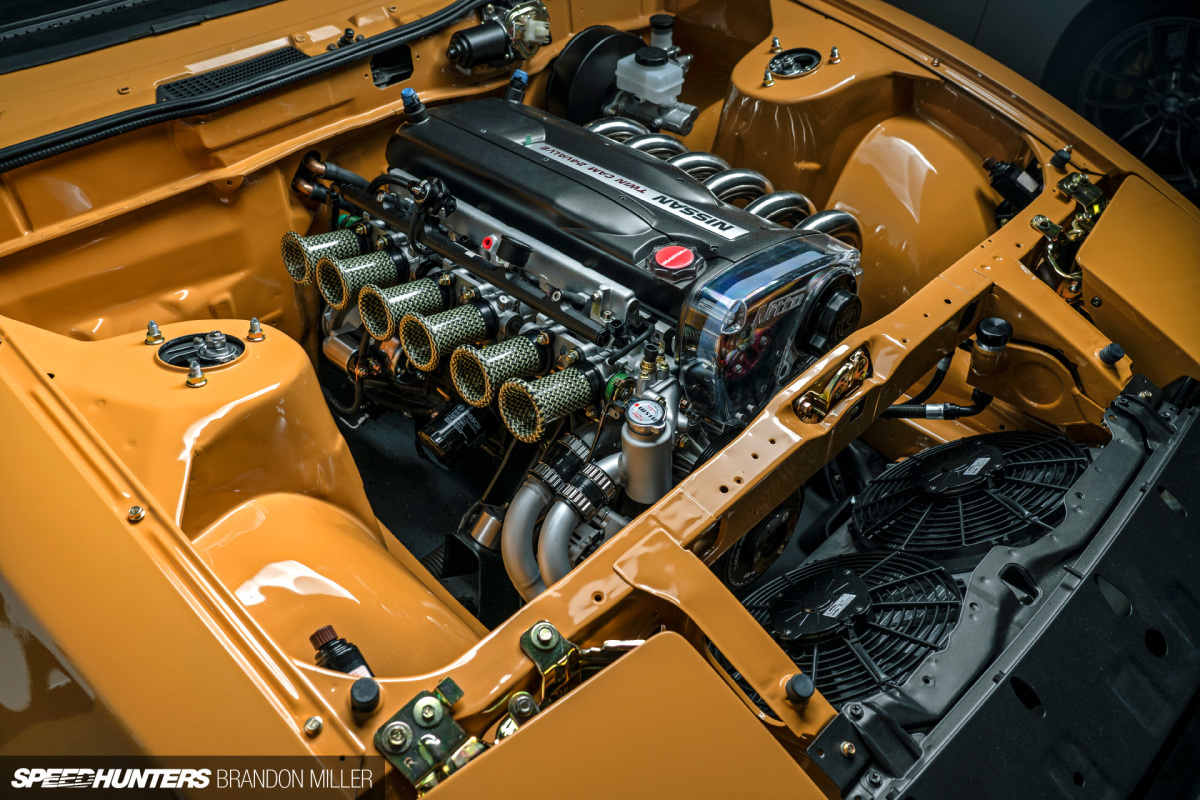
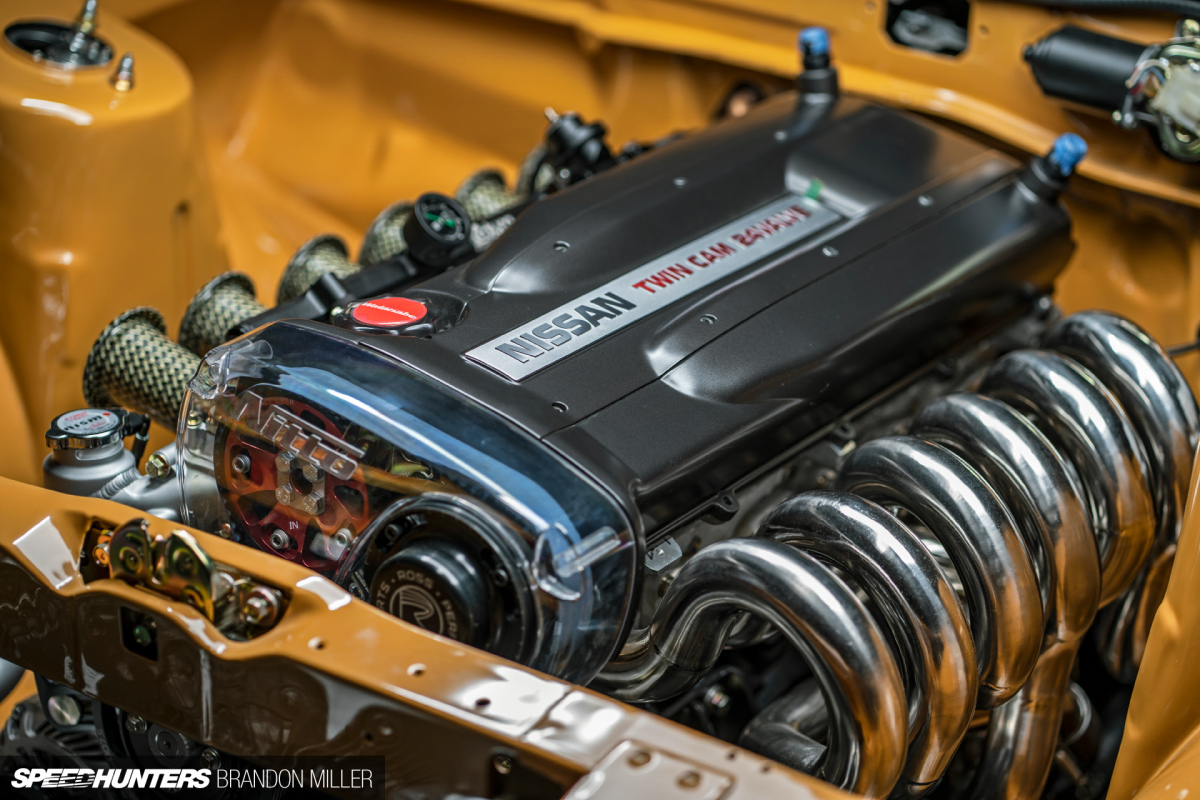
To finish off the engine itself, Concept Color created a custom cam cover which removed the OE intercooler pipe notch and coil ignitor recess. It’s a subtle detail that goes unnoticed by most, but when compared to a stock RB cover it’s hard to miss. It was a must-have on the build list.

Last but certainly not least are the two show stoppers: the one-off carbon-Kevlar velocity stacks made by Niklas at HNengineering, and the one-off titanium header by Freed Engineering. The original plan was to use aluminum velocity stacks, but I think it was my friend Mike Poore who suggested carbon-Kevlar, as it would match the Bride seats and play off the color of the car quite well. After several failed attempts to find a composite specialist to take on the task at a reasonable cost, it was Stefan from IEE who put me in touch with Nik, and the rest is history. I believe Nik made over 30 stacks before the final six were finished. He went through several molds and injection processes as well. I greatly admire Nik’s dedication and persistence to create such an amazing final product; one that will never go unnoticed.
On the other side of the engine lies the masterpiece of an exhaust header – a one-off full titanium creation by Billy Freed, of Freed Engineering. Billy took on the difficult task of creating the header, exhaust, radiator, coolant and power steering reservoirs as well as the driveshaft, and did it all with great efficiency and the utmost attention to detail.
The OS Giken-style header is an absolute work of art that will only be improved after the first dyno run when the color changes naturally. Extending to the rear of the car is an equally beautiful 2.5-inch titanium exhaust with twin mufflers and tips which were brushed and color-treated just enough to bring out some gold. Freed Engineering also created the cooling system using a custom Bell radiator core with handmade end tanks. Twin Spal fans were added along with a custom shroud to keep the air flow moving.
Oddly enough, my second favorite component was the hidden power steering reservoir. Billy went through several variations, and I challenged him to create a hidden tank with a swan-neck filler. The end result is nothing short of amazing, and is barely noticeable since it has been painted to match the bay. Even the coolant pipes were so thoughtfully designed that they’ve become a feature to admire and enjoy.
The transmission is an NOS OEM R34 GT-S 5-speed. The clutch is a dual disc with flywheel combo from Competition, and the driveshaft is a single-piece aluminum unit.

Other items to note in the engine bay are the JDM R33 brake master cylinder, which is fitted to a slim S13 booster. The JDM master was used because it exits on the driver side which gained more header clearance, and the booster was turned upside down to better hide the vacuum line. The heater ports were modified and fit with 90s to better hide the hoses.
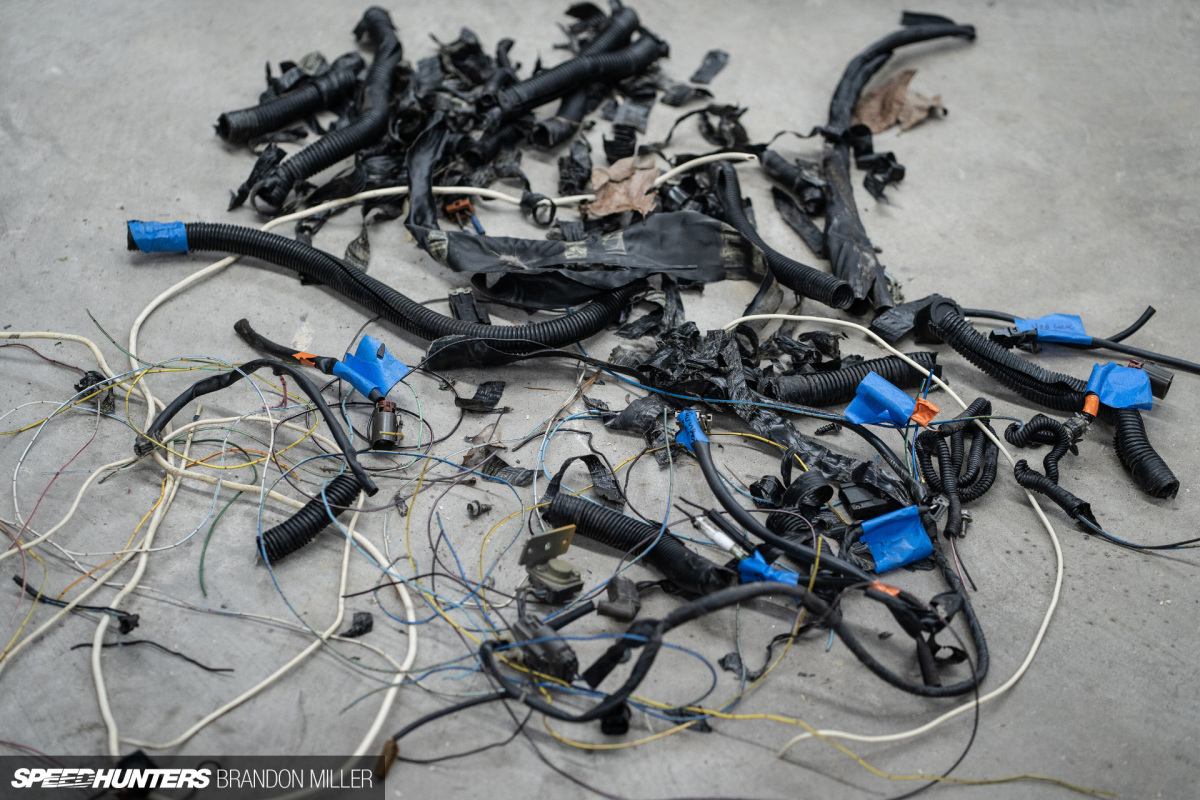
The chassis harness was cut in two and lengthened by about three-foot. Instead of being run throughout the engine bay, it is now run through the fenders, and enters the cabin to the left and right of the kick panels. The relays and fusible links are mounted inside the fenders and any wires or items not used were removed from the harness.

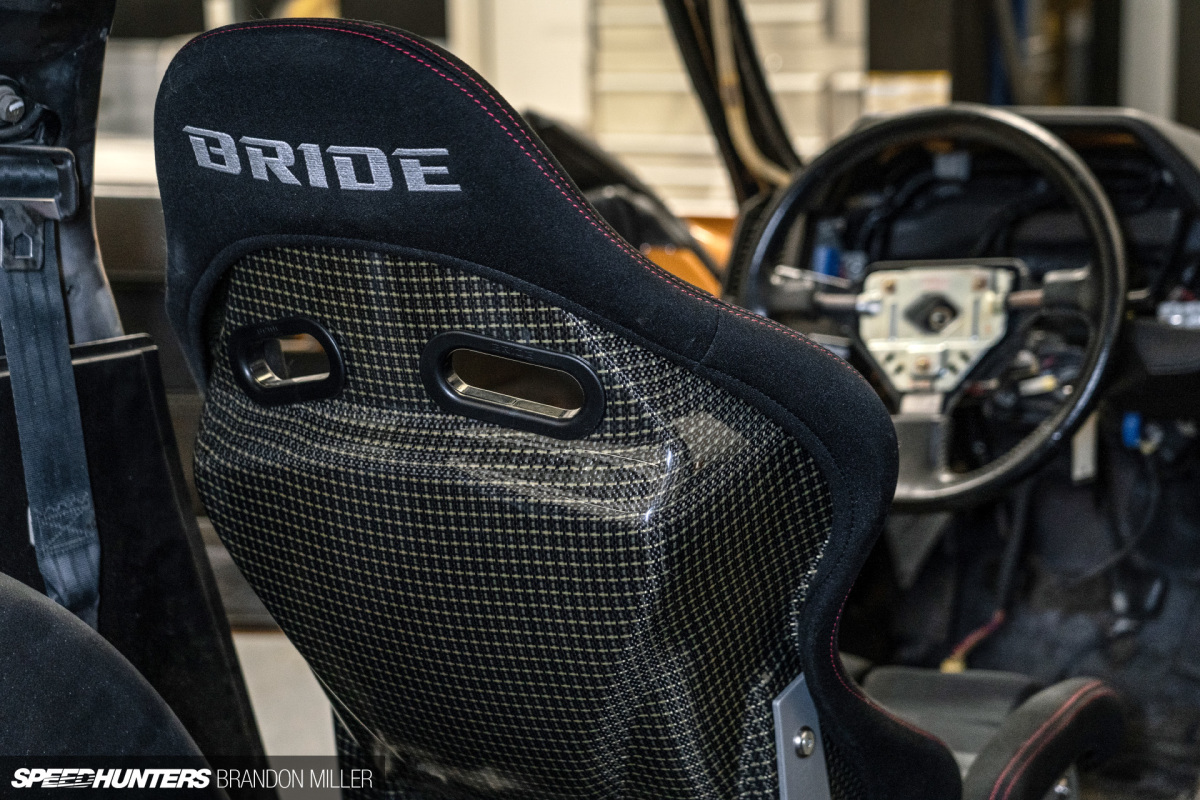
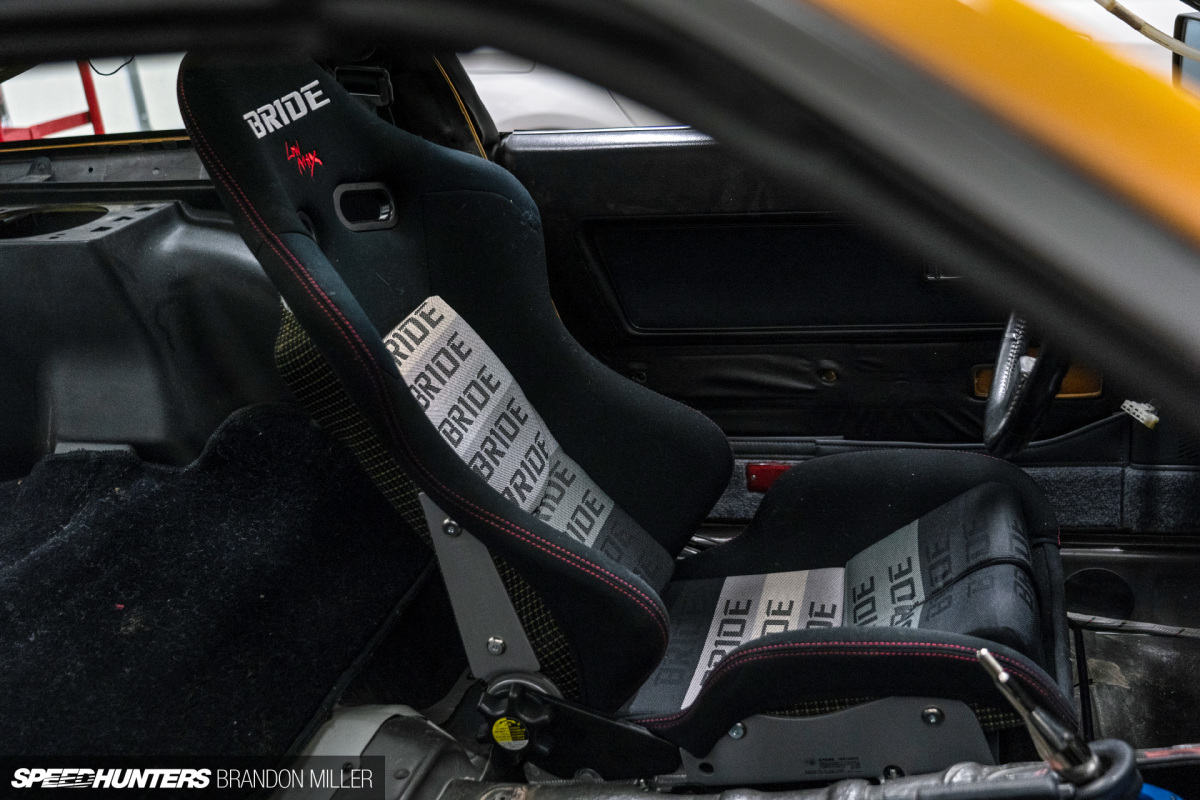
The interior of the car is mostly stock. The base car only had around 60K miles on it and was in really good shape. The carpet is all new, and I was able to source an NOS arm rest and pedal covers. The seats are Bride Japan Stradia IIs in gradient with carbon-Kevlar backs. The steering wheel is a Renown 130R.
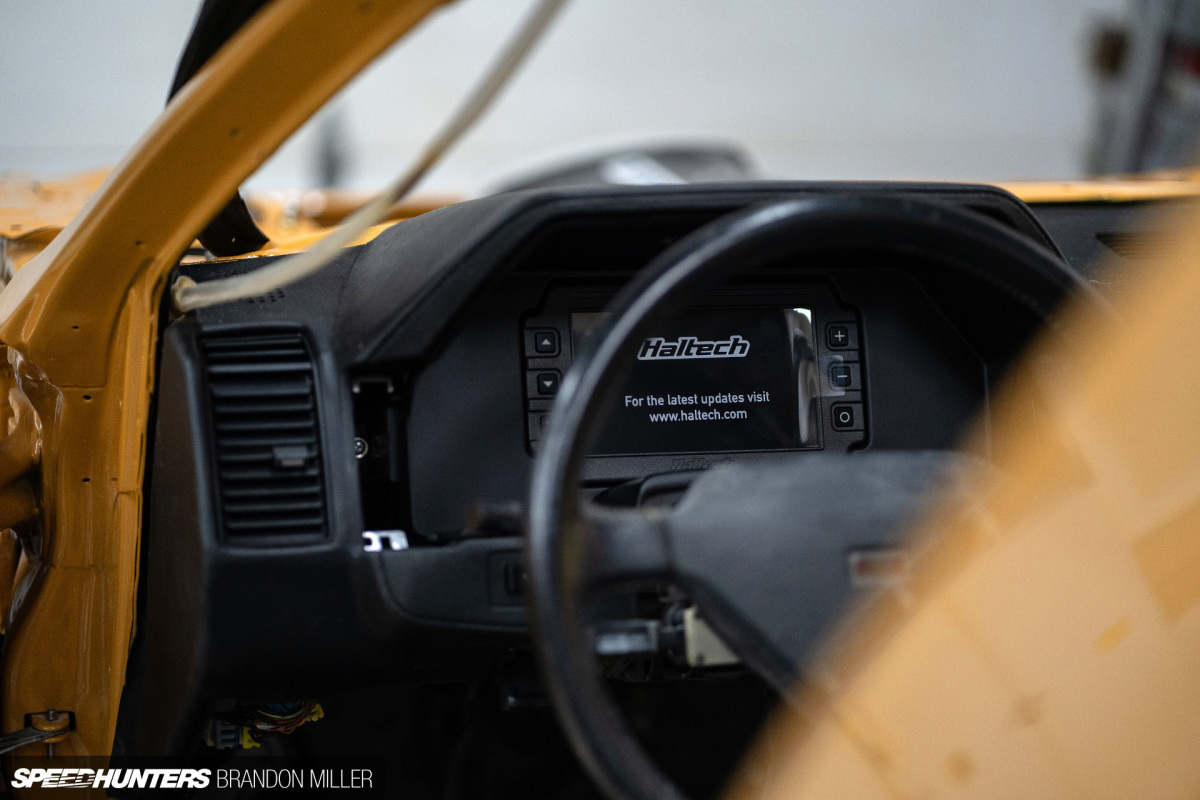
Save for the digital dash, everything else is stock. Although the car will retain the OEM head unit, there will be no speakers; the engine/exhaust will be the soundtrack.
This about sums up the technical aspect of this project. One final story will follow after the car is 100% finished and ready for its official debut. Thanks for tuning in!
Brandon Miller
Instagram: rvae38
How To join the IATS program: We have always welcomed readers to contact us with examples of their work and believe that the best Speedhunter is always the person closest to the culture itself, right there on the street or local parking lot. If you think you have what it takes and would like to share your work with us then you should apply to become part of the IAMTHESPEEDHUNTER program. Read how to get involved here.