
If there’s one thing that Project bB has taught me over the course of the build, it’s that custom turbocharging a naturally aspirated platform is far more challenging than the ‘chuck a turbo on it’ notion first seems.
Sure, if you’re working with a popular vehicle and engine base, and have access to a quality bolt-on turbo kit, the conversion is likely to be pretty straightforward. If you’re not, as I have been, it’s exponentially harder, and you’d be silly not to expect your fair share of mistakes and setbacks. There have been a few of those along the way, but thankfully, I’ve had some very talented people supporting the build, and with every challenge that’s been thrown up a custom solution has been found. It’s been frustrating and so rewarding at the same time.
In this update I’m going to tick another couple of jobs off the long and seemingly ever-growing to-do list that accompanies Project bB, but truth be told, we’re actually a lot further along with the build than what this post will lead you to believe. So basically, I just need to pull finger and bring you a bunch of updates in short order to get you all up to speed, at which time I think we’ll pretty much be there.
First, the intercooler system…

Although some of the turbo kits you could once upon a time get for the JDM bB and its USDM derivative the Scion xB were sold without intercoolers (they were often an option to add), the thought of not running one never entered my mind. I researched a range of options, both top-mount and front-mount, aftermarket and OEM parts bin, but ultimately found what I was looking for in Vibrant Performance’s catalogue.

The Vibrant name should be familiar will all Speedhunters readers, as performance products from this Canadian company – a subsidy of Vibrant Power – have appeared on untold feature cars over the years. Their titanium products for exhaust and intake systems, their fluid delivery lines and fittings, and their clamping systems are all extremely well regarded in the automotive aftermarket. Thanks to Vibrant I’m using some of these other components in my build too, but I’ll delve into those in the next update.
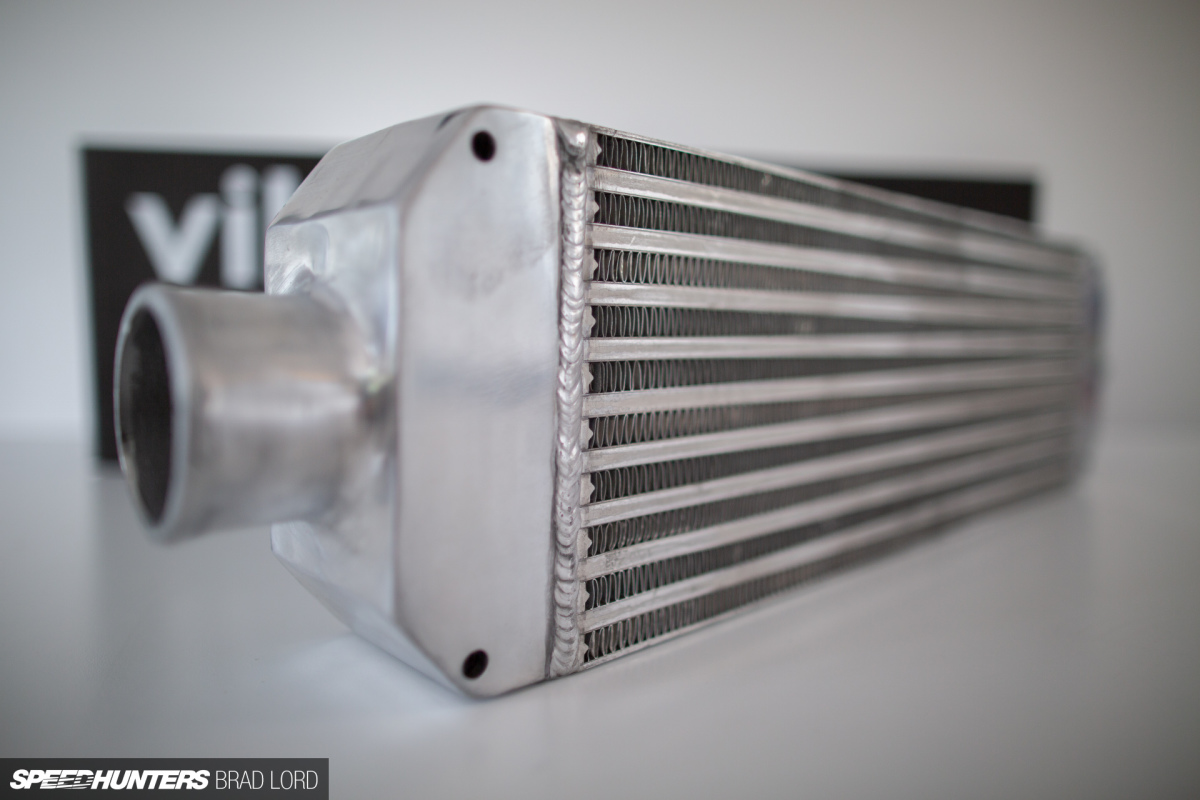
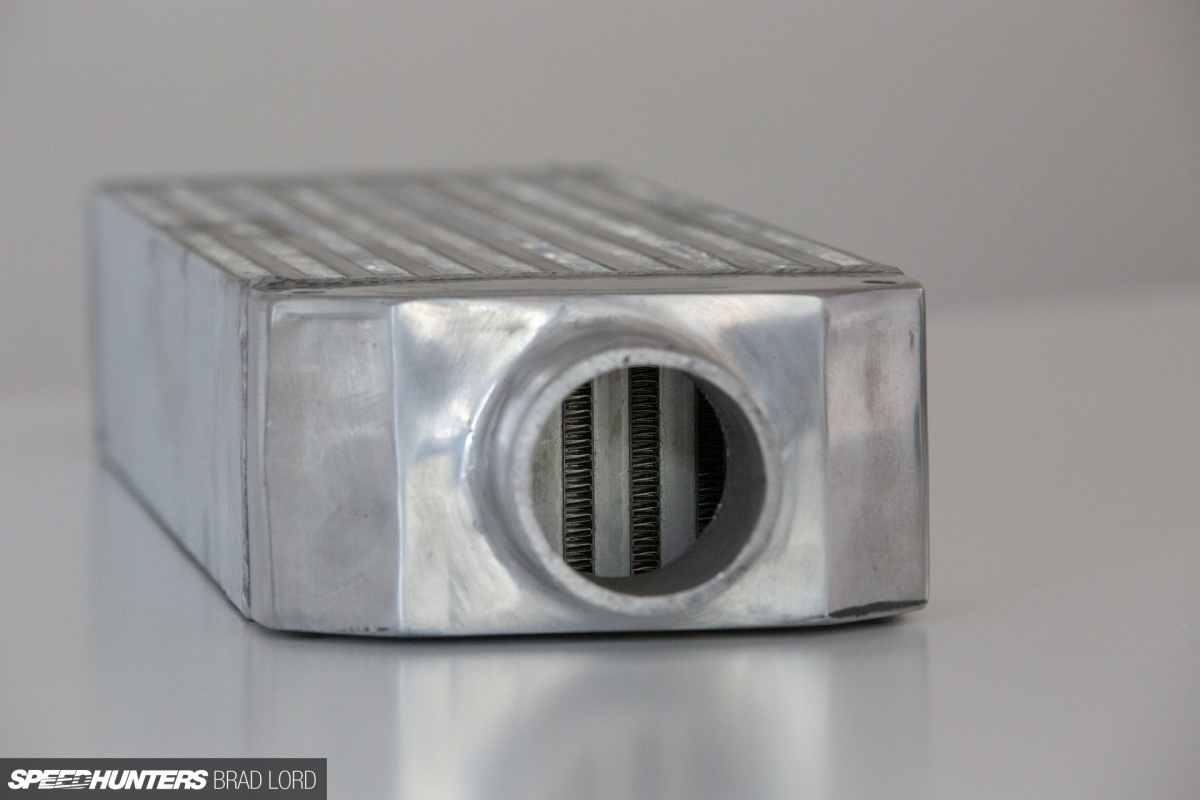
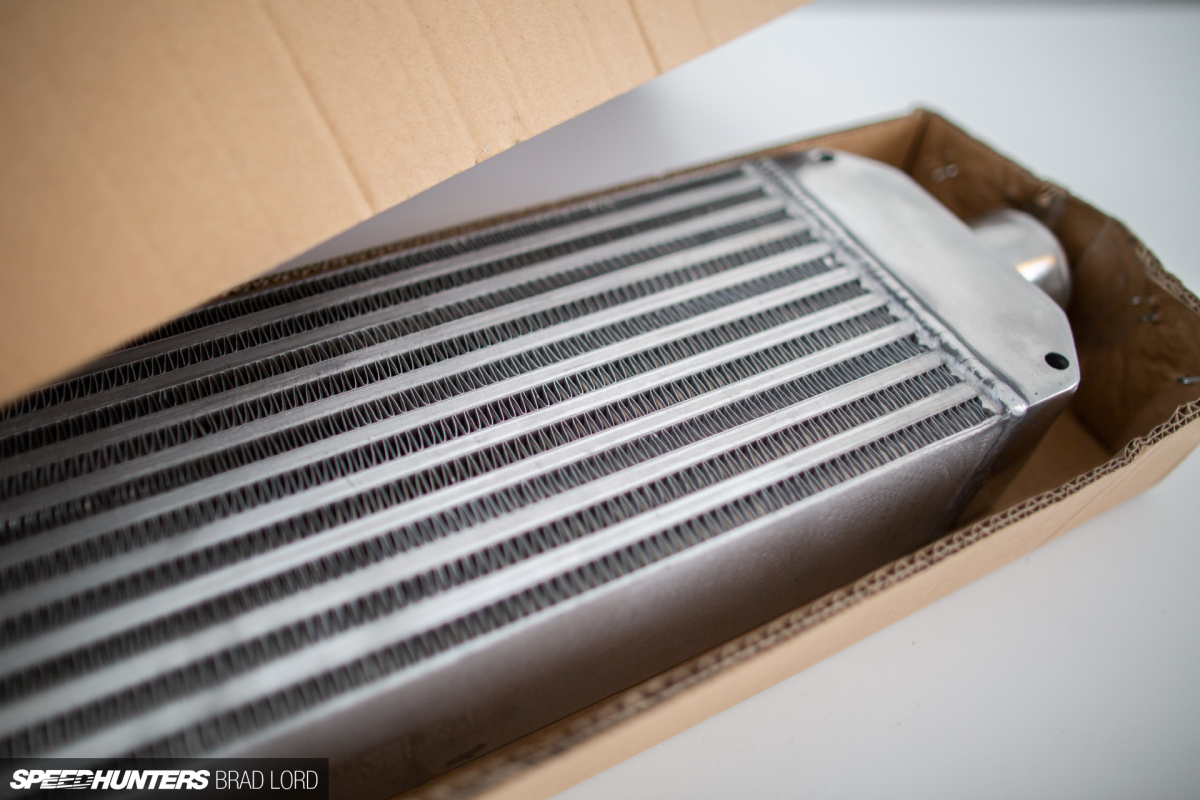
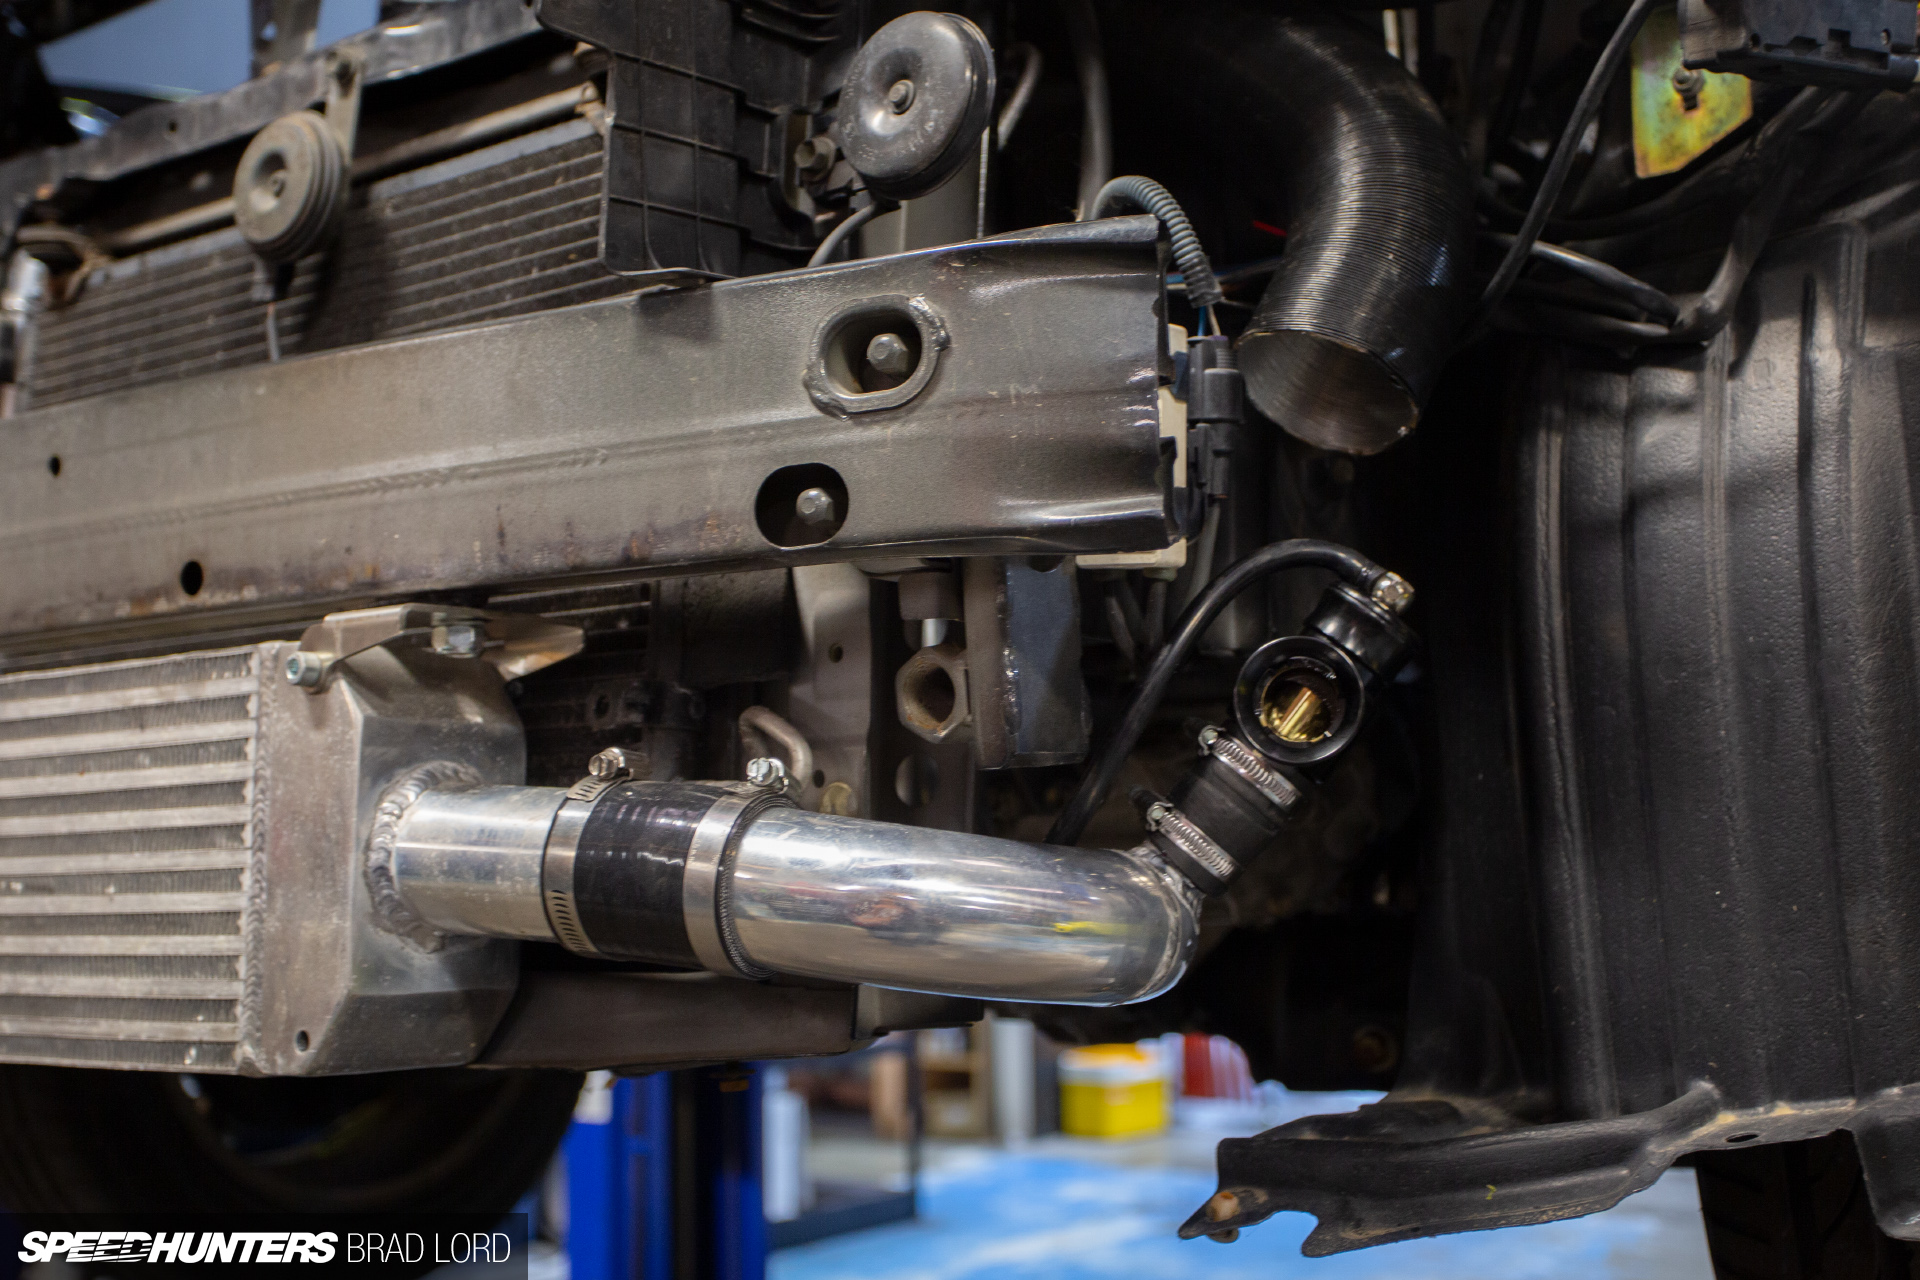
There are three off-the-shelf, ready-to-fit universal intercoolers in Vibrant’s catalogue, and this one is the smallest of the bunch. As I’m running a small 1.5L four-cylinder engine and will be content with 200hp, I only ever needed a compact intercooler, and after mocking up a cardboard template, I was happy to learn that this one had the perfect dimensions to slip in behind the front bumper with minimal fuss. It’s rated for 350hp too, so there’d be no flow problems.
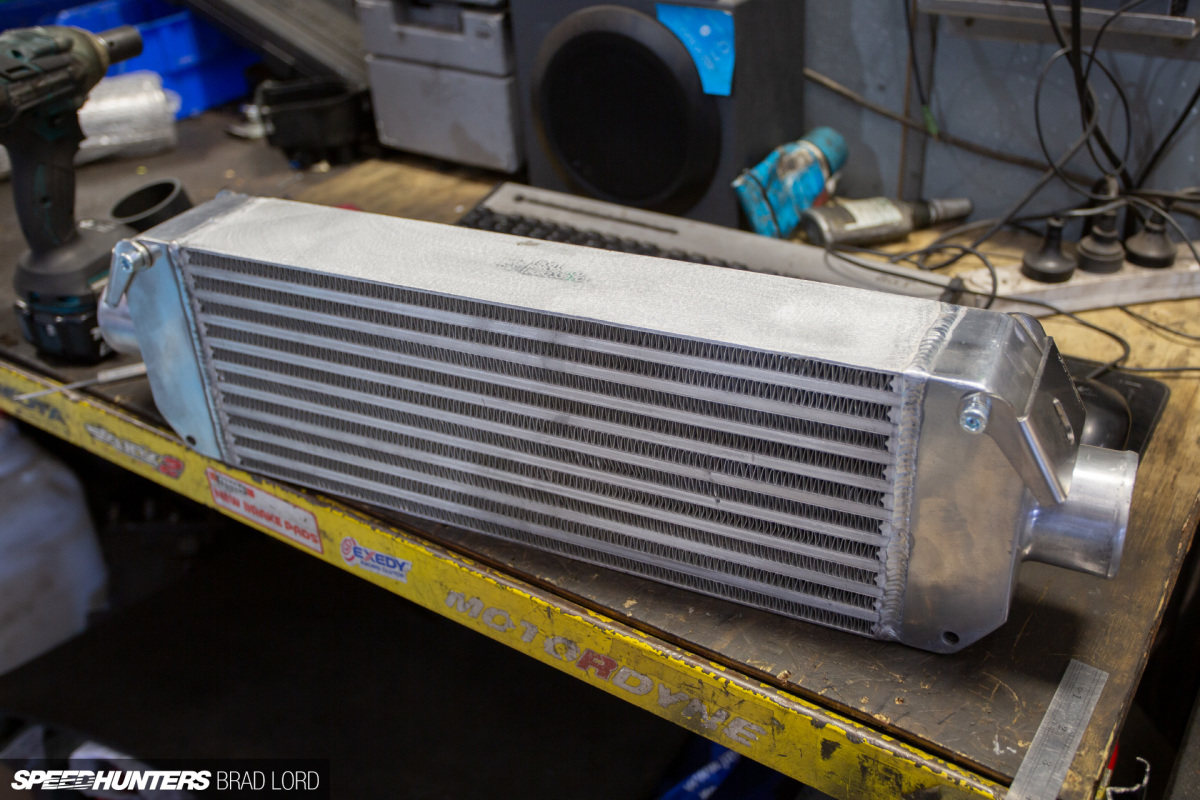
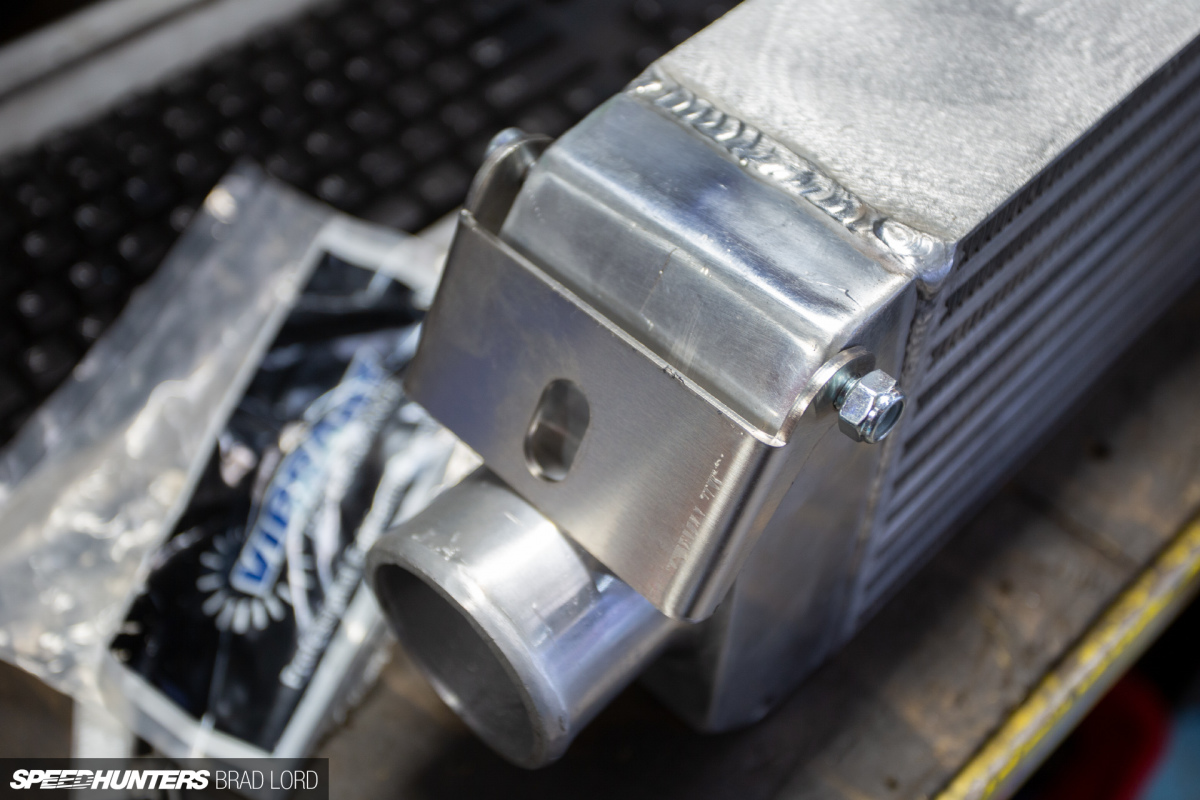
You’ll likely have noticed the four threaded holes in the end tanks, and these combined with the pair of included Vibrant stainless steel ‘Easy Mount’ bracket assemblies made fitting the intercooler, well… easy.
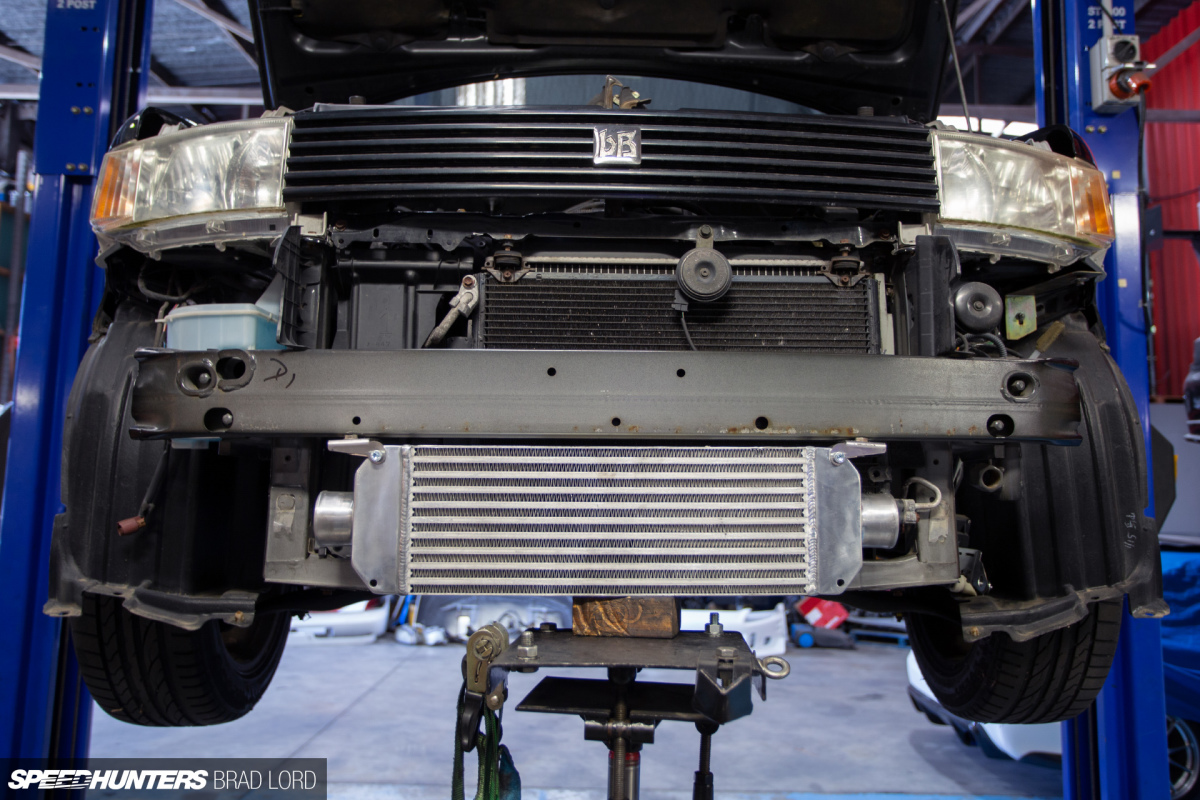

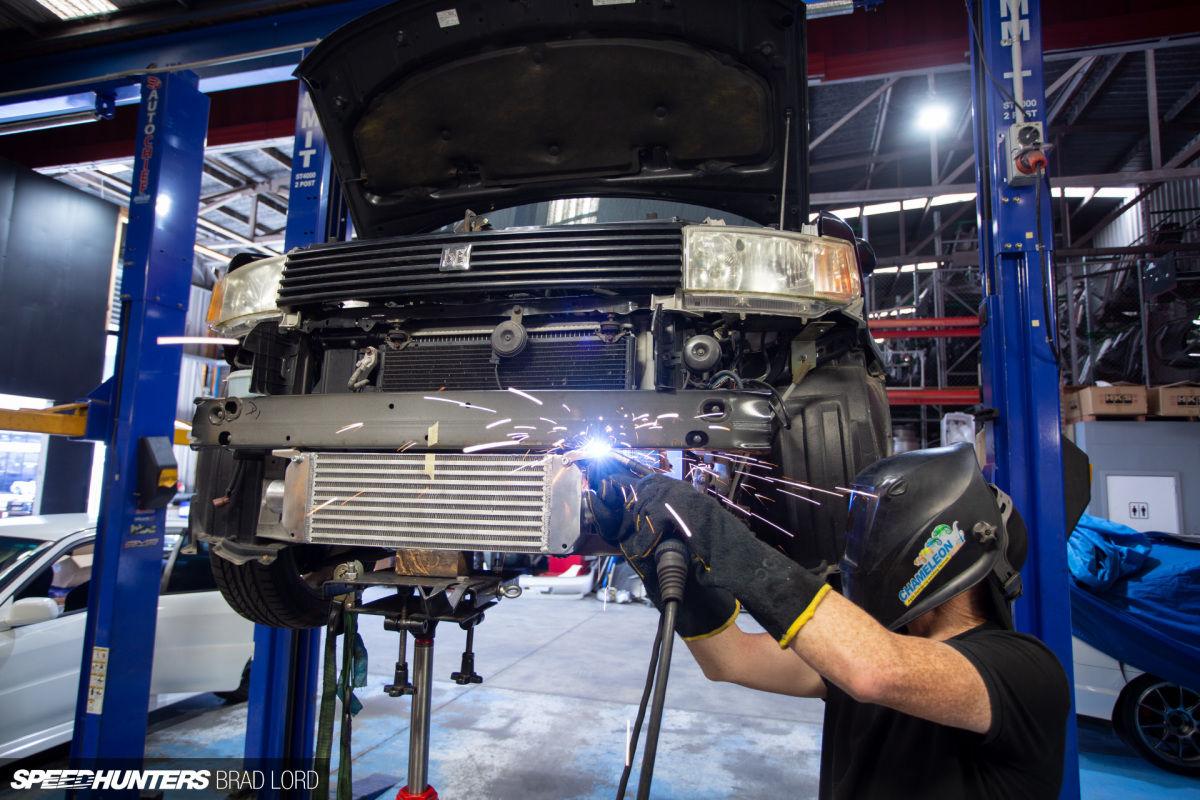
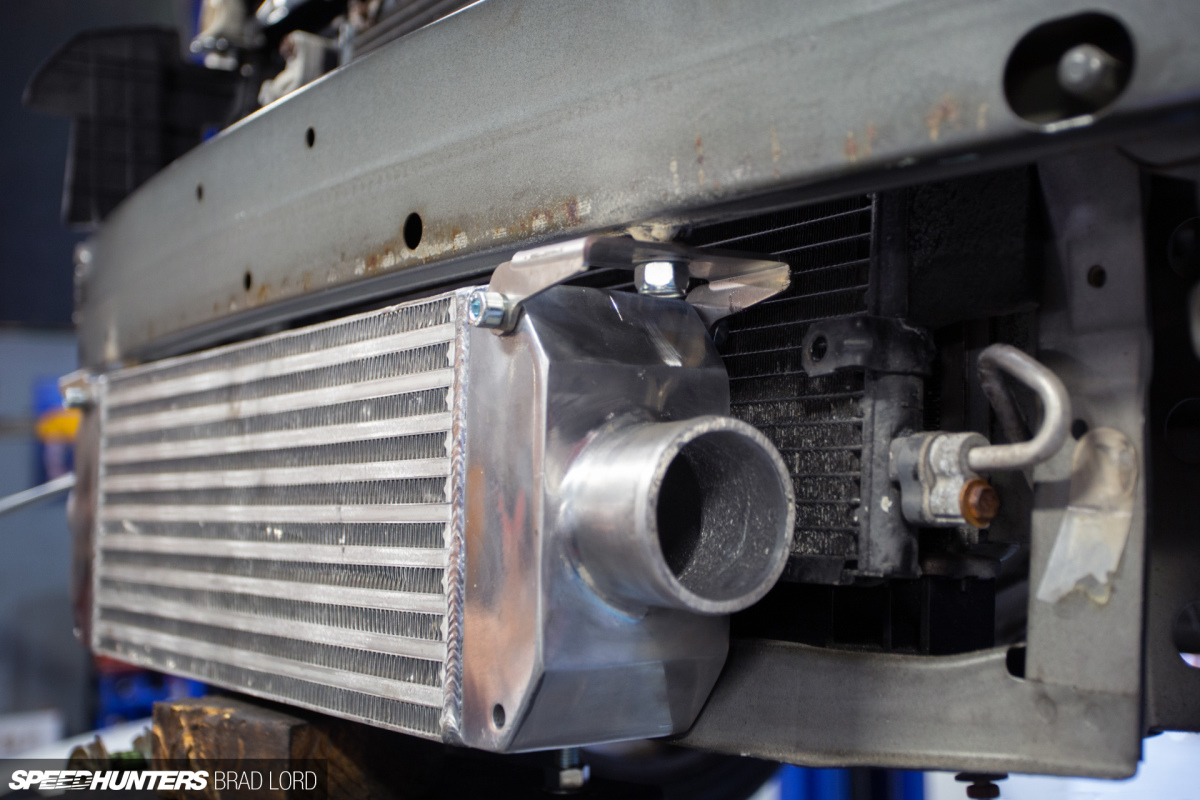
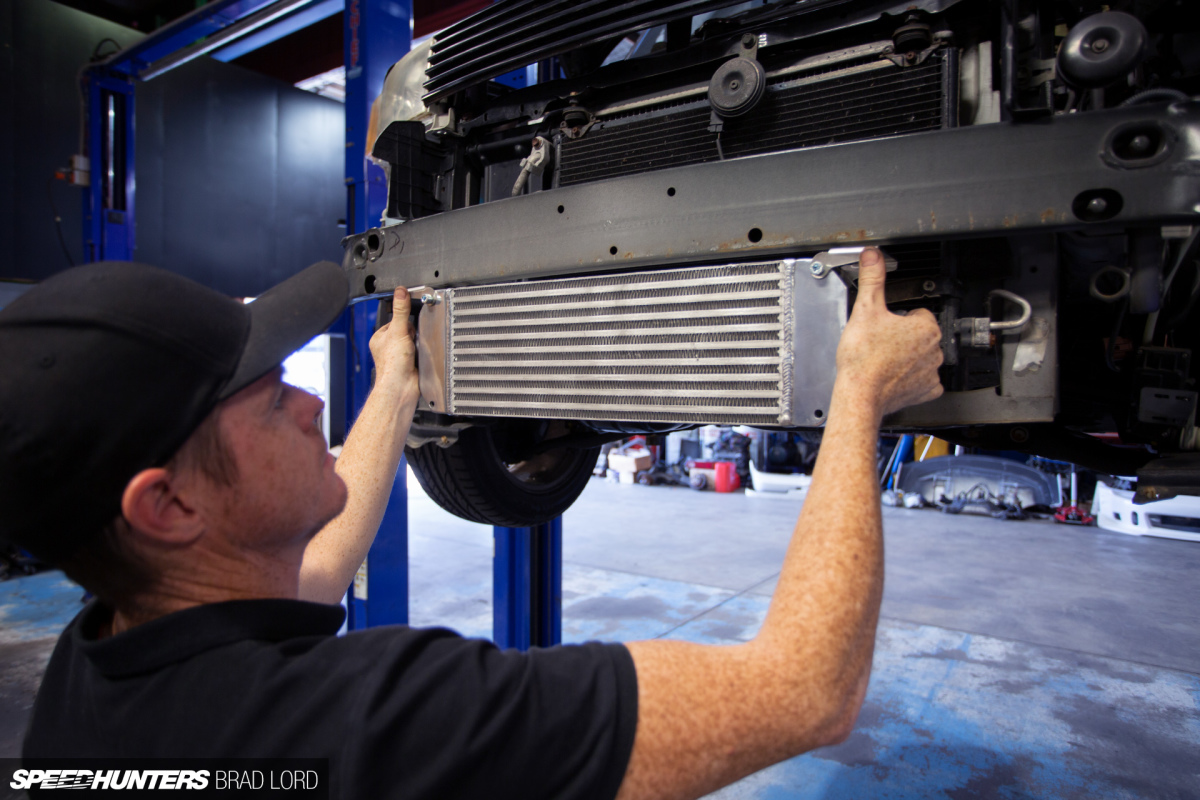
Our chosen location for the intercooler was directly below the front impact bar, which would position it right in line with the lower vents in the bumper. In the JTune Automotive workshop, Kevin welded two bolts to the bottom of the impact bar, allowing to the intercooler to simply be bolted into position.

To refit the bumper, only a tiny bit of trimming on the inside was required.
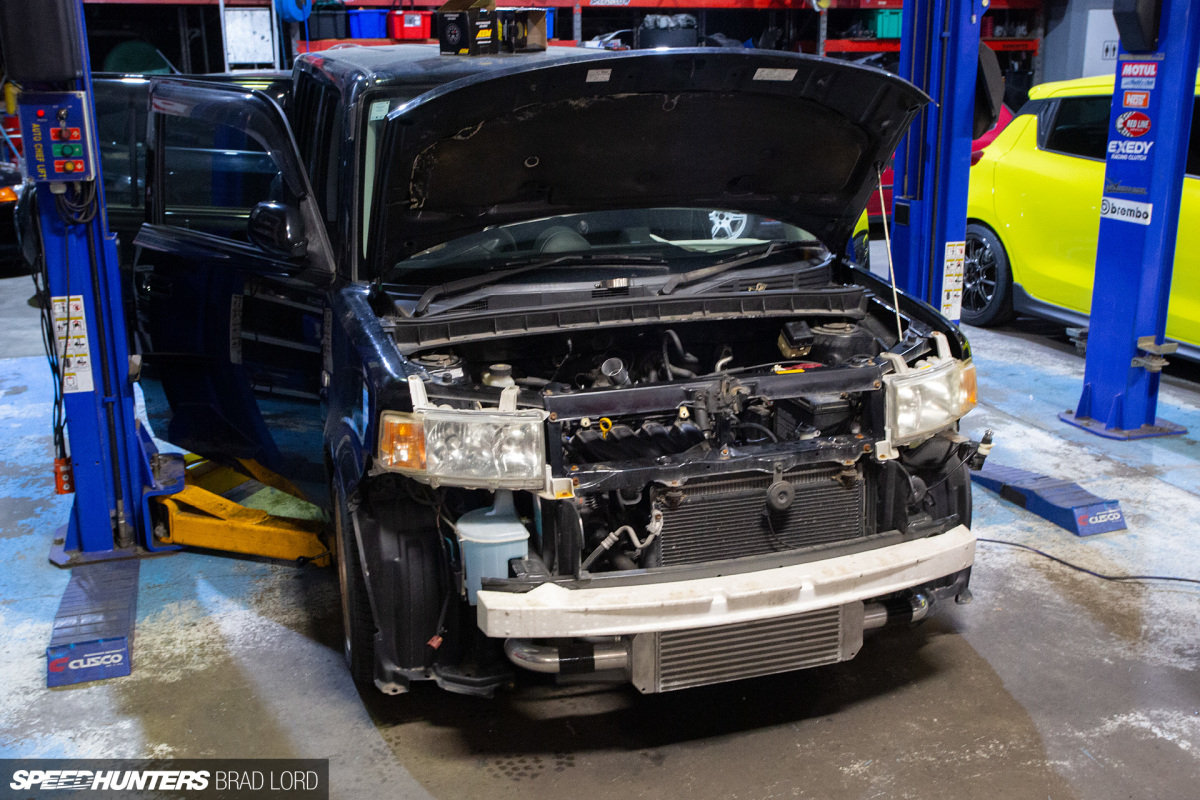

To plumb it all up, I grabbed a bunch of 2.5-inch aluminium bends (which were cut to size and welded where required), some silicone hoses and stainless steel T-bolt clamps.
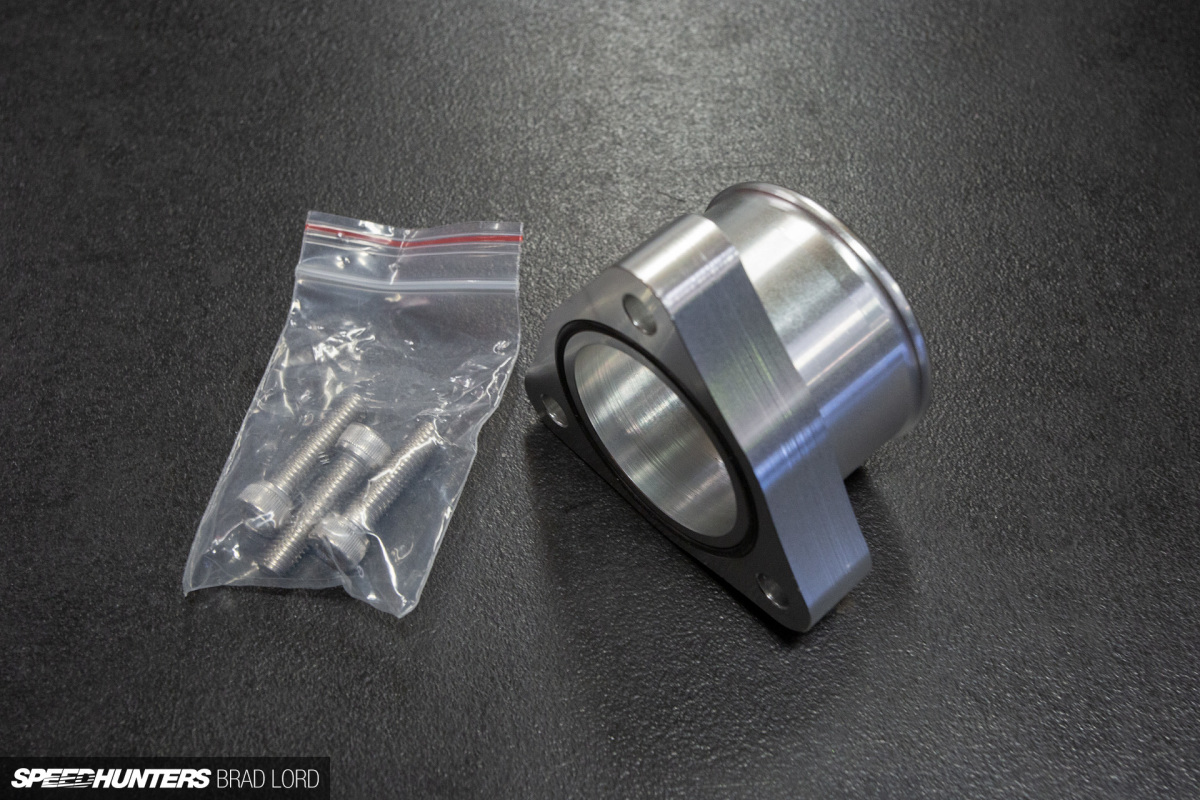
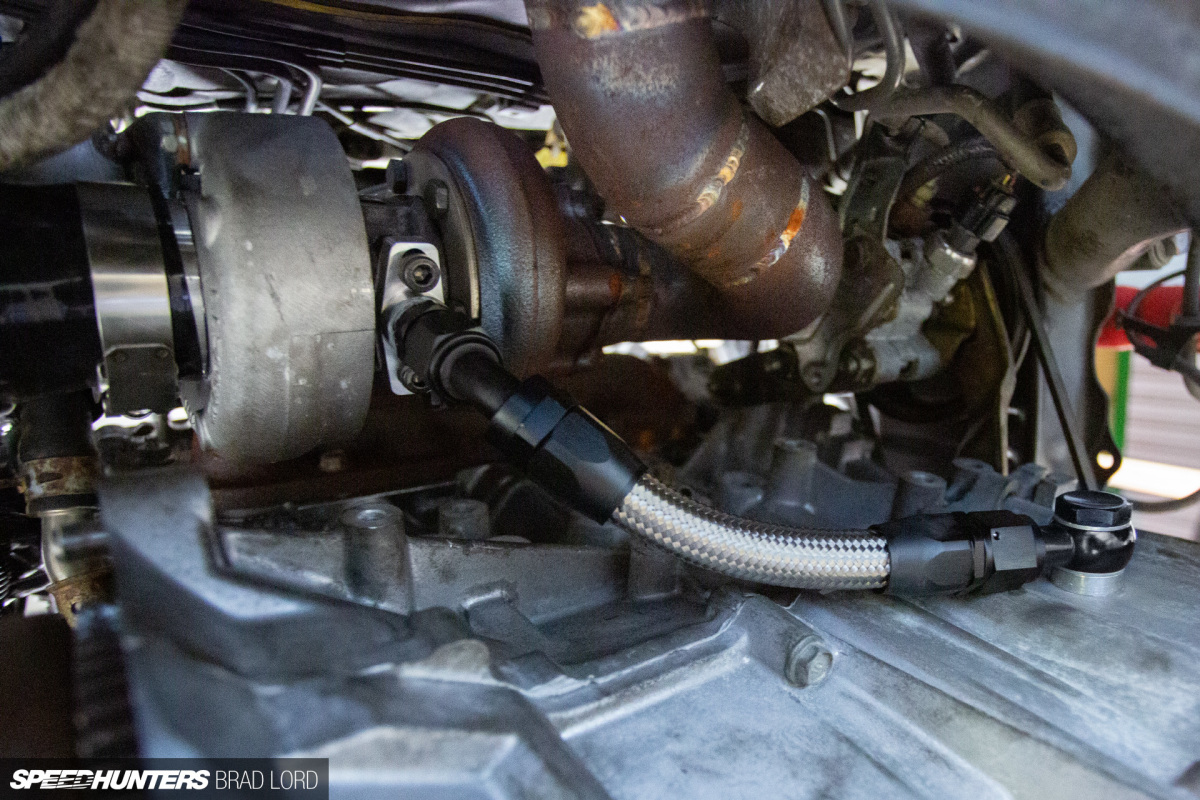
Another important piece of the puzzle was this Vibrant Performance aluminium turbo compressor outlet flange, which is designed for the OEM Nissan SR20DET Garrett turbocharger, but is also a perfect fit for the front of my Garrett GT2554R.
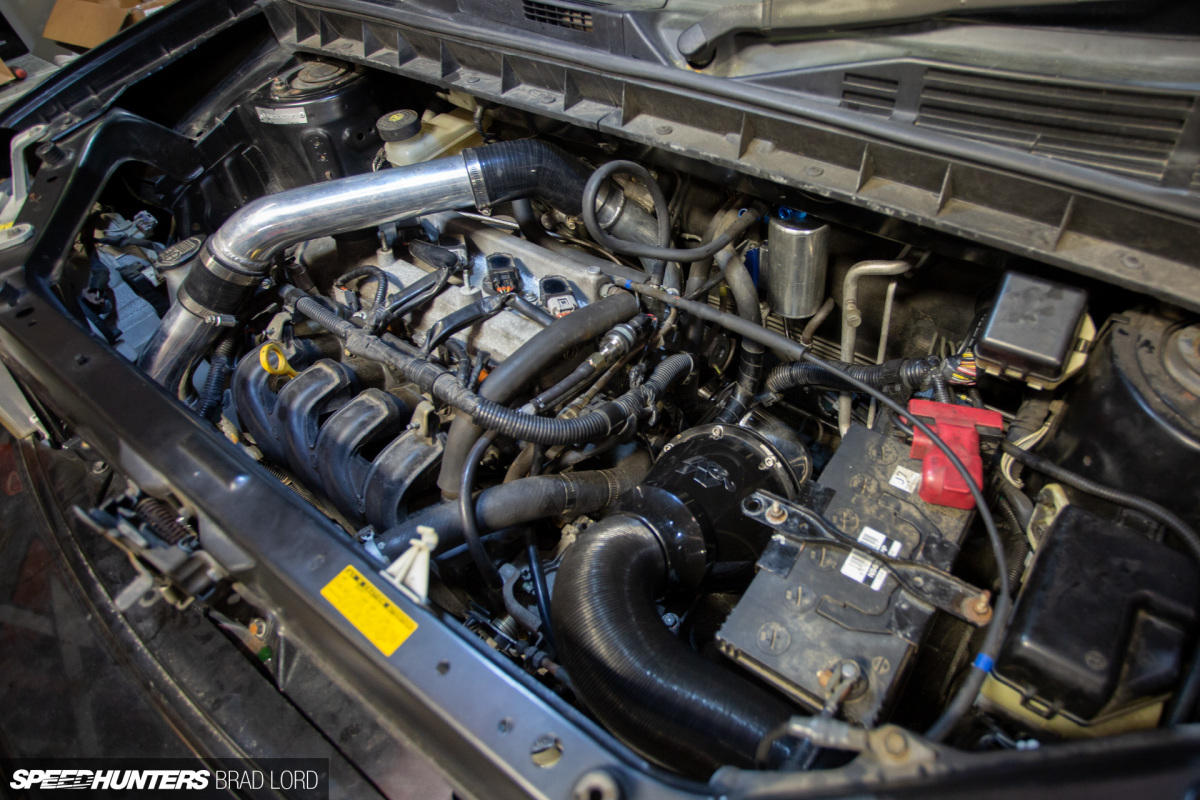
We also used aluminium tube for the turbo intake pipe, which draws air through a K&N Apollo Closed Air Intake. This system features a plastic air box with K&N filter within, fed via a flexible hose that draws air from behind the front bumper (you’ll see it a few images down). The K&N air box is a neat, straightforward solution and fills the gap in the engine bay that the factory air box once occupied.
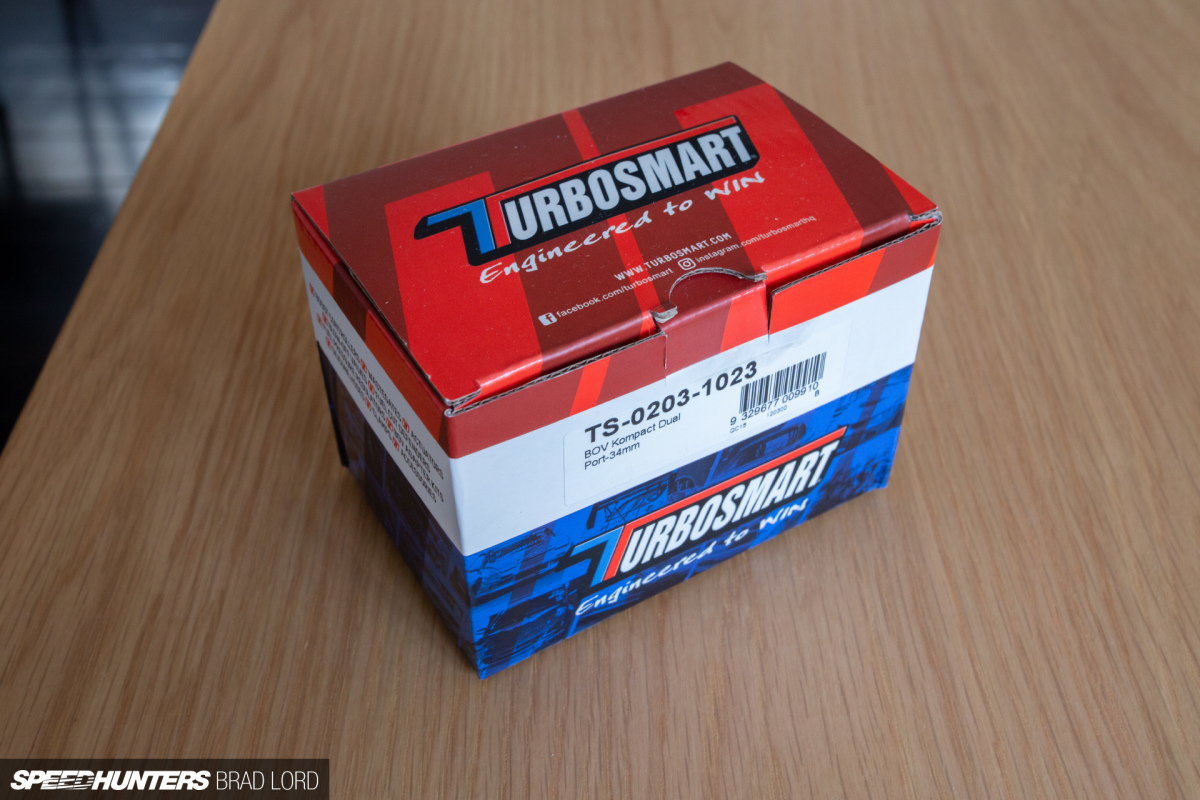
A blow-off valve is another important piece of a turbo conversion puzzle, and for this aspect I turned to Turbosmart. Here’s another company whose reputation for quality and innovation precedes them, and after a quick chat with the gurus in Turbosmart’s Australian HQ about which BOV from their extensive range would suit my application best, we settled on a 34mm Kompact Dual Port unit.

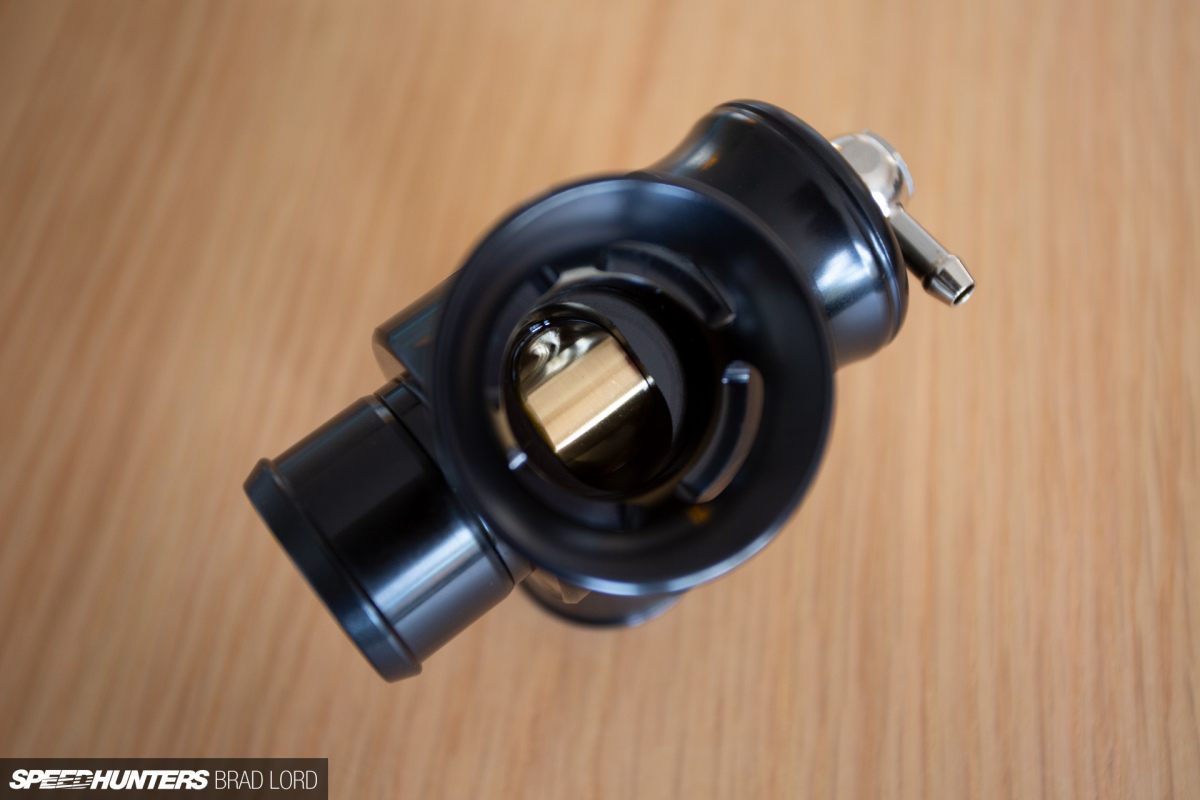
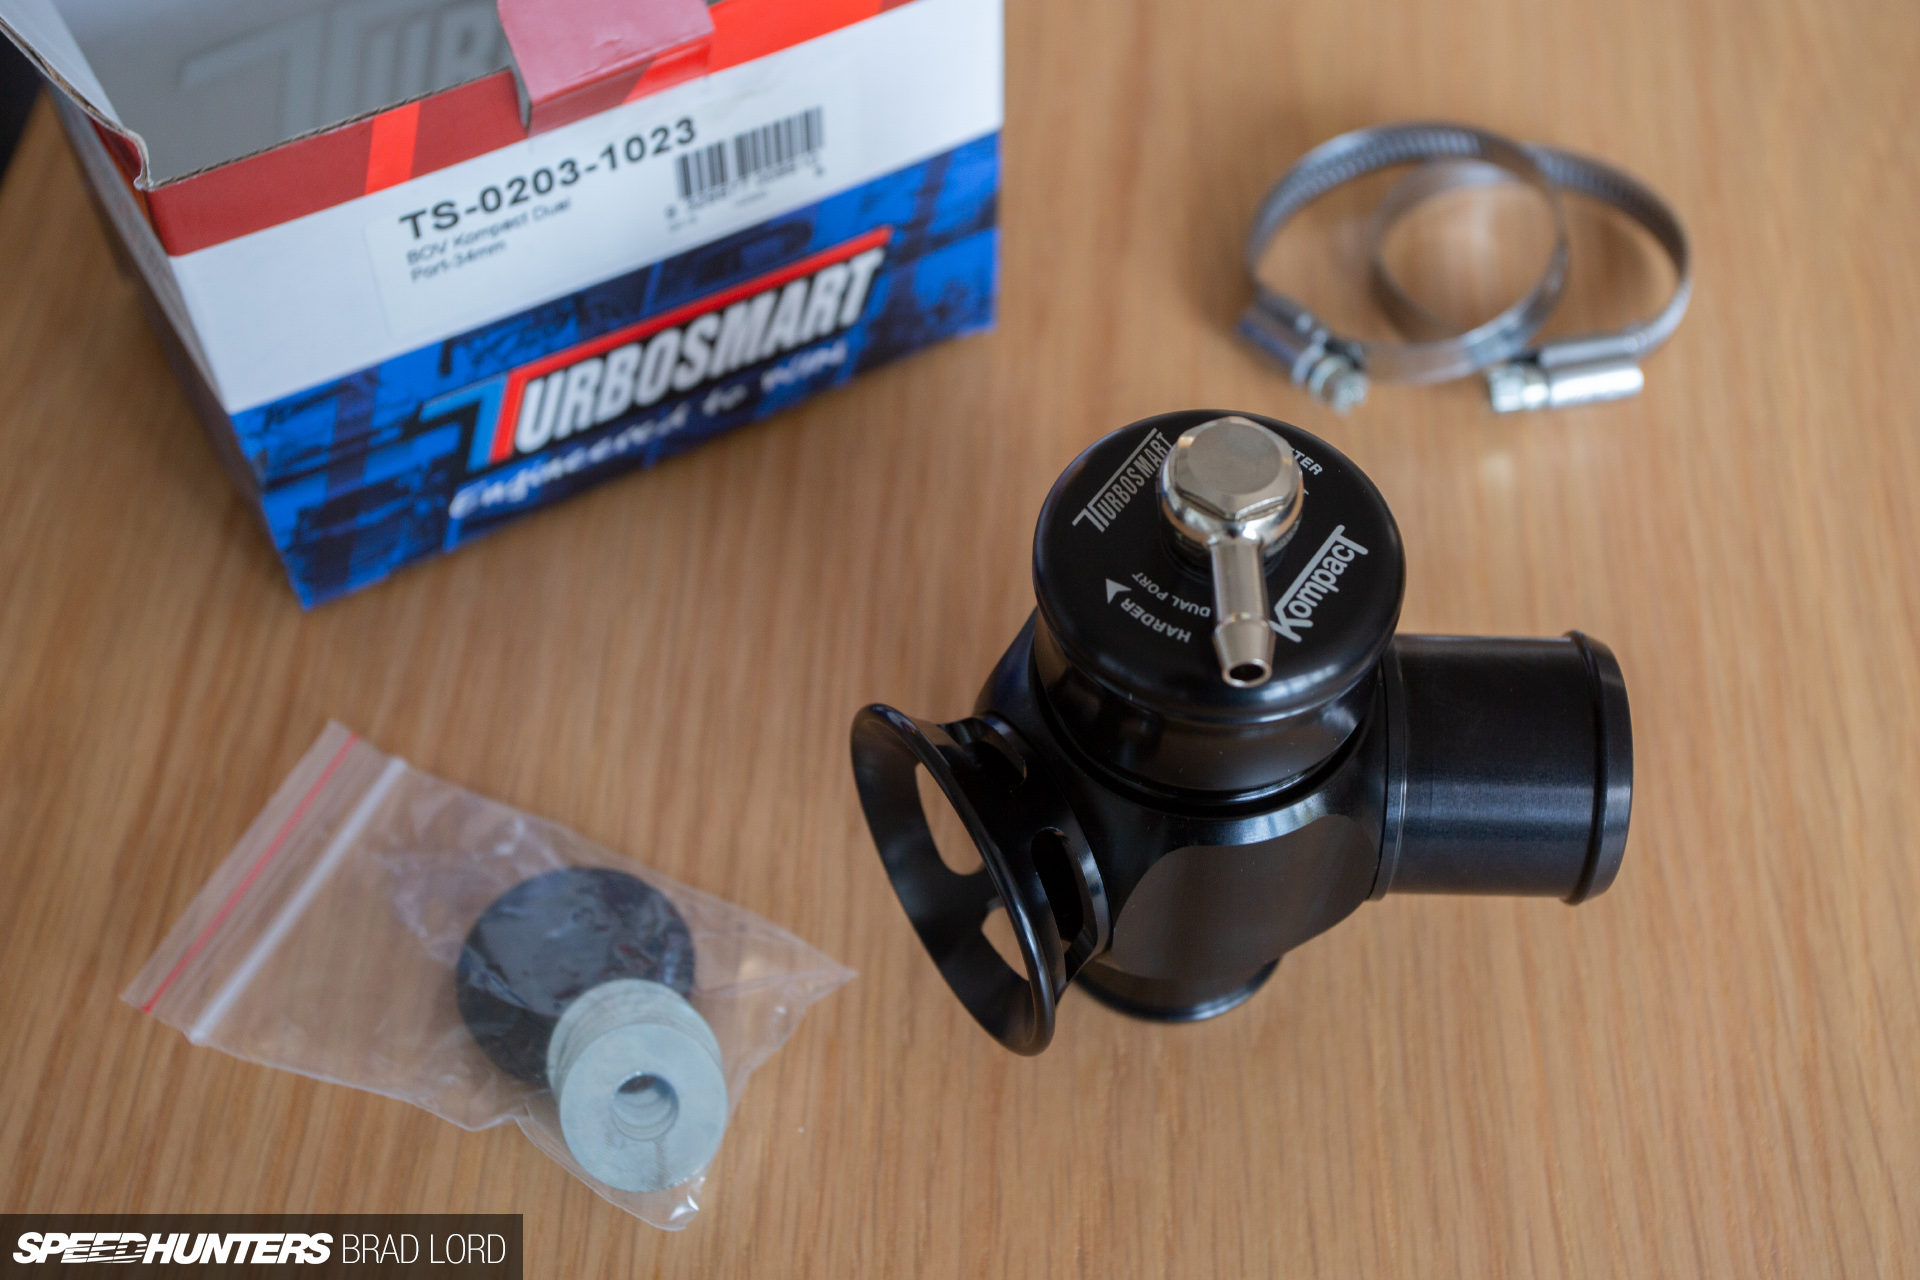
Prior to researching my options, I was under the impression that ‘Dual Port’ meant you just had the option of full vent-to-atmosphere or full bypass (recirculate into the intake) configuration. While you absolutely can run this valve either of those ways using the supplied port blanking plug, what Dual Port really means is that it sequentially does both. That is, it’s staged, with the bypass valve coming on first and then the atmospheric valve coming on second. This means that under normal driving conditions the valve is in quiet recirculation mode, but when you’re on it, you have all the benefits (and noise) of atmospheric venting. This clip explains it quite well.
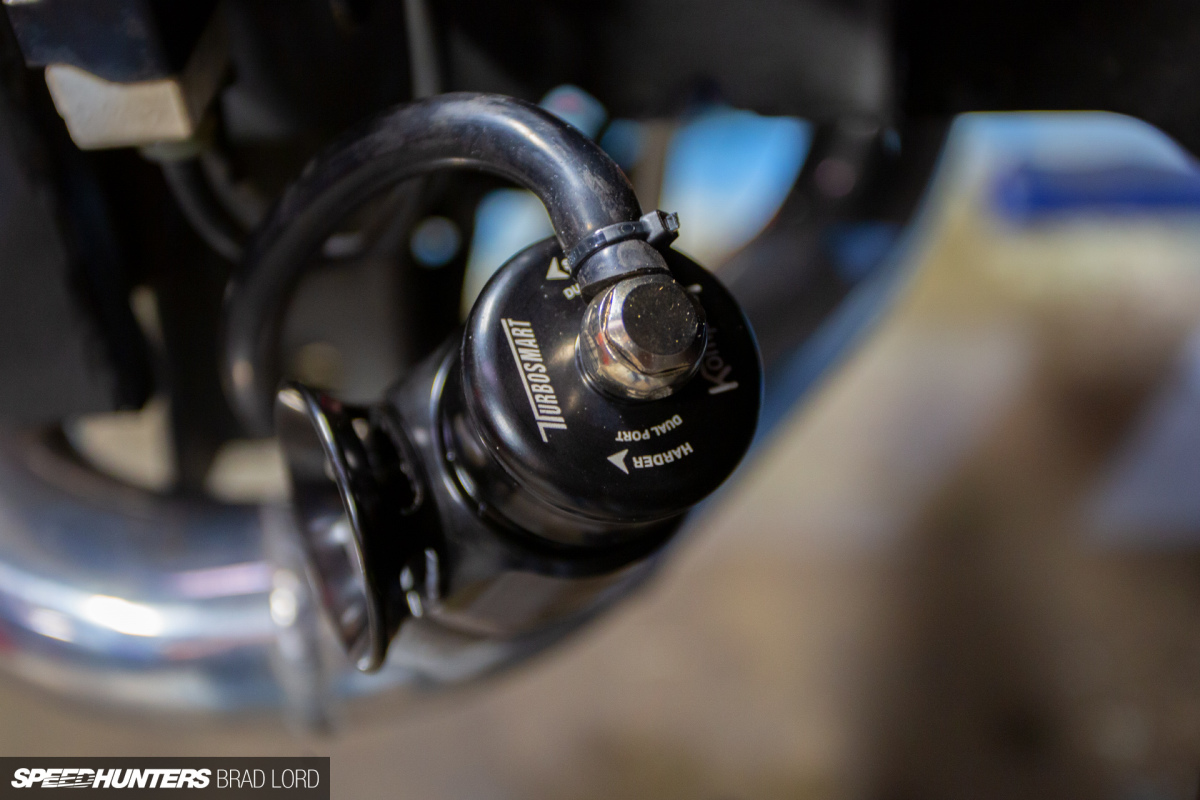

For ease of initial installation, we currently have the Kompact Dual Port operating in full vent-to-atmosphere configuration, but I think it’s likely that we’ll convert to the sequential configuration down the track. I just need to wait and see how loud it is under all driving conditions first.
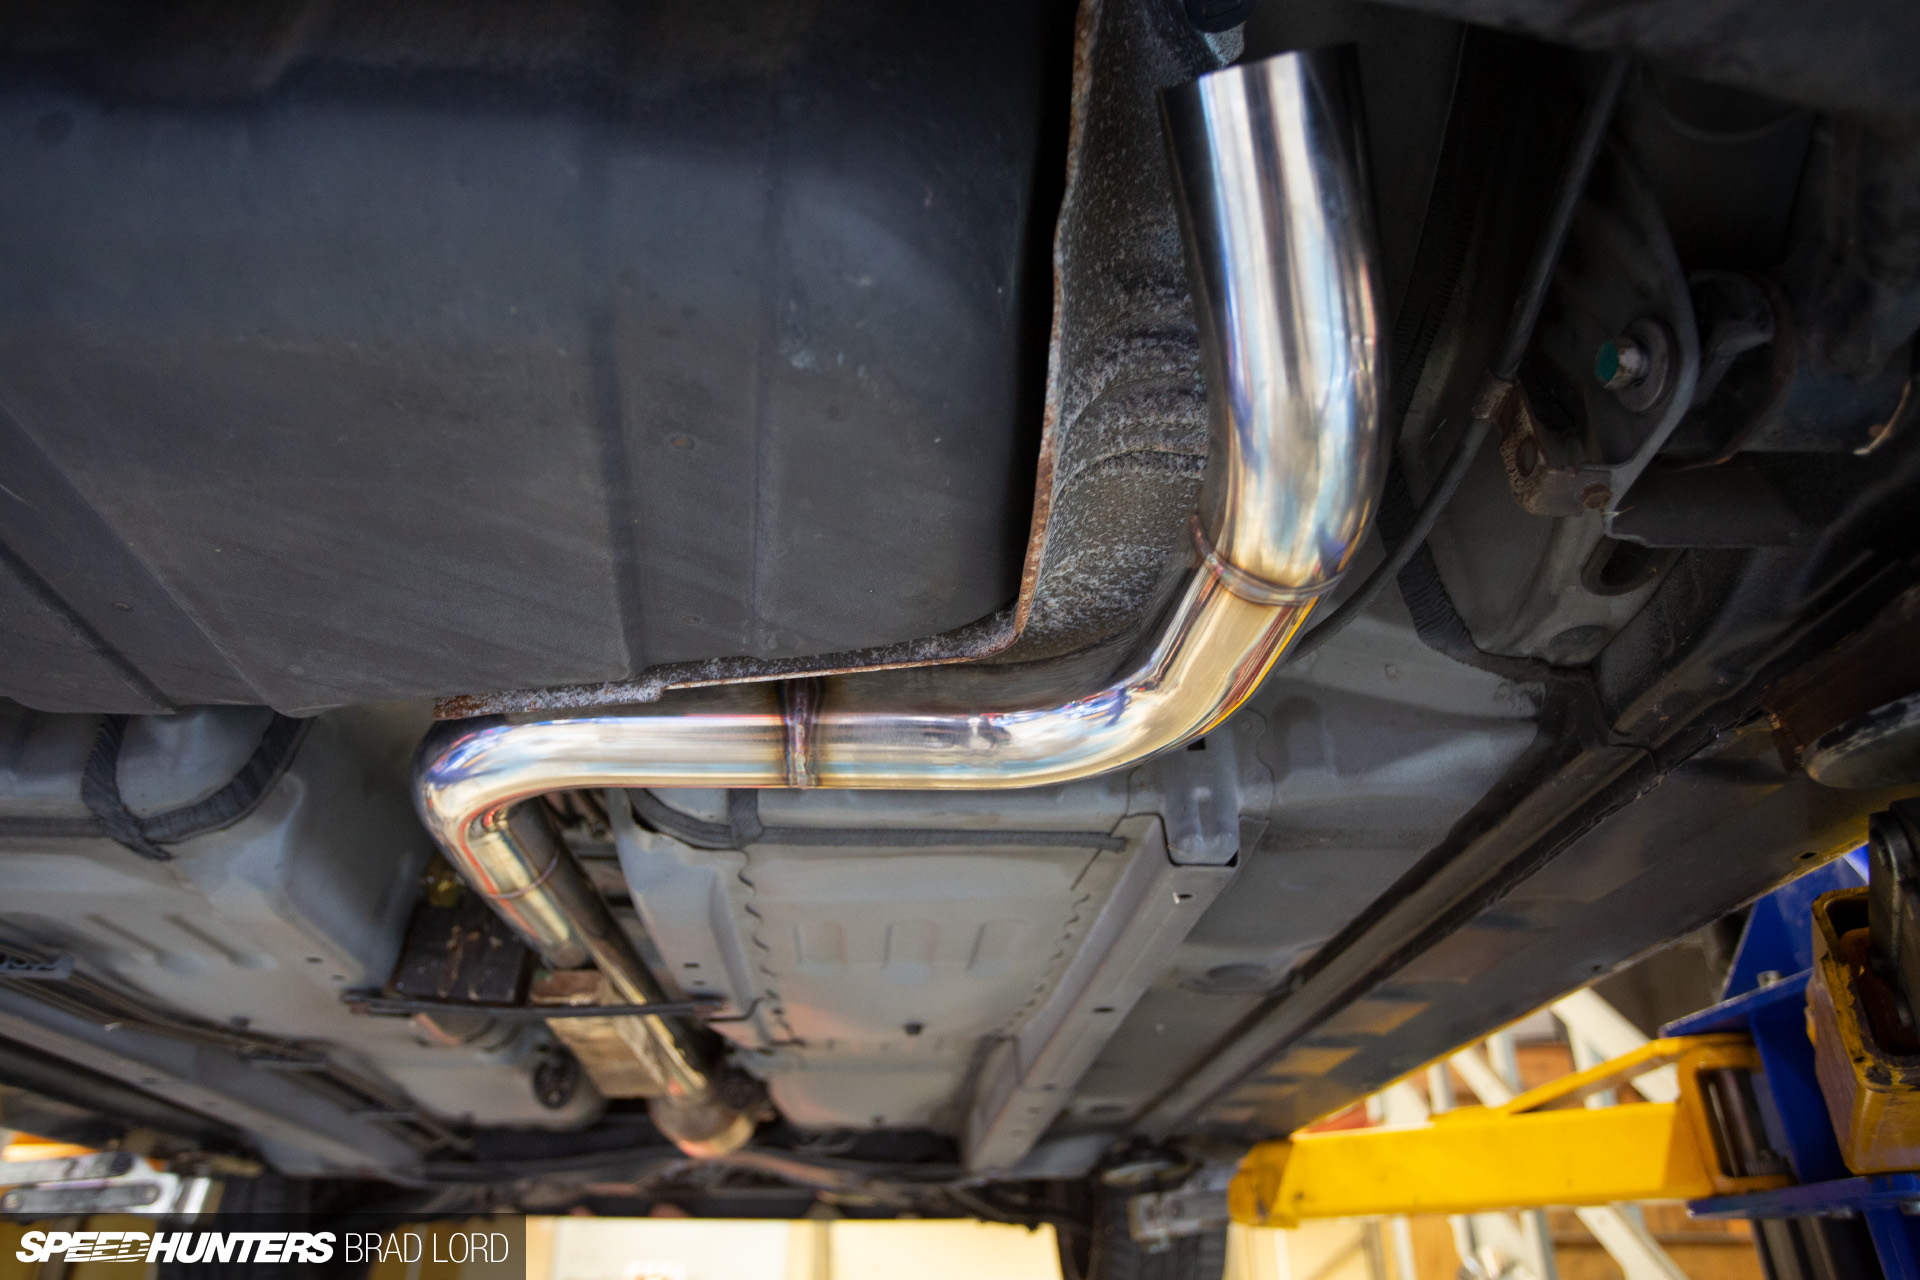
With the intake side of the turbo (air) plumbing complete, attention was turned to the exhaust, where we were essentially starting from scratch.
Beginning at the turbo end, a custom down-pipe was a given, so I picked up a Precision Turbo 5-bolt turbine discharge flange and Kevin got to work – so quickly that the next time I saw it the down-pipe was finished and fitted. You can see it here though.
Also pictured is the Vibrant Performance turbo oil drain, but more on that next time.
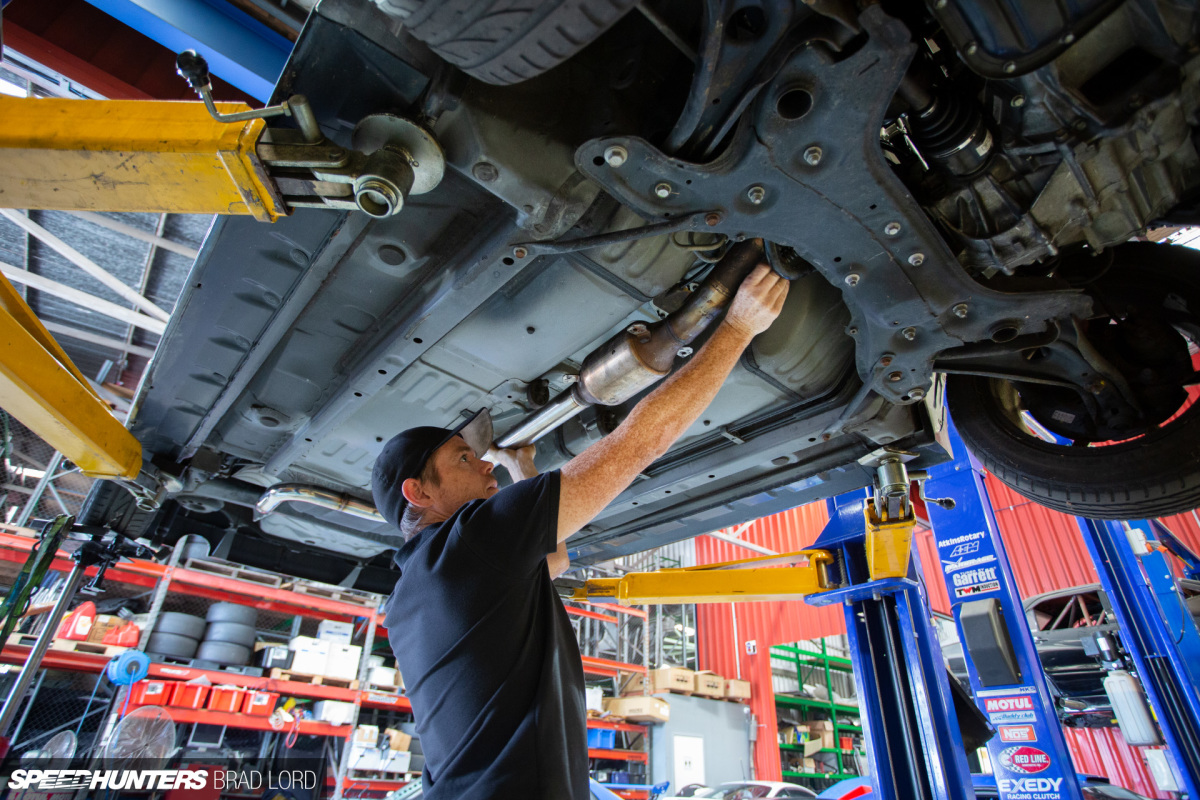
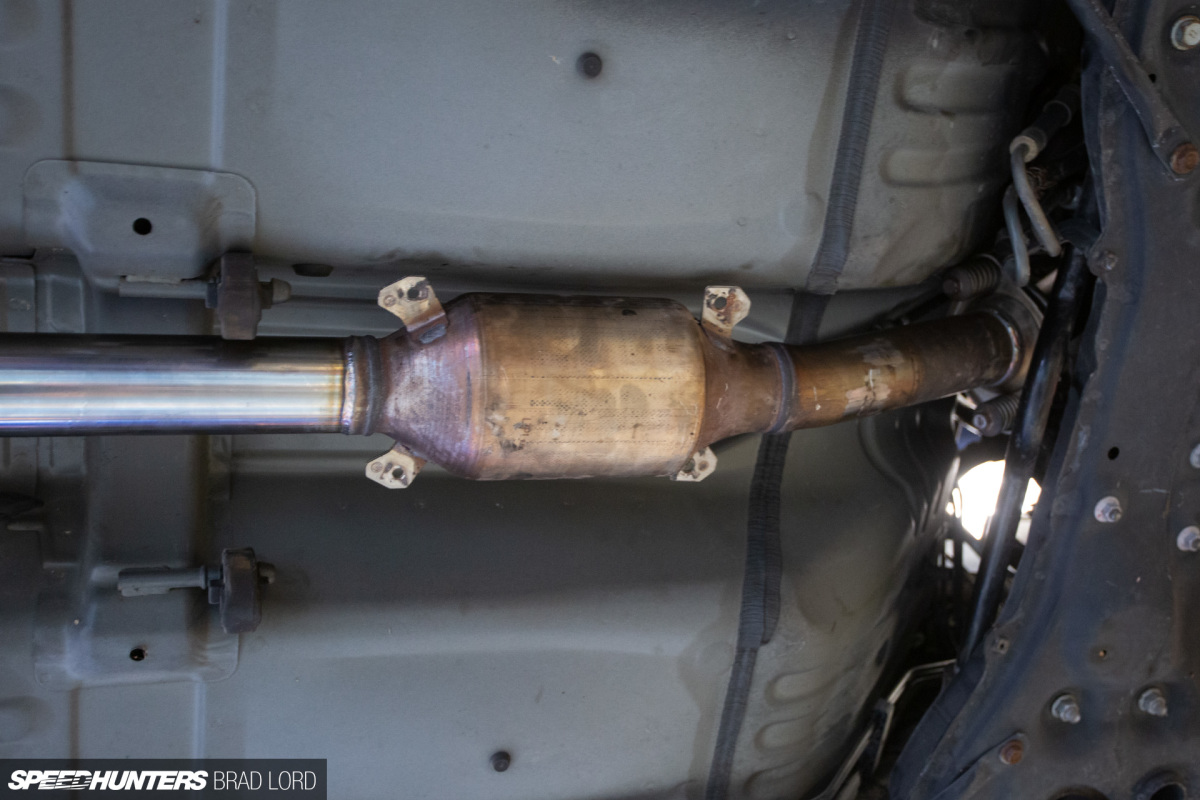

For the exhaust itself, there was the option of a 2.25-inch or 2.5-inch system. You could argue that the smaller size might have been best, but as I also needed to run a catalytic converter to get the car legal, and JTune had a used Mazda3 MPS (Mazdaspeed3) OEM unit with 2.5-inch inlet/outlets taking up room on a shelf, we went with the latter.
I was up for mild steel, but JTune owner Jacky wouldn’t have a bar of it – hence the full stainless system now under the car.
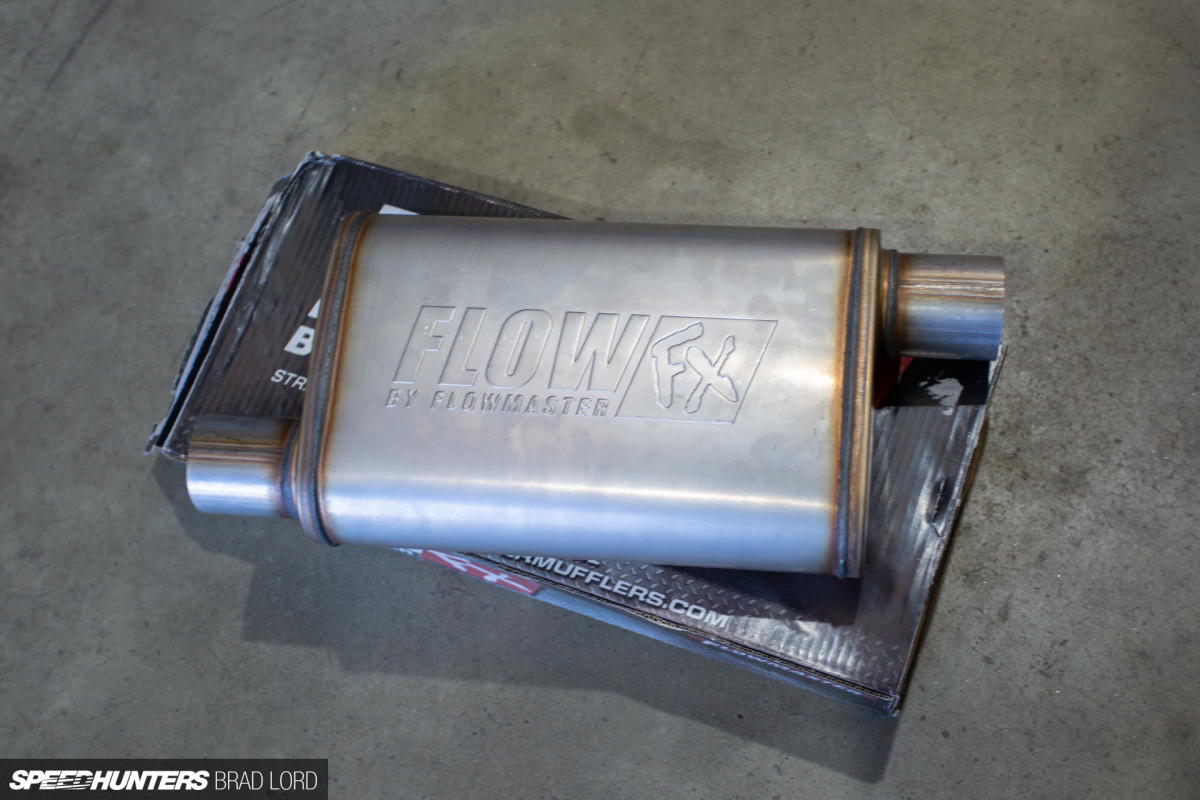
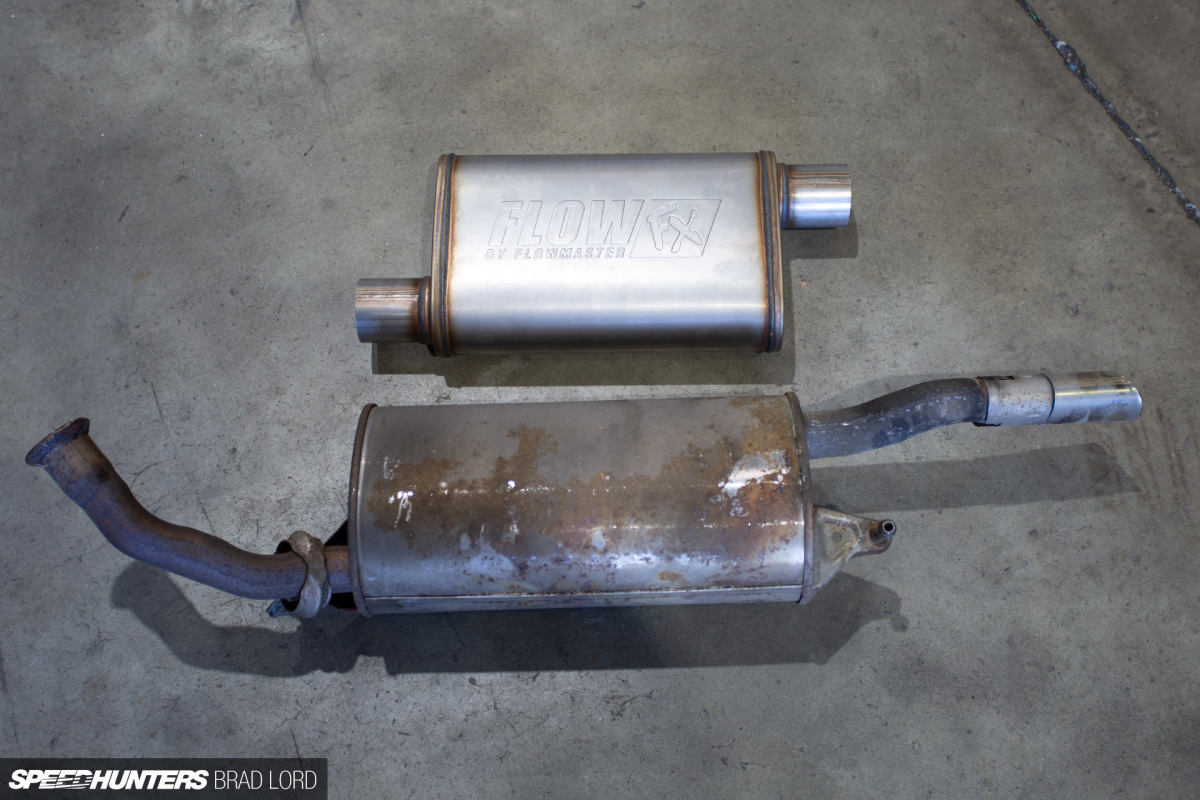

With the new pipework, I also needed a muffler. Actually, I might need more than one, but for starters we’ve just gone with a Flowmaster FlowFX unit out back. The FlowFX is an imported, low-cost 409 stainless steel muffler with a straight-through design, but on its own is possibly a bit too loud for my liking.
You can actually have a listen, because Project bB is running!
I shot this very average iPhone clip moments after the first fire-up on a custom, start-from-scratch base map that Jacky threw together on the fly in the space of 30 minutes.
It also means that I need to bring you the next instalment of the Project bB saga very soon, and in that I’ll fill in all the other blanks up to this major milestone in the build.
Brad Lord
Instagram: speedhunters_brad
brad@speedhunters.com